


What Are Stamping Die Storage Racking Systems
Imagine a single progressive die weighing 15,000 pounds sitting on a shelf designed for palletized consumer goods. That mismatch is exactly why a specialized storage category exists for press tooling.
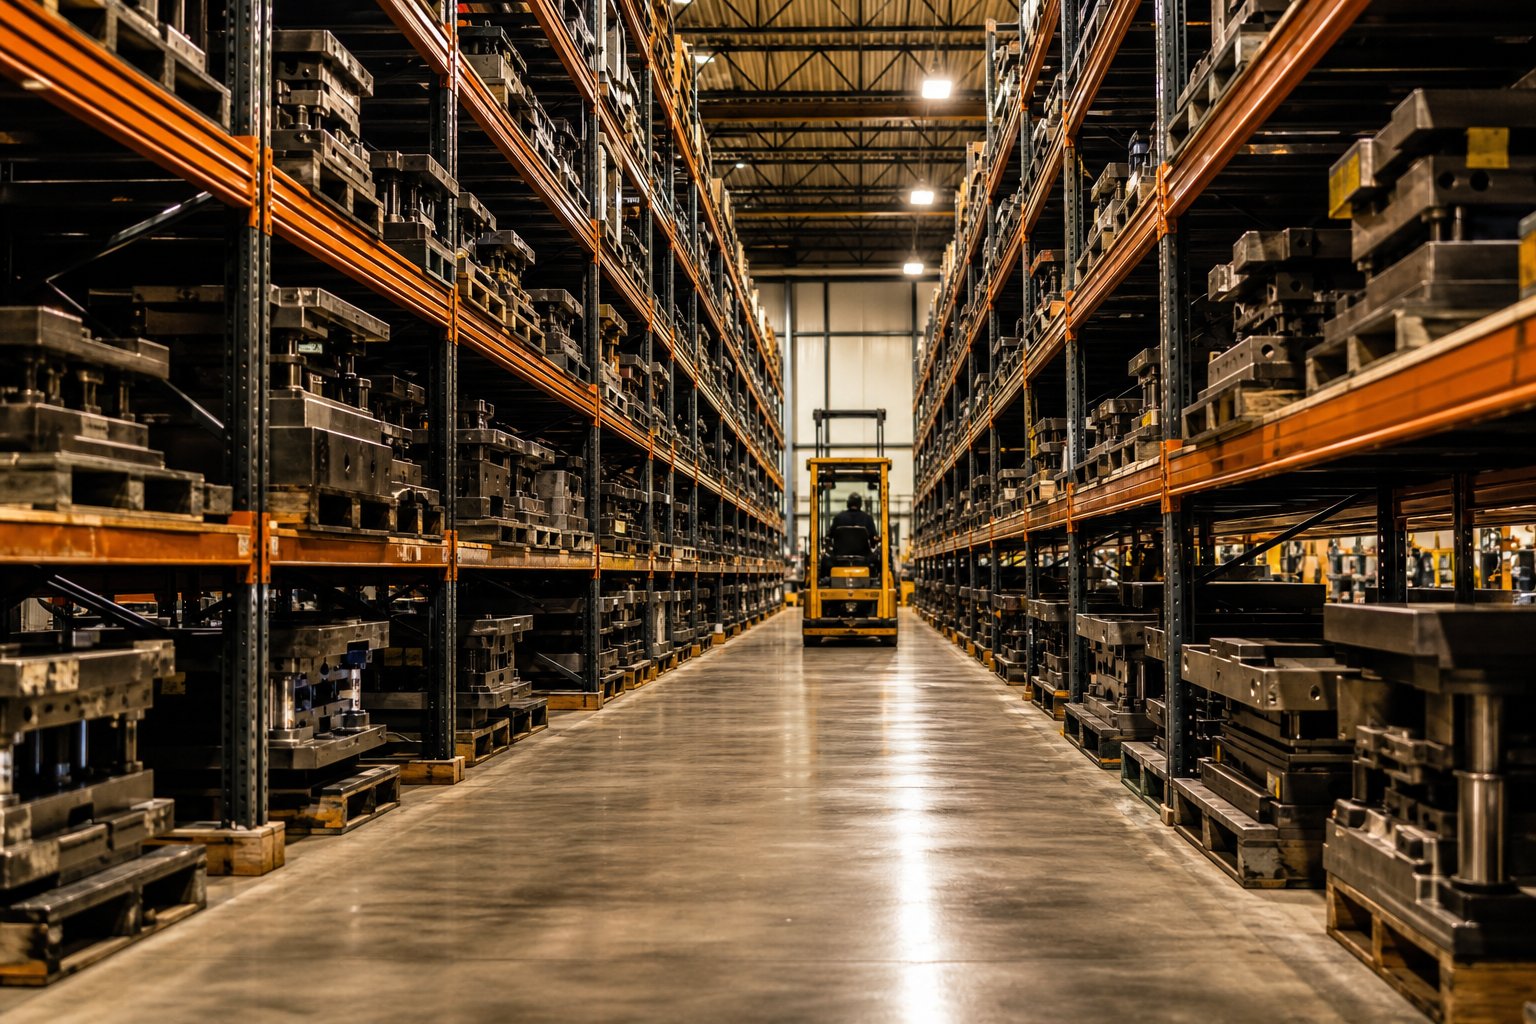
Stamping die storage racking systems are heavy-duty industrial racking structures engineered specifically to organize, protect, and provide safe access to stamping dies ranging from a few hundred pounds to tens of thousands of pounds per shelf level.
Unlike general warehouse shelving built for evenly distributed carton loads, these systems use reinforced steel frames, wider shelf spans, and access-friendly designs like pull-out drawers or forklift-compatible bays. Their purpose is straightforward: keep expensive tooling safe, organized, and ready for the next press run.
What Makes Die Storage Racking a Specialized Category
Standard commercial racking handles uniform, lightweight loads spread across a full shelf surface. Stamping dies present the opposite challenge. They concentrate massive weight into compact, irregular footprints. A heavy duty die storage rack system accounts for this with thicker steel decks, closer beam spacing, and structural members sized for concentrated point loads rather than distributed pallet weight. Load capacities typically range from 1,500 to 15,000 pounds per level, with shelf areas and heights adjustable to match each facility's tooling inventory.
Who Needs Dedicated Stamping Die Racking
Any operation running stamping presses with multiple die sets benefits from specialized racking for press dies. The most common environments include automotive stamping plants cycling dozens of dies daily, appliance manufacturers managing progressive and transfer dies, and aerospace shops storing precision tooling that demands careful protection between runs. Tool and die shops, metal fabricators, and plastic injection molding facilities also rely on these systems to keep heavy molds and dies accessible without consuming excessive floor space.
This guide serves as a vendor-neutral resource for tooling managers, maintenance teams, and facility planners evaluating stamping die organization solutions. The sections ahead break down why generic racks fail under die loads, compare every major racking type, and provide a practical framework for choosing the right system.
Why Standard Pallet Racks Fail for Heavy Die Storage
A common question tooling managers ask early in the planning process: can pallet racking hold stamping dies? Technically, a beam might support the raw weight. But weight alone does not determine whether a rack is safe or suitable. The real issue is how that weight reaches the steel.
Standard selective pallet racking is engineered around one core assumption: the load is uniformly distributed across the full beam surface from side-to-side and front-to-back. Palletized cartons, wrapped goods, and cross-stacked cases satisfy this assumption. A 5,000-pound stamping die sitting on two narrow rails does not. That die creates concentrated point loads at specific contact locations, generating a fundamentally different stress profile than the rack was designed to handle.
Structural Risks of Standard Pallet Racking Under Die Loads
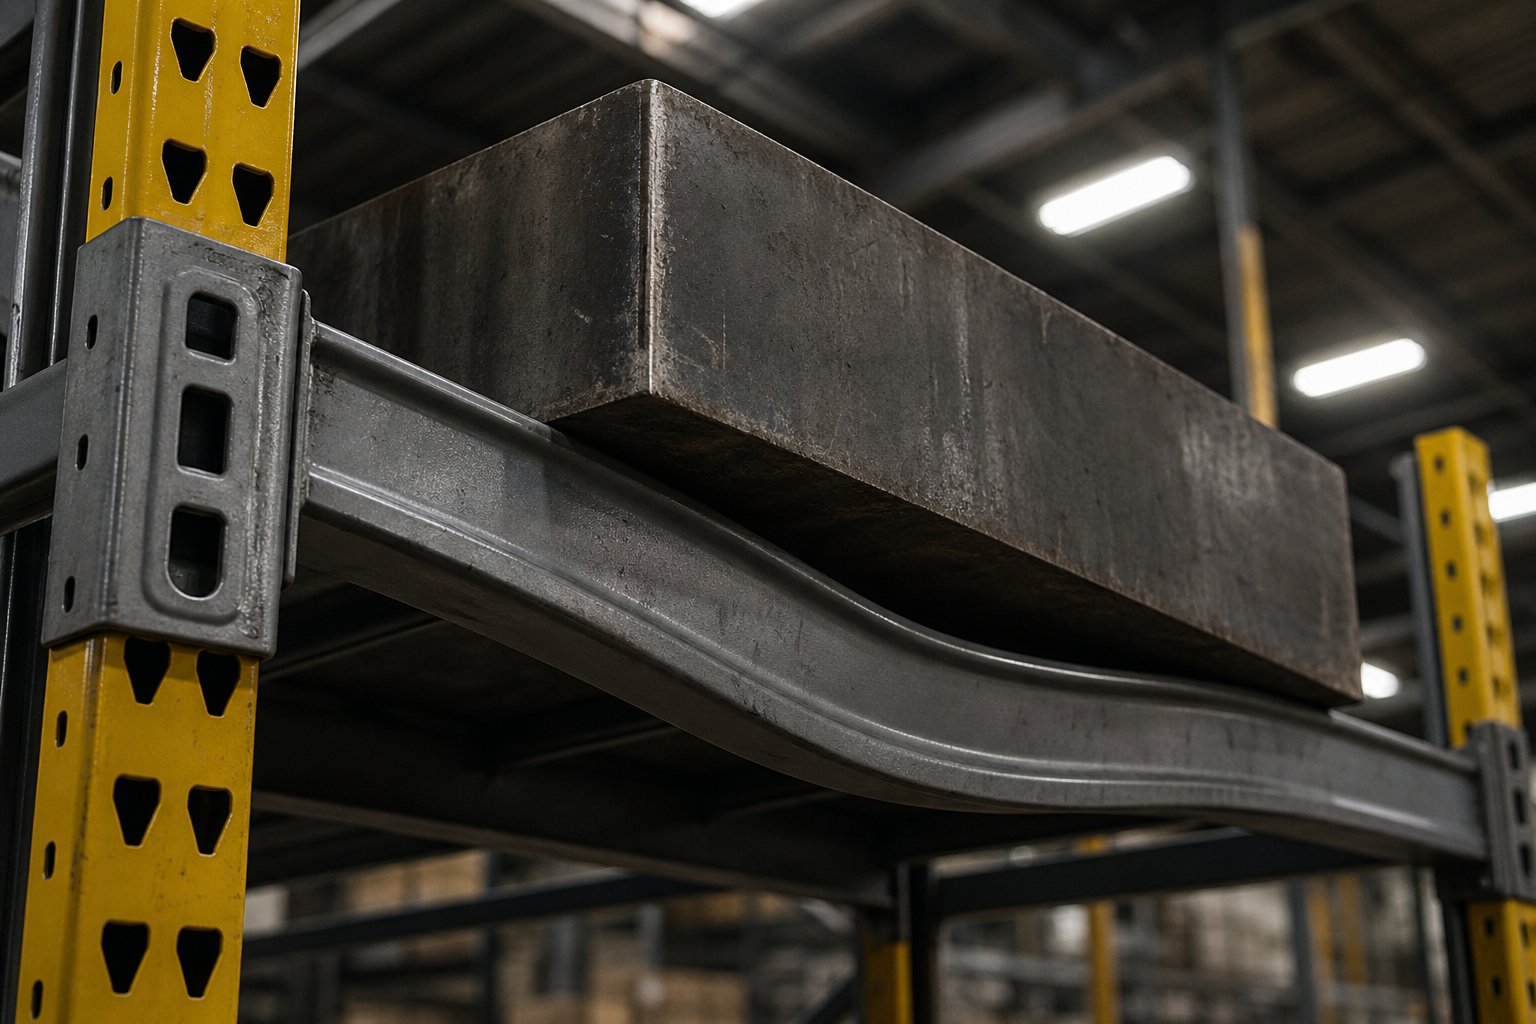
The engineering difference comes down to bending moment. When weight spreads evenly, beam stress distributes predictably along the span. When a compact die concentrates thousands of pounds at the beam's midpoint or across two narrow contact strips, the maximum bending moment spikes dramatically at those locations. According to the Rack Manufacturers Institute (RMI), placing a point load within a rack designed solely for uniformly distributed loads could cause excessive beam deflection and potential failure. The ANSI MH16.1 standard limits beam deflection to L/180 of horizontal beam length, but that rating assumes distributed loading. A concentrated die mass can exceed this threshold even when the total weight appears to be within the rack's posted capacity.
Think of it this way: two 5,000-pound loads can behave completely differently on the same beam. One spread across 48 square feet of pallet surface creates gentle, even pressure. The other resting on a 24-inch-wide die shoe focuses the same force into a narrow band, multiplying localized stress. The beam does not care about total weight alone. It cares about where and how that weight lands.
Common Failure Scenarios and Their Consequences
Pallet rack failure under heavy die loads does not always happen catastrophically on day one. More often, you'll see progressive degradation that compounds over time until something gives. Here are the specific failure modes that make storing dies on standard shelving a serious risk:
- Beam deflection beyond safe limits: Concentrated point loads cause beams to bow at the contact zone, exceeding the L/180 deflection standard and creating a cascading structural risk. Permanently deformed beams lose load-bearing integrity even after the die is removed.
- Weld fatigue at beam-to-upright connections: Repeated loading and unloading cycles with heavy dies stress connector welds beyond their design fatigue life, particularly when beam connectors deform into a visible V-shape under uneven loading.
- Inadequate deck support: Wire mesh decking or thin steel panels rated for distributed pallet loads can puncture or collapse under narrow die feet. As RMI notes, decking design must accommodate the specific type of load and pallet placed upon it.
- Forklift damage from tight spacing: Dies stored on standard racks often require narrow aisle configurations that push forklift clearances to unsafe margins, increasing collision frequency with uprights and bracing. WorkSafe guidelines emphasize that damaged uprights can seriously compromise the entire racking structure.
- Die surface damage from improper cradles: Without purpose-built support surfaces, die shut heights shift, precision-ground surfaces contact bare steel edges, and tooling alignment suffers. Each extraction and return cycle risks chipping cutting edges or deforming guide pins.
The safety hazards compound the financial risks. You're dealing with stamping die storage safety hazards that include rack collapse onto personnel, crush injuries during die extraction from deflected shelves, and tip-over events when top-heavy die loads shift the rack's center of gravity. A single progressive die sliding off a bowed beam represents a potentially fatal incident in a facility where workers operate nearby.
Floor stacking, the other common shortcut, introduces its own problems: limited accessibility requiring constant shuffling, surface damage from die-on-die contact, disorganized inventory that extends press changeover times, and enormous floor space consumption that could serve production.
The core takeaway is simple. Standard racking is designed around distributed warehouse loads. Stamping dies deliver concentrated masses that violate every assumption baked into those designs. The question is not whether the rack can technically hold the weight. It is whether the rack can hold that weight safely, at those specific contact points, across thousands of load cycles, without progressive structural failure. For most standard systems, the honest answer is no.
Racking System Types Compared for Die Storage
The structural problems with standard racking raise an obvious follow-up: what systems actually work? The answer depends on your die inventory profile, access frequency, and available floor space. Five major racking categories dominate the die storage rack types comparison, each solving the weight and access challenge differently.
Roll-Out Drawer and Slide-Out Shelf Systems
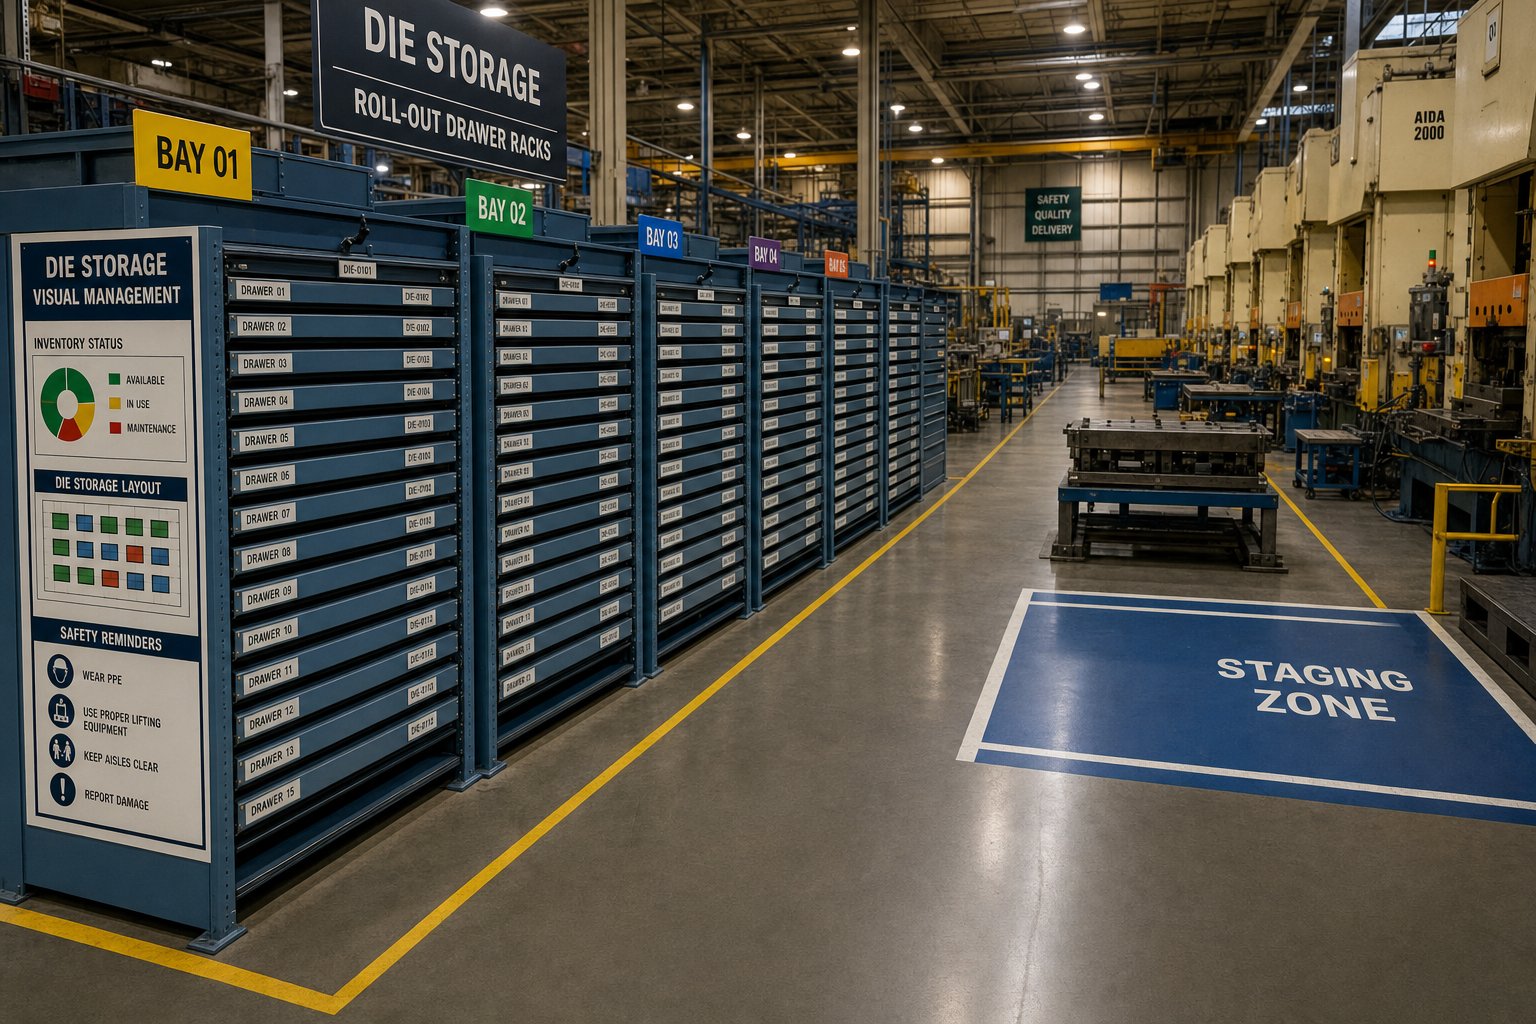
Roll-out drawer die storage racks are the workhorse of high-frequency stamping operations. Each shelf operates on heavy-duty linear bearings or roller tracks, sliding outward to provide full overhead access for cranes, hoists, or forklifts. You load and unload dies vertically rather than attempting risky horizontal pulls from deep within a rack bay.
Capacities on these systems typically range from 4,000 pounds per shelf for standard units up to 15,000 pounds per shelf for motorized mold storage configurations. Extension ranges vary too: manual and hand-crank models commonly offer 100% shelf extension, while heavier motorized units provide around 75% extension to maintain structural stability under extreme loads. Optional safety interlocks prevent more than one drawer from opening simultaneously, eliminating tip-over risk from shifted center of gravity.
These systems excel in facilities that cycle dies daily. The tradeoff is cost per position and the vertical space consumed between levels to accommodate drawer travel clearance.
Cantilever and Wide-Span I-Beam Configurations
Cantilever racking for stamping dies uses open-front arms extending from a single column line, creating unobstructed access from the front and sides. There are no vertical uprights between bays to interfere with forklift placement. This design handles oversized dies that exceed standard shelf widths, and the adjustable arm heights accommodate tooling of varying shut heights without wasting vertical space.
The limitation? Cantilever arms rely on moment resistance at the column connection. For extremely heavy dies, the lever arm creates significant bending stress at the base, requiring robust column anchoring and wider base footprints. Cantilever works best for medium-weight dies (roughly 2,000 to 8,000 pounds per arm) where lateral access and flexible arm spacing outweigh raw load capacity needs.
Wide-span I-beam die racking systems fill the gap between cantilever flexibility and maximum load capacity. These use structural I-beam shelves spanning between heavy-gauge columns, often at widths of 72 to 120 inches. The I-beam profile delivers high section modulus, meaning the shelf resists deflection even under concentrated point loads. Fork entry bars integrated into the shelf design let forklifts slide dies on and off without dedicated crane access. Facilities with mixed die inventories and forklift-based material handling frequently land on this configuration.
Vertical Storage and Floor-Level Die Bases
Vertical die storage tower solutions use automated lift mechanisms to store dies in stacked compartments within a compact vertical footprint. A single tower can hold a dozen or more dies in the floor space that two conventional rack bays would occupy. Access is sequential rather than random: the system retrieves one die at a time via an elevator platform. This makes towers ideal for lower-frequency dies or archived tooling that doesn't need instant access but still requires organized, protected storage.
Floor-level die bases sit at the opposite end of the complexity spectrum. These are essentially reinforced steel platforms at ground level, sometimes with low-profile rollers or tracks for sliding dies into position. They require no vertical structure, no crane clearance, and minimal installation. The tradeoff is obvious: floor bases consume massive square footage. They make sense for very heavy dies (above 15,000 pounds) where lifting into elevated rack positions introduces unacceptable risk, or in facilities with low ceiling clearance that prevents multi-level storage.
| Type | Access Method | Typical Load Capacity Per Level | Footprint Efficiency | Best For |
|---|---|---|---|---|
| Roll-Out Drawer | Slide-out shelf with overhead crane/hoist access | 4,000 - 15,000 lbs | High (vertical stacking with full access) | High-frequency die changes, press brake tooling |
| Cantilever | Open-front forklift or crane placement | 2,000 - 8,000 lbs per arm | Moderate (requires wide aisles) | Oversized dies, variable die dimensions |
| Wide-Span I-Beam | Forklift slide-on via fork entry bars | 5,000 - 20,000+ lbs | High (multi-level, dense bay spacing) | Mixed die inventories, forklift-based operations |
| Vertical Storage Tower | Automated elevator retrieval | 2,000 - 10,000 lbs per position | Very High (minimal floor space) | Low-frequency dies, archived tooling, space-constrained facilities |
| Floor-Level Die Base | Forklift direct placement or roller slide | 15,000+ lbs | Low (single-level, large footprint) | Extremely heavy dies, low ceiling clearance |
Each system type addresses a specific intersection of weight, access speed, and space. The right choice rarely comes down to one variable alone. It depends on how your heaviest dies, your most frequently changed dies, and your facility constraints interact. That interaction starts with understanding the structural engineering principles that determine whether a given rack design can safely handle your specific load profile.
Structural Engineering Behind Heavy-Duty Die Racking
Many racking suppliers mention I-beam construction as a selling point. Few explain why it actually matters for die storage. The difference is not marketing language. It is a measurable engineering advantage rooted in how steel cross-sections resist bending under concentrated loads.
I-Beam vs Roll-Formed Steel Performance Under Load
Roll-formed racking is manufactured by feeding flat steel sheet through a series of rollers that shape it into C-channels, hat sections, or box profiles. The process is fast, cost-effective, and produces lightweight components ideal for general warehousing. As Patterson Pope notes, roll-form racks are easier to install, adjust, and reconfigure, making them a natural fit for facilities where SKU profiles shift regularly and loads are light to moderate.
Structural racking uses hot-rolled, low-gauge steel that is bolted together rather than clipped into place. The result is heavier, harder to reconfigure, but fundamentally stronger under stress. Structural systems provide roughly 20-30% more load capacity than comparable roll-form racks, and their thicker steel resists deflection over time, preventing the beam sagging and upright damage that accumulates in high-load environments.
For die storage, the gap between these two approaches widens dramatically. Here is why: the critical performance metric is not just raw weight capacity. It is section modulus, the geometric property that determines how well a beam resists bending at a specific point.
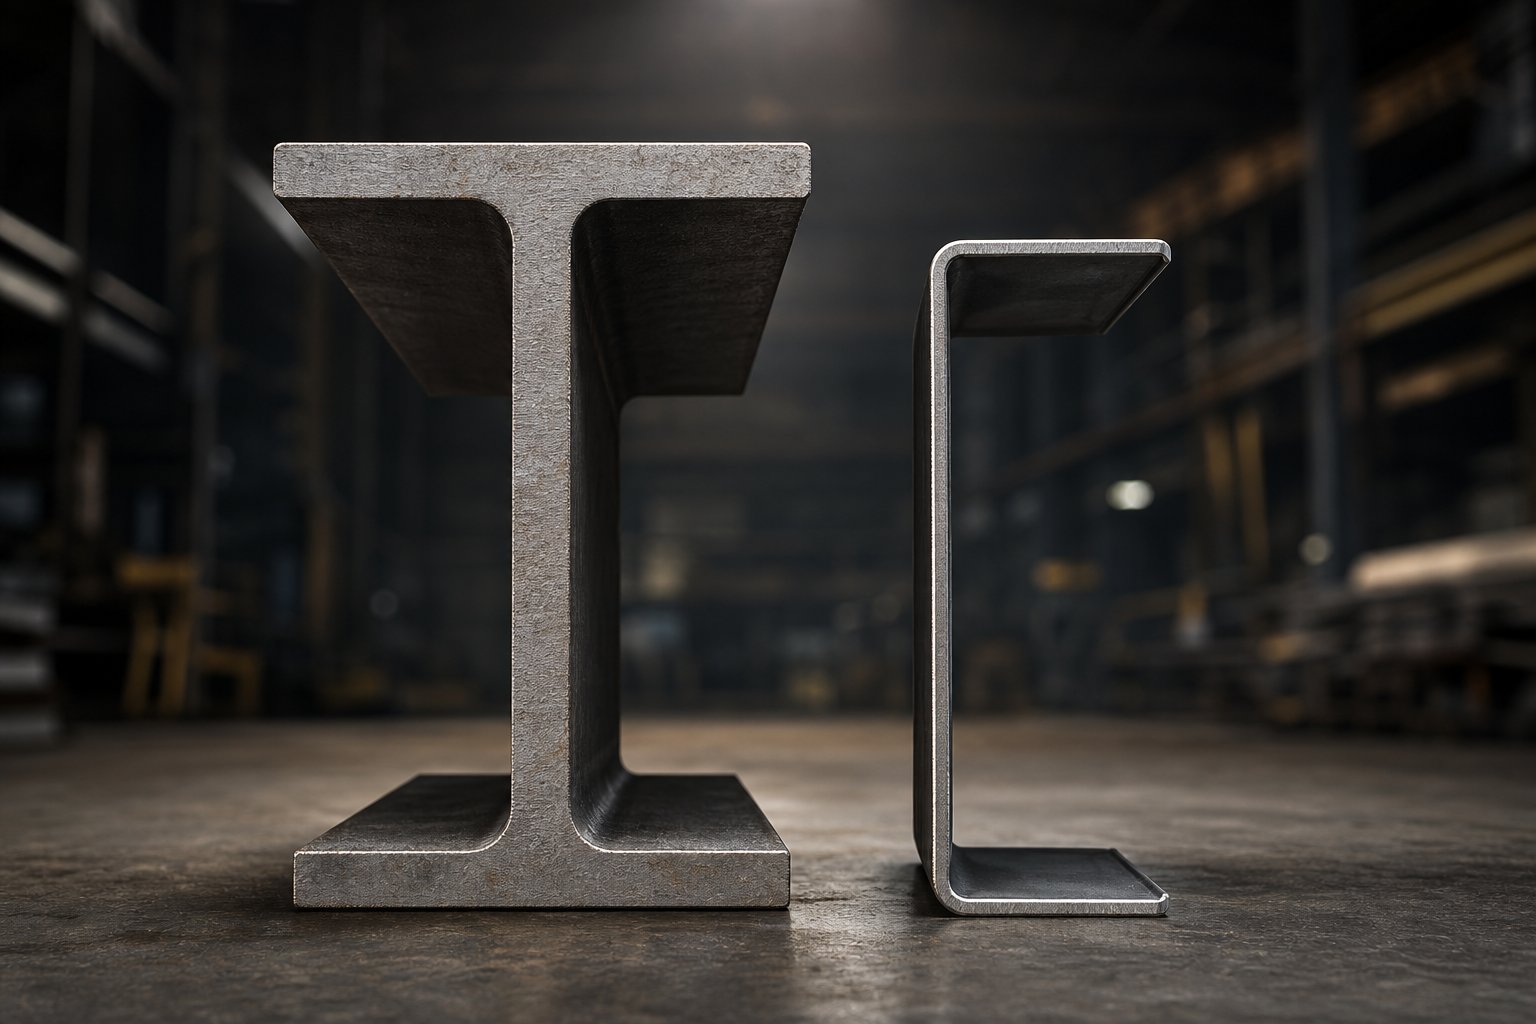
Concentrated point loads from stamping dies require structural members with high section modulus, not the distributed load profiles that standard pallet racking is designed around. A beam's resistance to deflection scales with its moment of inertia, and I-beam profiles concentrate material at the flanges where bending stress is greatest, delivering superior stiffness per pound of steel compared to roll-formed channels or tubes.
Imagine two beams of identical weight. One is a roll-formed C-channel with material distributed relatively evenly around its profile. The other is a hot-rolled I-beam with wide flanges top and bottom separated by a thin web. Under a concentrated die load at midspan, the I-beam deflects significantly less because its material sits farther from the neutral axis, increasing the moment of inertia. That geometric advantage means an I-beam construction for die storage racks can handle the same point load with less material, less deflection, and a wider safety margin.
Weld integrity at connection points follows a similar logic. Roll-form systems typically use tab-and-slot connectors or teardrop clips that hook into punched upright holes. These connections work well under distributed loads but concentrate stress at small contact patches when subjected to heavy point loading. Structural bolted connections, by contrast, distribute attachment forces across larger bearing surfaces. The bolts themselves can be torqued to specific preload values, and the connection can be engineered with gusset plates or stiffeners where moment forces from heavy shelf loads transfer into columns.
Column gauge and cross-bracing complete the frame stability picture. Heavy duty racking structural engineering requires columns thick enough to resist buckling under the combined axial load of multiple die-laden shelves, plus lateral forces from die extraction (sliding a 10,000-pound die off a roll-out shelf generates significant horizontal force at the column base). Diagonal cross-bracing in the frame's depth direction prevents racking sway, while horizontal struts between column pairs keep the system square under asymmetric loading. Thin-gauge roll-formed columns, even with cross-bracing, reach their buckling limits far sooner than heavy-gauge structural columns under the same cumulative die weight.
PE-Certified Engineered Systems vs Custom Fabrication
Not all heavy-duty die racking is created through the same process. Three distinct categories serve the market, each appropriate for different operational profiles:
- PE-certified engineered racking systems: These are designed by licensed Professional Engineers, analyzed with structural calculations specific to your die weights and facility conditions, and stamped with a PE seal. They meet ANSI/RMI MH16.1 standards, include documented load ratings, and satisfy building code and permit requirements. PE-certified engineered die racking systems are the appropriate choice whenever local building codes require structural calculations for heavy storage installations, when seismic design is mandated, or when your facility's insurance carrier requires documented engineering.
- Standard commercial heavy-duty racking: Manufactured products sold with published load charts based on standardized testing. These systems work when your die weights fall within the manufacturer's tested parameters and your installation conditions (floor capacity, seismic zone, ceiling height) align with catalog assumptions. They cost less than custom-engineered solutions and ship faster, but you inherit the responsibility of verifying that your specific loads match the published ratings.
- Custom-welded fabricated solutions: Built by local fabrication shops to a facility's exact specifications. These can be cost-effective for simple, low-level die bases or unique configurations that no catalog product addresses. The risk is lack of engineering documentation: without PE review, load capacity engineering for die racks relies entirely on the fabricator's experience and judgment. A welded rack without engineering calculations may hold up for years or may reach a hidden failure threshold when a heavier die enters the inventory.
The decision between these categories often comes down to liability and load magnitude. For die inventories where individual shelf loads exceed 5,000 pounds, PE-certified systems provide both structural confidence and documented compliance. For lighter tooling stored at moderate heights, standard commercial heavy-duty racking with published load charts delivers adequate performance at lower cost. Custom fabrication fills gaps where geometry is unusual, but it should still involve engineering review when loads are substantial.
Understanding the steel behind the structure is one side of the equation. The other side, equally critical, is ensuring that whatever system you select meets the safety codes and inspection standards that govern high-mass industrial storage.
Safety Compliance and OSHA Standards for Die Storage
A 12,000-pound progressive die stored three levels high creates consequences that no standard warehouse load ever would if the supporting structure fails. Yet safety compliance for heavy die racking remains one of the most neglected topics in the stamping industry. No competitor addresses it substantively, and many facilities operate racking systems without documented load ratings, proper anchoring, or scheduled inspections.
Here is what you need to know: OSHA does not publish a standalone regulation specifically governing die storage racks. Instead, enforcement relies on the General Duty Clause (Section 5(a)(1) of the OSH Act) combined with industry consensus standards. That means your obligations are real, even if no single regulation spells out "die storage" by name.
OSHA Requirements for Heavy Industrial Racking
OSHA uses the General Duty Clause to cite employers for rack-related hazards including missing capacity markings, inadequate anchoring, and overloading. As J.J. Keller's safety resources explain, even without a rack collapse, systems that sag or show evidence of overloading could be considered accidents waiting to happen. OSHA references ANSI/MH 16.1 (Design, Testing, and Utilization of Industrial Steel Storage Racks) during inspections, which covers anchoring, load ratings, load configuration, inspection, and maintenance.
For stamping die storage, the load rating requirements carry heightened importance. A rack might have a published capacity of 10,000 pounds per shelf level based on uniformly distributed loading. Place a 10,000-pound die with a concentrated footprint on that same shelf, and the actual structural demand may exceed the rating at specific points. This gap between assumed capacity and actual concentrated load behavior is where OSHA citations and structural failures originate. Engineered load ratings that account for your specific die weights and contact footprints are the only defensible approach.
Additional OSHA-relevant requirements for die storage include:
- Aisle clearance: OSHA's warehousing guidelines require marked boundaries for permanent aisles and sufficient clearance for handling equipment. Dies retrieved by forklift or overhead crane need wider clearances than general pallet storage.
- Overhead sprinkler clearance: Regulation 1910.159(c)(10) mandates a minimum 18-inch vertical clearance between stored materials and overhead sprinklers. Tall die stacks in elevated racks can easily violate this threshold.
- Employee training: Workers extracting and placing dies must understand load ratings, proper placement procedures, and damage reporting obligations. OSHA expects trained operators, not assumptions of competence.
Seismic Design and Rack Inspection Protocols
Seismic anchoring for heavy die racking deserves special attention because the stored mass amplifies seismic risk exponentially. A rack holding 60,000 pounds of tooling across four levels generates enormous lateral forces during even moderate ground motion. SJF's anchoring guidelines note that facilities in Seismic Design Category C or higher typically require two anchors per column, larger diameter fasteners, increased embedment depth, and potentially reinforced slabs or engineered footings.
The concrete slab itself often becomes the weak link. Before installation, evaluate slab thickness, compressive strength (PSI), existing cracking, and rebar placement. If the slab cannot support the anchor loads under seismic demand, no amount of heavy-gauge steel in the rack itself will prevent failure.
Inspection protocols for die storage racking should be more frequent and more rigorous than general warehouse systems. Dies get loaded and unloaded by heavy equipment operating in tight quarters. Forklift tine strikes, off-center die placement, and repeated heavy cycling all degrade structural integrity over time. Damaged rack sections should be immediately isolated and evaluated by qualified personnel using manufacturer-approved repair components, never improvised fixes.
Use this prioritized die storage rack safety inspection checklist as a baseline for your facility:
- Load rating verification: Confirm posted load capacities reflect actual concentrated die loads, not distributed pallet assumptions. Recalculate if die weights have increased since installation.
- Seismic anchoring confirmation: Verify every column base plate is anchored with approved fasteners at correct torque values and embedment depth for your seismic design category.
- Aisle clearance validation: Measure actual clearances against equipment requirements monthly, especially after layout changes or new die additions.
- Rack damage inspection schedule: Conduct visual inspections weekly in high-traffic die storage areas. Look for bent columns, deformed beam connectors, cracked welds, and missing cross-bracing. Perform comprehensive structural audits quarterly.
- Operator training frequency: Retrain all die handling personnel at least annually and whenever new racking configurations, heavier dies, or different material handling equipment are introduced.
The critical mindset shift for die storage safety is this: you are not storing consumer goods where a failure means damaged inventory. You are storing concentrated masses that can kill. Every decision about load ratings, anchoring, and inspection frequency should reflect that reality. Compliance is not paperwork. It is the margin between controlled operations and catastrophic failure.
Safety standards define what your racking must withstand. The next consideration is how that racking fits within the physical infrastructure around it, from crane clearance overhead to floor slab capacity beneath.
Integrating Racking with Material Handling and Facility Layout
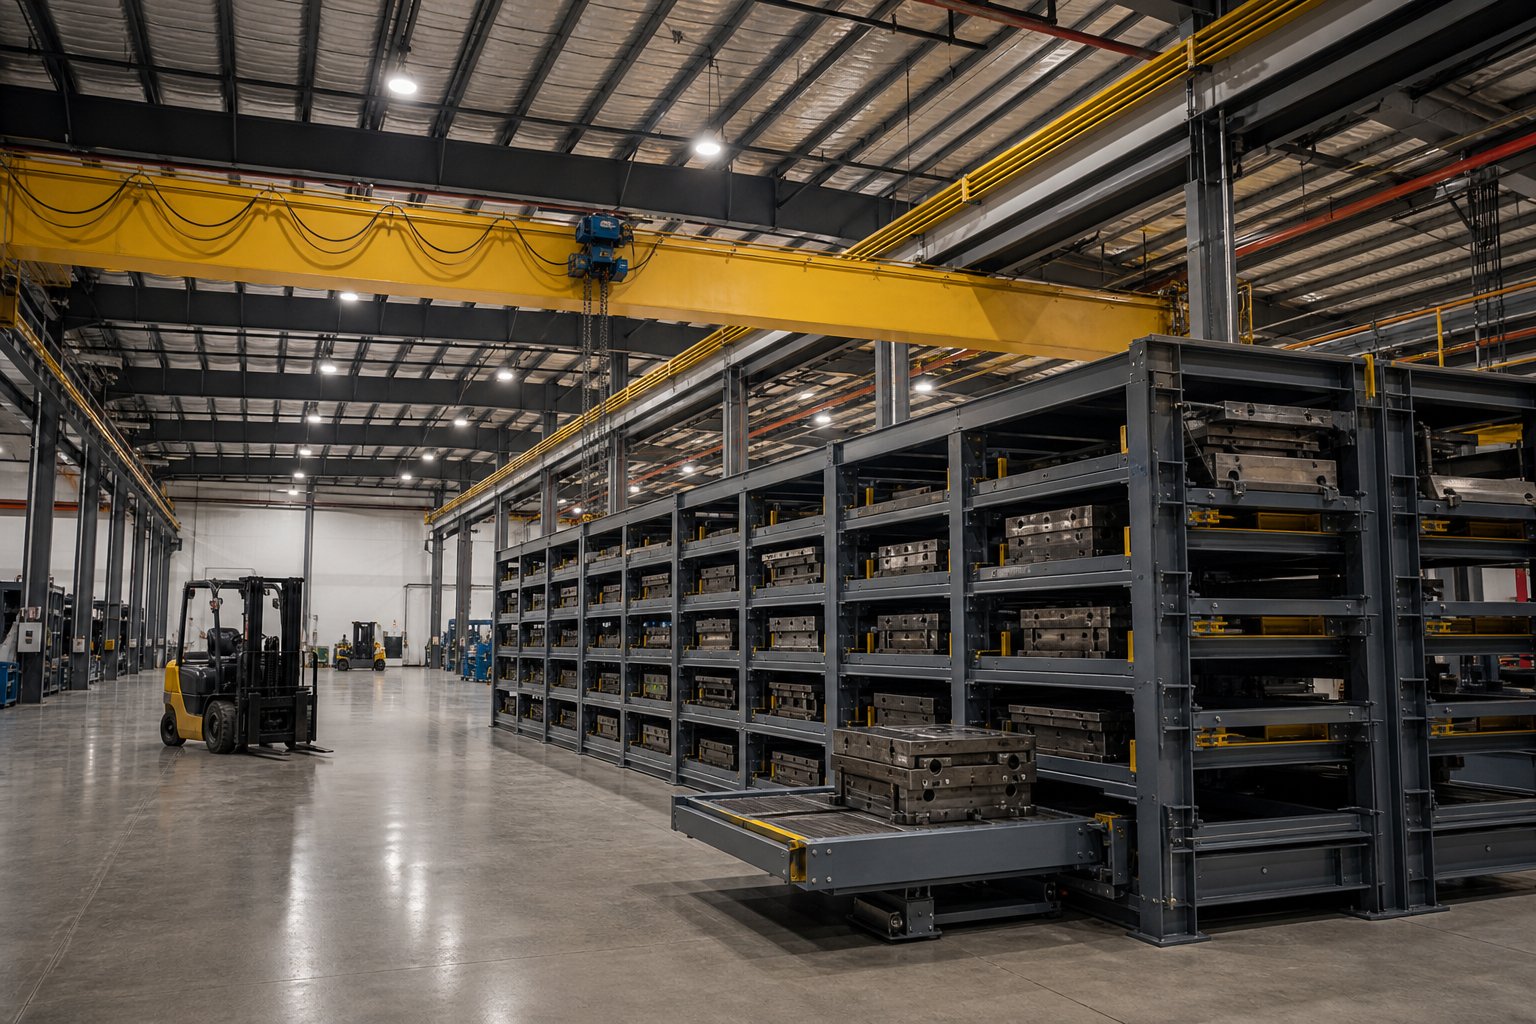
A racking system rated for your heaviest die means nothing if your crane cannot reach the top shelf or your forklift cannot turn in the aisle. Material handling integration for die racking is where structural capacity meets operational reality. The rack does not exist in isolation. It exists within a facility ecosystem of cranes, forklifts, floor slabs, and traffic patterns that all must work together.
Crane Access and Overhead Clearance Requirements
Overhead bridge cranes are the primary method for loading and unloading dies from multi-level racks, especially roll-out drawer systems where the shelf extends outward and the die lifts vertically. That vertical lift path demands unobstructed clearance above each rack bay. Per OSHA 1910.179(b)(6), a minimum clearance of 3 inches overhead and 2 inches laterally must be maintained between the crane and any obstruction. In practice, die rack crane access clearance requirements go well beyond that regulatory minimum. You need enough height for the hook block, rigging, the die itself in its lifted position, and safe maneuvering margin above the top rack level.
Consider the math: if your tallest rack level sits at 10 feet, and the die being extracted is 18 inches tall with 24 inches of rigging and hook block above it, your crane hook at full hoist needs at least 13.5 feet of unobstructed vertical space. Add clearance for sprinklers, lighting, HVAC ductwork, and structural beams, and many facilities discover their overhead environment constrains rack height more than floor space does.
Roll-out shelf clearance adds another dimension. When a drawer extends fully, the die must clear the rack frame on both sides and the front overhang must not interfere with adjacent aisles or crane approach paths. Motorized heavy-duty drawers that extend 75% still require planning for the crane's approach angle and sling spread.
Forklift Aisle Planning and Floor Load Capacity
Forklift aisle width for die storage racking depends on the equipment class handling your tooling. The standard formula is straightforward: right angle stack dimension plus load length plus clearance. A typical 5,000-pound counterbalance forklift handling a 48-inch die requires roughly 12 to 13 feet of aisle width. Reach trucks reduce that to 8 to 10 feet, but most die handling involves heavier counterbalance or specialty trucks with wider turning radii than standard warehouse equipment.
Dies add a complication that pallets do not: irregular load dimensions. A progressive die 96 inches long on a forklift changes the aisle width calculation significantly compared to a standard 48-inch pallet. You'll want to calculate based on your longest die, not your average one, to avoid creating aisles that work for most tooling but trap your largest sets.
Floor load capacity for heavy die racks is the constraint hiding beneath everything else. As Cisco-Eagle's engineering resources emphasize, both the concrete slab and the soil subgrade must support the combined rack and die weight. A four-level die rack holding 40,000 pounds total concentrates that load through four column base plates, each potentially delivering 10,000 or more pounds into a few square inches of slab. Typical warehouse slabs range from 4 to 8 inches thick, but thickness alone does not determine capacity. Concrete compressive strength (PSI), rebar spacing, joint locations, and subgrade compaction all factor into whether your floor can safely carry the installation.
Before specifying any racking system, gather these key facility measurements:
- Floor slab thickness, reinforcement type, and compressive strength (PSI)
- Overhead obstruction height (crane runway, sprinklers, lighting, ductwork, structural members)
- Available aisle width from rack face to the nearest opposite obstruction
- Building column spacing and proximity to intended rack locations
- Door opening dimensions for die transport into and out of the storage area
- Distance from proposed rack location to press lines and staging areas
Die storage facility layout planning should minimize the travel path between racking and the presses those dies serve. Every extra foot of transport distance adds time to changeovers, increases forklift traffic in production zones, and raises the probability of handling damage. Position high-frequency dies closest to their assigned press lines, with a dedicated staging area where the next die can be pre-positioned and inspected before the changeover window opens. Low-frequency or archived dies can occupy more remote positions where longer retrieval times are acceptable.
Traffic flow matters as much as proximity. One-way aisle patterns prevent head-on conflicts between loaded and unloaded forklifts. Separate inbound and outbound paths to the storage area keep production traffic moving without bottlenecks. When crane and forklift paths overlap, clear operational procedures and physical separation reduce the risk of simultaneous operations creating pinch points.
Getting these physical parameters documented before contacting a racking supplier eliminates the most common source of project delays: discovering mid-installation that the floor cannot handle the load, the crane cannot reach the top level, or the aisles are too narrow for the equipment already on your floor. That documentation also feeds directly into the operational question every tooling manager eventually asks: how does proper die storage actually reduce press changeover time?
Die Storage Organization and Press Changeover Efficiency
Every minute a press sits idle during a die change costs money. Not just in lost output, but in downstream scheduling disruption, overtime labor, and missed delivery windows. What most operations overlook is how much of that idle time originates not at the press itself, but back at the storage area where the next die should be ready and waiting.
Die storage for SMED press changeover is not a stretch of lean methodology. It is a direct application of its core principle: converting internal setup activities into external ones. If your team cannot locate, inspect, and stage the next die while the press is still running the current job, your changeover clock starts long before anyone touches the bolster plate.
How Die Organization Accelerates Press Changeover
The SMED methodology developed by Shigeo Shingo breaks changeover into four steps: separating internal and external activities, converting internal to external, streamlining all operations, and standardizing the new procedure. Proper die racking directly enables the first two steps. When dies are organized in dedicated, labeled positions within a structured racking system, the search-and-retrieve phase becomes an external activity that happens while the press finishes its current run.
Consider what happens without organized storage. A forklift operator gets the changeover signal, drives to a floor-stacked die area, spends time identifying the correct tool among visually similar sets, possibly moves other dies to access the one needed, then transports it to the press. That sequence might consume 20 to 45 minutes before the actual mechanical changeover even begins. With a well-organized racking system, the operator goes to a known bay and position number, extracts the die in a single pull, and stages it beside the press. That retrieval drops to 5 to 10 minutes.
Here is how die racking reduces changeover time across the full workflow:
- Eliminates search time: Assigned rack positions with clear labeling and digital inventory tracking mean operators never hunt for tooling. The next die's location is known before the changeover starts.
- Supports parallel staging: Roll-out drawer systems and dedicated staging areas let teams pre-position the incoming die and inspect it visually while the press completes its current production run.
- Reduces transport damage: Dies stored at proper heights on engineered shelves come out undamaged and aligned. No time is lost discovering a chipped cutting edge or bent guide pin at the press.
- Enables predictable workflows: When every die lives in a consistent location, changeover procedures can be standardized with standardized work instructions that any trained operator can follow identically.
- Speeds die return: After changeover, the outgoing die returns to its designated position immediately rather than landing in a temporary floor spot where it blocks access or gets forgotten.
Visual management reinforces these gains. Shadow boards for die accessories, color-coded rack zones by press line, and status indicators (ready, needs maintenance, in production) turn the storage area into an information system rather than just a holding area. As the 5S methodology emphasizes, a well-organized work environment facilitates quicker changeovers by eliminating non-value-added motion and decision-making.
Storage Conditions That Extend Die Service Life
Changeover speed is one benefit. Die longevity is the other, and the two are connected. A die that degrades in storage requires unplanned maintenance, which disrupts production scheduling and extends changeover windows. Proper die storage to extend die life is not a secondary consideration. It is a direct contributor to press uptime.
Dies stored improperly suffer measurable damage over time. A heavy progressive die resting on two narrow support points instead of its full base develops stress concentrations in the unsupported spans. Over weeks or months, that sustained loading can cause subtle warping, particularly in long, thin die shoes. Precision-ground surfaces left unprotected contact bare steel shelves, accumulating scratches and corrosion that affect part quality when the die returns to production. Guide pins and bushings exposed to shop atmosphere without protective covers attract contaminants that accelerate wear during the next press run.
Stamping die maintenance and storage best practices work together as a system. Organized racking makes condition-based maintenance practical because every die has a known location and an accessible inspection position. Maintenance teams can schedule visual checks and preventive work without pulling dies from random floor stacks or navigating overcrowded bays. That predictability supports the kind of proactive maintenance culture that industry guidance recommends: reviewing every step of a die's journey from storage to press to identify conditions that put tooling at risk.
Environmental control also plays a role. Dedicated racking positions can incorporate corrosion-inhibiting practices: protective coatings on shelf surfaces, desiccant packs in enclosed bays, or climate-controlled zones for precision tooling. Dies stored on open floor areas near loading docks face temperature swings, humidity exposure, and airborne contaminants that accelerate surface degradation between production cycles.
Die longevity ultimately depends on two factors working in concert: manufacturing quality and storage conditions. A die engineered with maintainability in mind, with robust construction, accessible wear components, and stable dimensional performance, still needs proper support between runs to preserve those built-in durability features. Manufacturers like YICHEN engineer their stamping dies with attention to long service life and stable production performance, meaning the dies arrive with durability designed in. Proper storage complements that engineering investment by maintaining alignment, preventing surface damage, and ensuring the die returns to the press in the same condition it left the manufacturer's floor.
The link is straightforward: a well-built die paired with a well-designed storage system creates a cohesive tooling management strategy. The die's engineering keeps it performing under production stress. The racking system keeps it protected during the 80% or more of its life spent waiting for the next run. Break either half of that equation, and die life shortens, maintenance costs rise, and changeover windows expand as teams deal with damage that proper storage would have prevented.
These operational benefits, faster changeovers and longer die life, only materialize when the racking system matches your specific tooling profile. The variables that determine the right fit go beyond structural capacity into questions of access frequency, die dimensions, and how your inventory will evolve over time.
How to Choose the Right Racking System for Your Dies
Selecting a racking system feels overwhelming when you are staring at a catalog of options, each promising maximum capacity and optimal access. The reality is simpler than it looks. The right system reveals itself when you work through your operational variables in sequence rather than shopping features first.
Think of it as a stamping die rack selection guide built around your facility's constraints, not a supplier's product line. Every decision branches from a handful of measurable inputs that you already have access to.
Assessment Variables for Racking Selection
Before contacting any supplier, gather the data that drives the decision. Skipping this step is the single most common reason facilities end up with racking that works for some dies but fails for others. Here is your die storage rack buyer checklist:
- Maximum individual die weight in your current and projected inventory
- Die footprint dimensions (length, width, and shut height) for your largest and smallest sets
- Access frequency per die: how often does each tool cycle between storage and press?
- Available floor space dedicated to die storage, including future expansion area
- Clear ceiling height minus overhead obstructions (cranes, sprinklers, ductwork)
- Material handling equipment on hand: forklift class, crane capacity, and rigging
- Floor slab capacity and condition (thickness, PSI rating, reinforcement type)
- Budget range including installation, anchoring, and any required PE engineering
Weight and access frequency are your primary sorting variables. A 2,000-pound die changed three times per week has completely different racking needs than a 14,000-pound progressive die pulled twice per year. Group your inventory into access tiers, daily production dies, weekly rotations, and archived tooling, and you will immediately see that no single racking type serves all three optimally.
Matching Racking Type to Your Operational Profile
How to choose a die storage racking system comes down to matching your dominant operational scenario to the system designed for it. The table below maps common inventory profiles to recommended configurations:
| Operational Scenario | Recommended Racking Type | Reasoning |
|---|---|---|
| High-frequency small dies (under 5,000 lbs, daily changes) | Roll-Out Drawer Systems | Full overhead access enables rapid crane extraction. Drawers keep each die in a dedicated, labeled position for instant retrieval. Vertical stacking maximizes floor space in busy tool rooms. |
| Infrequent heavy progressive dies (8,000-20,000+ lbs, monthly or less) | Wide-Span I-Beam Racks or Floor-Level Die Bases | Die storage racking for heavy progressive dies demands maximum structural capacity. I-beam shelves handle concentrated loads without deflection. Floor-level bases eliminate lifting risk for the heaviest tooling where ceiling clearance or crane capacity limits vertical storage. |
| Mixed inventories (varied weights, varied frequencies) | Combination: Roll-Out Drawers + Wide-Span I-Beam bays | The best racking system for mixed die inventories pairs drawer systems for high-rotation lightweight dies with I-beam bays for heavier, less frequent tooling. This avoids over-engineering light die positions or under-building heavy ones. |
| Oversized dies with variable dimensions | Cantilever Racking | Open-front design accommodates irregular footprints without vertical upright interference. Adjustable arm heights flex with changing die profiles. Roll-out cantilever adds overhead crane access for heavier bundles. |
| Space-constrained facilities with moderate die weights | Vertical Storage Towers | Minimal floor footprint stores multiple dies in the vertical plane. Automated retrieval compensates for sequential access limitation. Ideal when floor space is the binding constraint. |
Notice that budget is intentionally last in the assessment sequence. Starting with budget leads to undersized systems that require premature replacement or unsafe workarounds. Starting with weight, frequency, and space leads to a properly scoped system where budget becomes a question of which appropriate option fits your financial window, not whether safety and function get compromised.
A few decision rules simplify edge cases. If more than 60% of your dies weigh under 5,000 pounds and change frequently, roll-out drawers should anchor your layout. If your heaviest dies exceed your crane capacity at upper rack levels, those dies belong on floor-level bases regardless of the space penalty. If your die dimensions vary by more than 50% across the inventory, fixed-width shelving will waste space, and cantilever or adjustable I-beam configurations earn their premium.
One factor that rarely appears in racking supplier conversations but directly affects storage system specification: the die itself. Dies designed with standardized base dimensions, integrated fork pockets, and lifting provisions built into the shoe make racking selection more straightforward. You are not designing around awkward geometry or improvising support cradles for irregular shapes.
Tooling managers benefit from partnering with die manufacturers who consider the full lifecycle, including storage and handling requirements, during the design phase. YICHEN's engineering focus on maintainability and stable production performance means their dies are designed with practical handling in mind: consistent base footprints, accessible lift points, and robust construction that tolerates the mechanical realities of repeated racking and retrieval cycles. When your dies arrive with storage-friendly geometry engineered in, specifying the right racking system becomes a matter of matching capacity and access method rather than compensating for design oversights.
The selection process distills to this: document your variables, group your dies by weight and frequency, match each group to the racking type engineered for that profile, verify facility constraints support the configuration, and confirm your die supplier designs tooling that works within standard storage frameworks. Follow that sequence, and the system you install will serve both today's inventory and the heavier, more complex tooling your operation will inevitably acquire next.
Frequently Asked Questions About Stamping Die Storage Racking Systems
1. Can standard pallet racking safely hold stamping dies?
Standard pallet racking is engineered for uniformly distributed loads, not the concentrated point loads that stamping dies create. A 5,000-pound die resting on a narrow footprint generates localized bending stress that can exceed the beam's safe deflection limit, even when the total weight appears within the rack's posted capacity. This mismatch leads to progressive beam deflection, weld fatigue at connectors, and potential collapse. Purpose-built die storage racking uses I-beam construction and reinforced decks designed specifically for concentrated heavy loads.
2. What types of racking systems work best for stamping die storage?
Five major types serve different operational needs. Roll-out drawer systems (4,000-15,000 lbs per shelf) suit high-frequency die changes with full overhead crane access. Cantilever racks handle oversized dies with variable dimensions. Wide-span I-beam racks support 5,000-20,000+ lbs for mixed inventories using forklift slide-on access. Vertical storage towers maximize floor space for lower-frequency tooling. Floor-level die bases accommodate extremely heavy dies above 15,000 lbs where elevated storage introduces unacceptable risk. The right choice depends on your die weight range, access frequency, and facility constraints.
3. How does proper die storage reduce press changeover time?
Organized die racking directly supports SMED methodology by converting die search and retrieval from an internal setup activity into an external one performed while the press still runs. Facilities with structured racking typically reduce die retrieval from 20-45 minutes down to 5-10 minutes by eliminating search time, enabling parallel staging, and preventing transport damage that causes delays at the press. Assigned rack positions with clear labeling let operators go directly to a known location rather than hunting through floor-stacked dies.
4. What OSHA requirements apply to heavy die storage racking?
OSHA enforces die storage safety through the General Duty Clause and references ANSI/MH16.1 standards during inspections. Key requirements include posted load capacities that reflect actual concentrated die loads, seismic anchoring with approved fasteners at correct torque and embedment depth, adequate aisle clearance for handling equipment, 18-inch minimum sprinkler clearance, and documented operator training. Facilities should conduct weekly visual inspections in high-traffic areas and quarterly comprehensive structural audits, with immediate isolation of any damaged rack sections.
5. How do I choose the right die storage racking system for my facility?
Start by documenting your operational variables: maximum die weight, die footprint dimensions, access frequency per tool, available floor space, ceiling height, material handling equipment, floor slab capacity, and budget. Group dies into access tiers - daily production, weekly rotation, and archived tooling. Match each tier to the appropriate racking type: roll-out drawers for frequent lightweight dies, I-beam racks or floor bases for heavy infrequent tooling, and combination systems for mixed inventories. Verify facility constraints support the configuration before finalizing. Working with die manufacturers like YICHEN who design tooling with standardized bases and integrated handling provisions simplifies the specification process.


