


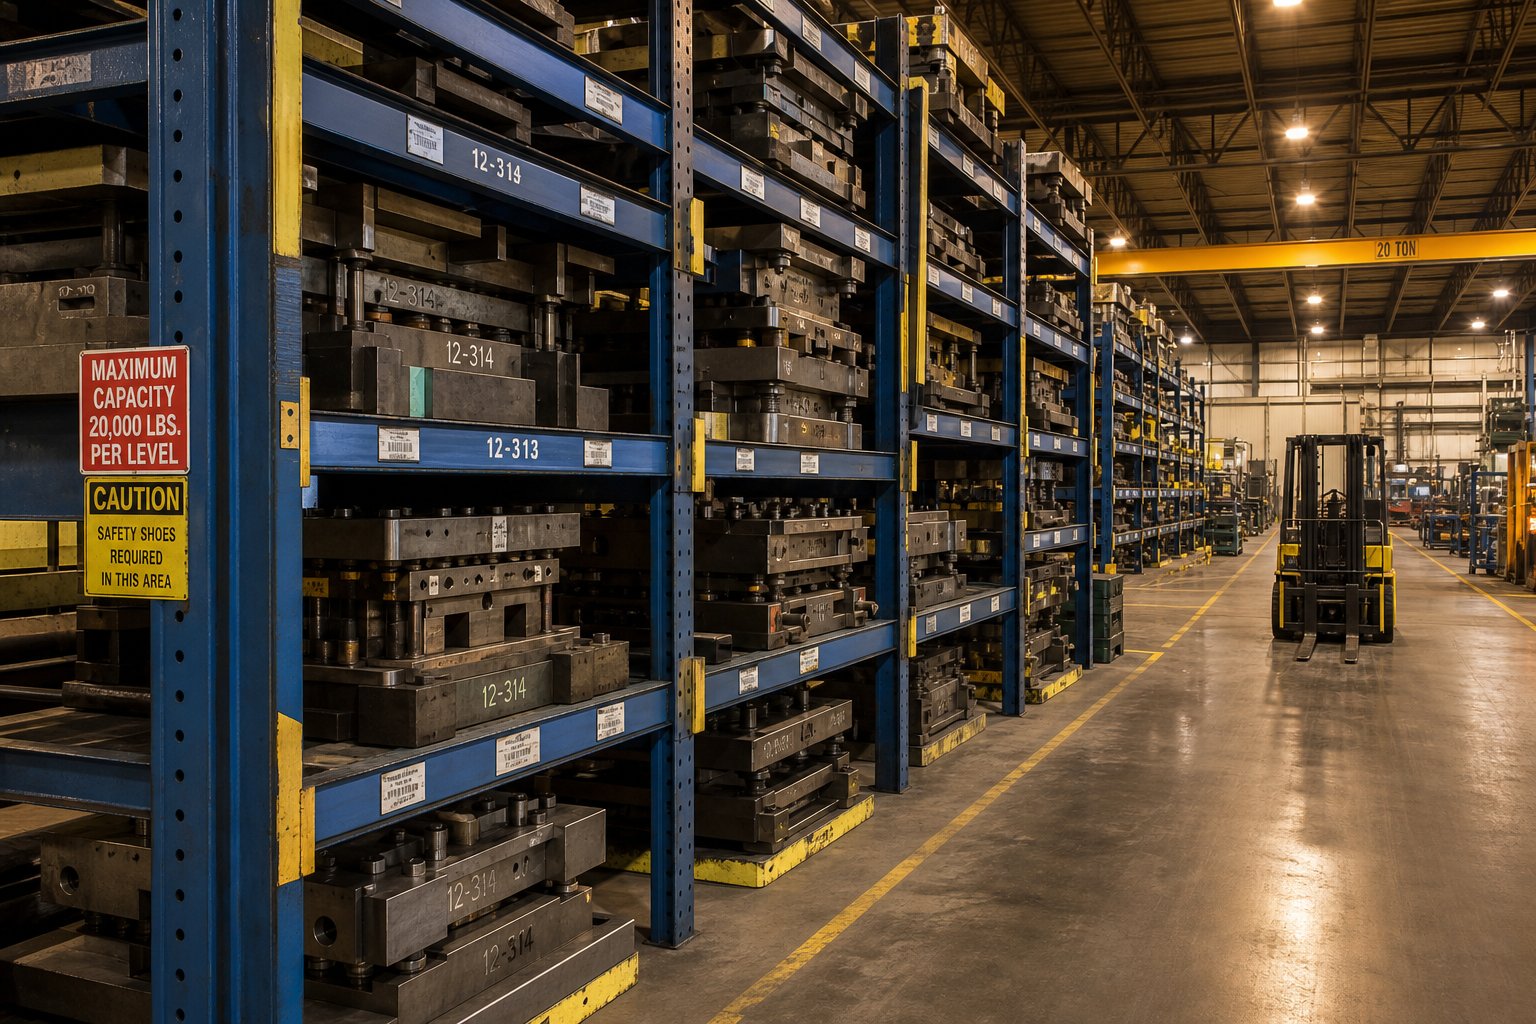
What Stamping Die Storage Really Means
When you hear "stamping die storage," what comes to mind? If you work in metal fabrication, you're probably picturing multi-ton progressive dies resting on heavy-duty racks near a press line. If you're a paper crafter, you might think of thin steel cutting dies organized in binders or magnetic sheets. Both are correct, and both share a common challenge: storing these tools poorly leads to damage, wasted time, and lost money.
Defining Stamping Die Storage Across Industries
At its core, stamp and die storage refers to any system or method used to house, protect, and organize dies when they're not actively in use. In industrial manufacturing, that means keeping precision tooling safe from mechanical damage, corrosion, and mishandling between production runs. In craft contexts, storage for dies and stamps means preserving thin metal templates and clear polymer stamps so they stay flat, sharp, and easy to find. The underlying principle is the same: protect the investment and make retrieval fast.
Why Proper Die Storage Impacts Production and Craft Quality
Consider what happens without a deliberate stamp storage strategy. Industrial dies get stacked on concrete floors where their precision-ground surfaces collect nicks and scratches. Craft dies get tossed into drawers where they bend or lose their labels. In both cases, quality suffers quietly before anyone notices the root cause.
Inefficient die handling and storage costs include additional die repair, equipment maintenance, lost production time, safety problems, and extra labor requirements - expenses most companies never attach to the cost of stamping a job.
This article bridges a gap that existing resources leave wide open. Most guides cover either the industrial world or the craft world, never both. Here, you'll find a complete framework - from lightweight magnetic sheets to engineered rack systems - so you can match the right storage approach to your specific situation, regardless of which side of the spectrum you fall on.
Craft Dies vs Industrial Stamping Dies
The phrase "die stamp" appears in product listings for a $3 scrapbooking template and in engineering specs for a 4-ton automotive draw die. That overlap in terminology creates real confusion, especially when you're searching for storage solutions. The two categories share almost nothing in common besides a name, and treating them interchangeably leads to mismatched advice. Let's draw a clear line between them.
Industrial Stamping Dies and Their Storage Demands
Industrial stamping dies are precision-machined steel tools used in presses to cut, bend, or form sheet metal at high volume. Think automotive body panels, appliance housings, electrical connectors, and aerospace brackets. These dies are made primarily from tool steel with a density of approximately 7.85 t/m3, and their finished weight depends on the part geometry, die complexity, and overall dimensions. A relatively simple die might weigh several hundred kilograms, while a large progressive die for an automotive panel can exceed 5,000 kg.
Storing these tools demands structural engineering. You're dealing with concentrated floor loads, forklift access requirements, corrosion prevention for hardened steel surfaces, and compliance with workplace safety standards. A stamp and die set in this category doesn't fit on a shelf - it requires purpose-built racking rated for the specific load.
Craft Cutting Dies and Lightweight Storage Solutions
Craft cutting dies are thin metal templates - typically 0.5 mm to 2 mm thick carbon steel or photopolymer - designed to cut paper, cardstock, fabric, or vinyl using a manual or electronic die-cutting machine. A single die weighs grams, not kilograms. Even a large collection of 300 dies might weigh less than a single industrial die shoe.
Storage concerns here center on organization, flatness preservation, and preventing surface oxidation on bare steel edges. You're choosing between magnetic sheets, clear pocket pages, labeled binders, and drawer inserts rather than calculating rack beam capacities. The challenge isn't structural - it's retrieval speed and space efficiency in a home studio or craft room.
Identifying Which Context Applies to You
Not sure where you fall? Here's a quick reference that separates the two worlds of die and stamping storage at a glance:
- Weight range: Industrial dies typically start at 50 kg and can exceed 10,000 kg. Craft dies weigh between 5 g and 150 g each.
- Typical dimensions: Industrial dies range from 300 mm to over 3,000 mm in length. Craft dies generally measure between 50 mm and 250 mm.
- Primary materials: Tool steel, alloy steel, and cast iron for industrial. Thin carbon steel, stainless steel, or photopolymer for craft.
- Access frequency: Industrial dies may sit in storage for weeks between production runs. Craft dies are often accessed multiple times per week.
- Environmental needs: Industrial storage requires humidity control, VCI protection, and heavy load-rated flooring. Craft storage needs dry conditions and flat, non-abrasive surfaces.
If your dies require a crane or forklift to move, you're in the industrial category. If you can hold your entire collection in both hands, you're in the craft space. Either way, the storage mistakes that damage these tools are predictable and preventable - but the solutions look completely different depending on which side of this divide you're on.

How to Assess Your Storage Needs by Collection Size
Knowing you need better die storage is one thing. Figuring out exactly what kind and how much is where most people stall. A crafter with 30 dies doesn't need the same setup as someone managing 250, and a shop running five progressive dies has completely different constraints than a facility cycling through 200 tool sets per year. The right approach starts with honest assessment - what do you actually have, how fast is it growing, and how often do you need access?
Sizing Your Storage for Small to Large Craft Collections
Craft die storage scales in tiers, and the solution that works beautifully for a small collection becomes a frustrating mess when your inventory doubles. Here's how to think about it:
Small collections (under 50 dies): At this stage, simplicity wins. A single binder with magnetic sheets or clear storage pockets keeps everything visible and accessible. Many crafters use plastic storage folders to keep stamps and dies together without losing small pieces. You don't need an elaborate system yet - you need one that's easy to maintain so you actually use it.
Medium collections (50 to 200 dies): This is where disorganization starts to bite. You can no longer flip through a single binder and spot what you need. Die cut storage at this level benefits from categorization - grouping by theme, brand, occasion, or shape type. Multiple binders, labeled drawer inserts, or dedicated bins within shelving units like IKEA Kallax with sturdy containers keep things findable. A label maker becomes essential rather than optional.
Large collections (200+ dies): At this volume, you're managing an inventory, not just a collection. Wall-mounted racks, rolling carts with labeled drawers, or dedicated shelving systems with indexed categories prevent the inevitable "I know I have that die somewhere" frustration. Some crafters maintain a simple spreadsheet or photo catalog so they can search digitally before digging through physical storage. The goal shifts from "where does this fit" to "how fast can I find and return it."
Calculating Industrial Rack Requirements by Die Weight and Dimensions
Industrial die storage assessment revolves around three variables: weight per die, physical dimensions, and access frequency. Unlike craft storage where you're optimizing for convenience, here you're engineering for safety and structural integrity.
Start by cataloging your die inventory. Record each die's weight, length, width, and height. Then determine how often each die enters and exits storage - daily, weekly, monthly, or seasonally. High-turnover dies need positions with direct access, while low-rotation tooling can occupy denser configurations deeper in the storage area.
Weight drives your rack selection more than any other factor. A rack system rated for 2,000 kg per shelf level accommodates most small to mid-size dies, but large progressive or transfer dies may demand 5,000 kg or more per position. Always calculate based on your heaviest die, not your average - one overloaded beam is all it takes for a structural failure.
Facility Layout Considerations for Heavy Die Inventories
Die weight doesn't just affect the rack - it affects the building. Concentrated floor loads from heavy dies stored on racks can exceed what standard warehouse slabs are designed to handle. Before installing any racking system, verify your floor's load-bearing capacity with a structural engineer. A standard 6-inch warehouse slab typically supports around 2,500 to 3,000 PSI, but point loads from rack columns concentrate that force significantly.
Aisle spacing is the other critical factor. Counterbalance forklifts typically require 12 to 13 feet of aisle width for safe maneuvering with standard loads. Reach trucks can operate in 8 to 10 feet, while very narrow aisle equipment needs only 6 to 7 feet but requires specialized guidance systems. The formula is straightforward: minimum aisle width equals right-angle stack dimension plus load length plus 12 inches of clearance. Choosing narrower aisles can add up to 20% more storage capacity, but only if your equipment can handle the tighter space safely.
Here's a step-by-step workflow you can follow to determine your specific die storage requirements, whether you're organizing a craft room or planning an industrial facility:
- Inventory everything. Count your dies and record key data - weight and dimensions for industrial, quantity and category for craft.
- Assess growth rate. How many new dies do you add per quarter or per year? Size your system for where you'll be in 18 to 24 months, not just today.
- Determine access frequency. Sort dies into high-rotation (weekly or more), medium-rotation (monthly), and low-rotation (quarterly or seasonal) groups.
- Measure your available space. Record floor area, ceiling height, door widths, and any obstructions. For industrial settings, note column locations and existing equipment paths.
- Identify constraints. Budget ceiling, floor load limits, fire code clearances, equipment turning radius, or simply how much room your craft desk allows.
- Match solution to tier. Cross-reference your inventory size, access needs, and space constraints against available storage methods to narrow your options.
This assessment framework gives you a clear picture before you spend money on any storage solution. The worst mistake - in both craft rooms and press shops - is buying storage reactively, one piece at a time, without understanding the full scope of what you're housing. That reactive approach is exactly how people end up with mismatched systems, wasted space, and dies that are technically stored but practically impossible to find when needed.
Comparing Storage Methods Side by Side
You've measured your space, counted your dies, and sorted them by access frequency. The next question is practical: which storage method actually fits your situation? Craft forums are full of stamp storage ideas that work great for 20 dies but collapse under 200. Industrial catalogs list rack specs without explaining when one type outperforms another. What's missing is a single, honest comparison that puts every major method on the same playing field with consistent criteria.
That's what this section delivers - a direct evaluation of each option based on what actually matters: how much it holds, how well it protects, how easily you can retrieve what you need, and whether it grows with you.
Craft Storage Methods Compared
Craft die storage methods fall into six main categories, each solving a slightly different problem. Magnetic sheets hold thin wafer dies flat and visible. Clear storage pockets - like the popular Avery Elle format - let you file stamp sets vertically like recipe cards, keeping artwork visible and matching dies together. Binders with magnetic or pocket inserts add portability. Drawers with dividers work well for rubber stamp storage where stamps are mounted on wood or foam blocks. Wall-mounted racks maximize vertical space in tight craft rooms, and rolling carts give you mobile access across different work surfaces.
The right choice depends less on which method is "best" and more on what your collection looks like and how you work. Someone who card-makes at a desk every evening has different retrieval needs than someone who pulls out supplies for a weekend scrapbooking session once a month.
Here's how these methods compare across the criteria that matter most:
| Method | Best For | Protection Level | Accessibility | Cost Tier | Scalability |
|---|---|---|---|---|---|
| Magnetic Sheets/Cases | Small to medium collections of thin wafer dies | High - keeps dies flat and secured | High - visual browsing at a glance | Low to moderate ($18–$35 per case) | Moderate - requires additional cases as collection grows |
| Clear Storage Pockets | Clear stamp storage with matching dies, medium to large collections | Moderate - protects from dust and loss, less from crushing | Very high - flip-through browsing like a filing system | Low ($12–$25 per pack) | Excellent - just add more pockets to existing bins |
| Binders with Inserts | Small to medium collections, portable use | Moderate - enclosed but prone to page sagging | Moderate - page-by-page flipping | Low ($15–$40 per binder) | Limited - binders get heavy and unwieldy past 3–4 per shelf |
| Drawers with Dividers | Rubber stamp storage (mounted stamps), mixed media supplies | High - enclosed and cushioned | Moderate - requires opening and scanning | Moderate ($40–$100+ per unit) | Moderate - limited by furniture footprint |
| Wall-Mounted Racks | Large collections in small rooms | Low to moderate - exposed to dust and light | High - immediate visual scanning | Low to moderate ($20–$80 DIY to commercial) | Good - add more rails or panels as needed |
| Rolling Carts | Medium to large collections, multi-surface crafting | Moderate - depends on drawer/bin inserts | High - bring storage to work area | Moderate ($50–$150) | Limited - physical cart dimensions set the ceiling |
A few patterns emerge from this comparison. Clear storage pockets score highest on scalability because you simply add more pockets to a bin or drawer - no structural change needed. Magnetic cases offer the strongest protection for thin dies specifically, but they fill quickly when your collection includes large nesting sets. Drawers suit rubber stamp storage well because mounted stamps don't fit neatly into flat pocket systems designed for thin profiles.
Industrial Rack Systems and Die Block Options
Industrial die storage is an engineering problem, not an organizing one. You're not choosing between "cute" and "functional" - you're choosing between safe and potentially catastrophic. The wrong rack under a 3-ton die doesn't just sag. It collapses.
Four primary systems handle heavy stamping die storage in manufacturing facilities: standard pallet racks, structural I-beam racks, custom welded racks, and polyurethane die block systems. Each occupies a different position on the capacity-cost spectrum, and each has specific failure points that disqualify it for certain applications.
| System Type | Best For (Die Weight) | Protection Level | Accessibility | Cost Tier | Scalability |
|---|---|---|---|---|---|
| Standard Pallet Racks | Light to moderate dies (under 1,500 kg) | Low - no surface cushioning, beam flex under heavy loads | Good - standard forklift compatible | Low ($200–$600 per bay) | Good - modular bolt-together design |
| Structural I-Beam Racks | Heavy dies (1,500–8,000 kg per level) | Moderate - rigid structure prevents beam deflection | Good - wide bay openings for forklift or crane access | High ($1,500–$5,000+ per bay) | Moderate - requires engineering for extensions |
| Custom Welded Racks | Oversized or irregular dies (any weight, purpose-built) | High - designed to exact die profiles | Variable - depends on configuration | Very high ($3,000–$10,000+ per unit) | Low - built for specific inventory |
| Polyurethane Die Blocks | All weights - used as die resting surfaces on any rack type | Very high - cushions precision surfaces, absorbs vibration | N/A - accessory, not standalone storage | Moderate ($50–$300 per block depending on size) | Excellent - add blocks to any existing system |
The critical insight here is that standard pallet racking - the default choice because it's cheap and available - is often the worst option for heavy stamping dies. Roll-formed pallet rack beams deflect under concentrated point loads. A 2,000 kg die sitting on two beams doesn't distribute its weight like 40 evenly spaced boxes on a pallet. That concentrated load bends the beams over time, creating a progressive failure risk that's invisible until it isn't.
Polyurethane die blocks deserve special attention. They sit between the die and the rack surface, cushioning hardened tool steel against metal-on-metal contact. The durometer rating (typically 70A to 95A for die storage applications) determines how much the block compresses under load. Too soft, and the die sinks unevenly. Too hard, and you lose the vibration-dampening benefit. These blocks outperform wood (which splinters and absorbs moisture), rubber (which degrades under heavy static loads), and bare steel (which damages precision-ground surfaces through direct contact).
Budget Tiers from DIY to Premium Solutions
Regardless of context, storage budgets fall into three practical tiers:
- DIY / Entry level: Craft users repurpose photo boxes, binder sleeves, and dollar-store magnetic sheets. Industrial shops adapt existing pallet racking with plywood decking. Cost is minimal, but protection and scalability suffer.
- Mid-range / Purpose-built: Craft users invest in dedicated pocket systems, magnetic cases, and labeled organizer furniture. Industrial facilities purchase rated heavy-duty racking with appropriate beam capacities and add polyurethane blocks. This tier balances cost against genuine die protection.
- Premium / Engineered: Craft users with large collections build custom wall systems or dedicated craft room cabinetry. Industrial operations commission custom-welded racks designed to exact die dimensions, integrate inventory tracking, and meet full safety compliance standards. This tier costs significantly more but eliminates compromise.
Most people underinvest at the start and overspend on corrections later. A crafter who buys three mismatched storage products before settling on clear pockets has already spent more than someone who started with the right system. A plant that stores $50,000 dies on $300 pallet racking is making a similar bet - just with higher stakes.
The comparison tables above give you a decision framework, but raw method selection is only half the equation. How you label, track, and organize within whatever system you choose determines whether your storage actually works day-to-day or just looks organized on the surface.
Industrial Die Storage Racks and Facility Planning
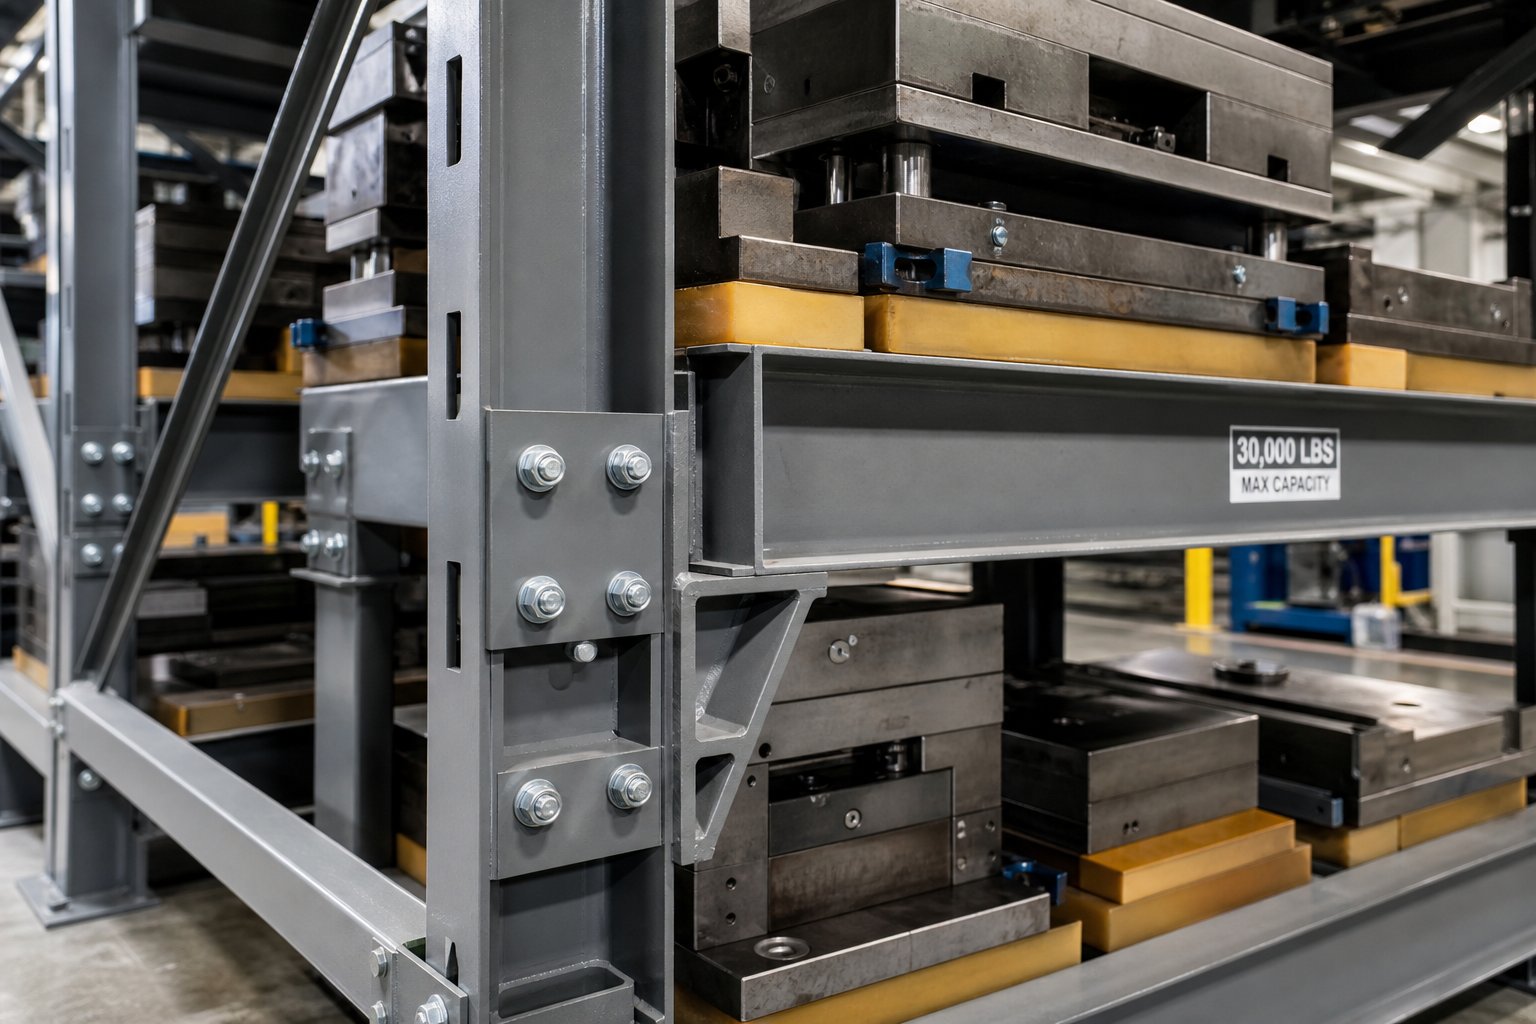
Selecting the right method is the starting point, but for industrial operations, the engineering behind your die storage racks determines whether that selection actually holds up - literally. A rack that looks adequate on paper can fail silently under the specific loading conditions stamping dies create. Understanding why requires looking at the structural mechanics most general warehouse racking was never designed to handle.
Why Standard Pallet Racks Fail for Heavy Dies
Standard pallet racking dominates warehouse storage for good reason - pallet racking represents over 61% of all installations globally due to its modular design and load-bearing versatility with evenly distributed palletized goods. But stamping dies aren't palletized goods. They're concentrated point loads sitting on two beams, and that distinction matters enormously.
Imagine a 3,000 kg progressive die resting on a pair of roll-formed pallet rack beams. Unlike 30 cartons spread across a pallet, that mass concentrates in a small footprint. The beams experience localized stress far exceeding their rated distributed load capacity. Over months, beam deflection becomes measurable. Over years, it becomes dangerous. The failure mode is gradual - a slow sag that eventually reaches a tipping point - which is exactly why it's so easy to ignore until a catastrophic collapse occurs.
Roll-formed beams also lack the torsional rigidity that heavy stamping dies demand. When a forklift places or retrieves a die, the dynamic loading - that momentary spike as the load shifts - introduces forces that standard connectors and beam profiles weren't engineered to absorb repeatedly. Purpose-built tool and die storage racks address this with fundamentally different structural approaches: hot-rolled structural steel members, welded connections instead of clip-in tabs, and beam profiles designed for concentrated rather than distributed loading.
Selecting Weight Capacity and Rack Configuration
Choosing die racks starts with honest load analysis. You need to know your heaviest die, not your average. Every shelf level must be rated for the maximum single-die weight it could hold, plus a safety margin that accounts for dynamic forces during placement.
Here are the key engineering criteria to evaluate when selecting industrial die storage racks:
- Per-level capacity rating: Confirm that each beam level supports your heaviest die with at least a 25% safety factor above static weight to account for dynamic loading during forklift placement.
- Beam deflection limits: Structural engineers assess that beam bending remains within defined tolerances so rack levels support dies without excessive deformation - a critical distinction from general warehousing where slight flex is acceptable.
- Upright column strength: Columns must resist buckling under vertical compression from multiple loaded levels. Multi-channel or structural I-beam uprights outperform standard roll-formed columns for heavy die applications.
- Connection type: Bolted or welded connections provide more reliable load transfer than tab connectors for heavy concentrated loads. Research indicates bolted connections can serve as a reliable alternative to tab connectors when engineering for high-capacity applications.
- Floor anchoring and load distribution: Rack column base plates must distribute concentrated loads to the floor slab without exceeding its capacity. Damaged or improperly installed baseplates make the rack vulnerable to tipping or collapse.
- Bay opening dimensions: Die width plus forklift clearance plus positioning tolerance - if the bay is too narrow, operators take risks during placement that damage both dies and racks.
- Seismic and lateral bracing: Cross-bracing and frame reinforcement strategies strengthen the rack structure by improving lateral rigidity, especially critical in regions with seismic requirements.
Configuration also depends on access patterns. High-rotation dies - those entering and leaving storage weekly - need positions at ergonomic forklift heights with clear sightlines. Low-rotation dies can occupy upper levels or denser configurations. Some facilities use structural I-beam cantilever racks with arms rated for up to 20,000 pounds per level, giving overhead cranes unobstructed access for the heaviest tooling.
Die design itself influences storage configuration. Dies engineered with standardized base dimensions, integrated lifting points, and flat resting surfaces simplify rack layout planning significantly. Manufacturers like YICHEN engineer stamping dies with maintainability and storage considerations factored in from the design phase - standardized shoe sizes, predictable center-of-gravity locations, and surfaces designed for stable resting positions. When die geometry is predictable, rack configurations become more uniform and storage density improves without compromising safety.
Die Storage Bases and Material Selection
What sits between the die and the rack surface matters as much as the rack itself. Precision-ground tool steel resting directly on structural steel beams is a recipe for surface damage - microscopic nicks accumulate into measurable tolerance loss over repeated storage cycles. Die storage bases solve this, but not all materials perform equally.
Wood blocks - the traditional choice - absorb moisture, swell, splinter, and compress unevenly under heavy static loads. Rubber degrades through compression set, losing its cushioning properties permanently under the constant weight of a multi-ton die. Bare steel-on-steel contact transmits vibration from nearby equipment directly into precision surfaces.
Polyurethane die blocks outperform all three alternatives. They resist compression set far better than rubber, repel moisture unlike wood, and provide genuine vibration isolation that bare metal cannot. The key specification is durometer - the Shore hardness rating that determines how the block behaves under load.
For die storage applications, the durometer sweet spot typically falls between Shore A 70 and Shore A 95. Here's how to think about that range:
- Shore A 70–80 (medium): Greater cushioning and vibration absorption. Suitable for lighter dies where impact dampening during placement matters more than load-bearing rigidity.
- Shore A 80–90 (medium-hard): Balanced performance for most stamping dies. Provides surface protection without excessive compression under heavy static loads.
- Shore A 90–95 (hard): Minimal deflection under extreme weight. Best for very heavy progressive dies where dimensional stability of the support surface is paramount.
Selecting too soft a durometer causes the die to sink unevenly, potentially stressing the die shoe. Too hard eliminates the protective benefit entirely. Environmental conditions also matter - softer polyurethanes become more pliable at elevated temperatures, while harder formulations may stiffen in cold storage areas. Match the durometer to both your die weight and your facility's temperature range for consistent year-round performance.
Compliance ties everything together. ANSI MH16.1-2023 establishes requirements for the design, testing, and utilization of industrial steel storage racks, and it's referenced by the International Building Code for safe installation. The standard requires that all racking operate within engineered capacity, with clearly posted load signage, proper anchor installation, and periodic inspections to detect deformation early. Column damage from forklift impact, missing safety pins, overloaded beams, or leaning frames - any single weak point can trigger the kind of progressive failure that turns a storage area into a liability. Regular visual inspections that check for beam damage, anchor integrity, and frame plumb alignment aren't optional best practices. They're baseline safety requirements that protect both personnel and the precision tooling the racks are designed to house.
Organization Systems and Labeling for Quick Retrieval
A well-built rack or a neatly stacked stamp storage box means nothing if you can't find the right die when you need it. The physical infrastructure gets you halfway there. The labeling and tracking system you layer on top is what turns storage into something genuinely usable - whether you're a crafter flipping through 150 dies or a tooling manager locating a specific progressive die among 80 sets in a warehouse bay.
Physical Labeling Methods That Scale
Labeling seems simple until your collection outgrows whatever casual system you started with. A few handwritten sticky notes work fine for 20 dies. They fall apart at 100. The key is choosing a method that still makes sense after your inventory doubles.
For craft users exploring storage ideas for rubber stamps and thin cutting dies, physical labels take several forms. Color-coded dots or washi tape strips on pocket sleeves let you group by category at a glance - green for floral, blue for sentiment, red for holiday. Numbered tags paired with a reference list add precision without requiring you to see the die itself. Printed category labels on dividers, like the library-style crate divider system, break large collections into browsable sections so you narrow your search before flipping through individual sets.
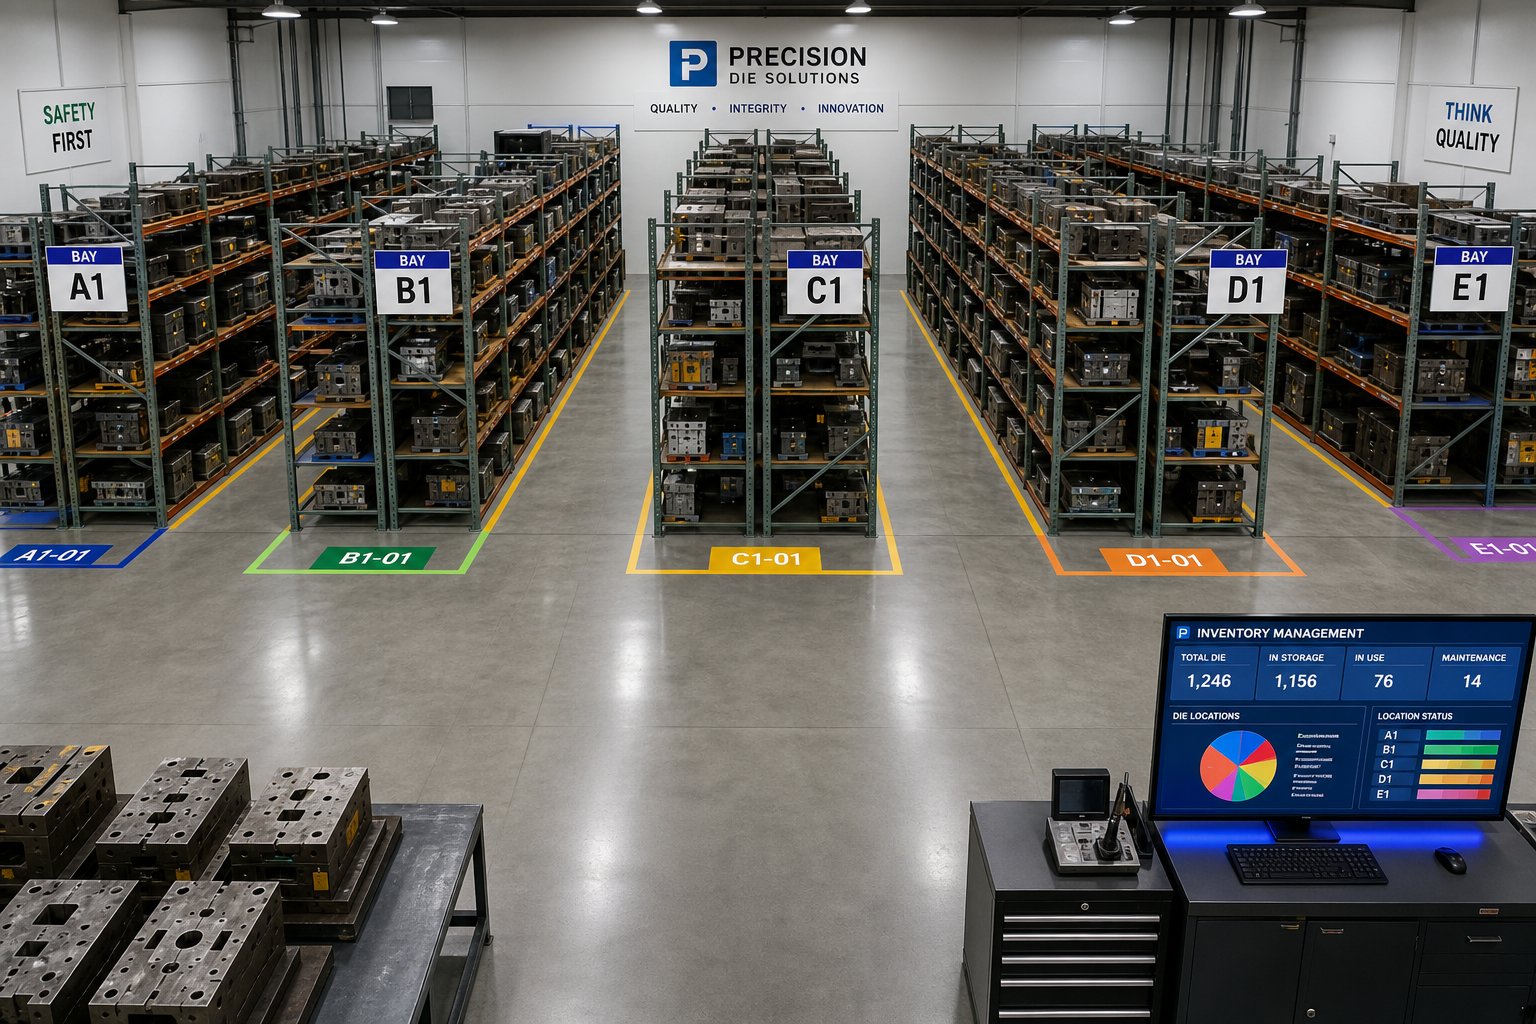
Industrial labeling demands more durability. Stamped metal tags, engraved placards, or heavy-duty adhesive labels with part numbers survive the oil, dust, and handling that paper labels won't. Color-coded rack positions - where each bay or level is assigned to a specific production line or die condition status - give forklift operators immediate visual cues without needing to read small print from a distance.
Digital Inventory Tracking for Die Collections
Physical labels tell you what's where once you're standing in front of the storage. Digital tracking tells you before you even walk over. For anyone managing more than a modest collection, some form of digital catalog eliminates guesswork entirely.
Craft users wondering how to store rubber stamps efficiently at scale have several lightweight options. A simple Google Sheet listing each set's name, category, and storage location is free, searchable from your phone, and shareable. Photo-based catalogs - snapshots of each die stored in a cloud folder sorted by theme - let you browse visually without pulling anything off the shelf. Dedicated apps like Color My Life allow you to search your collection digitally before heading to the right bin.
Industrial operations need more robust solutions. Barcode-based inventory systems assign each die a unique scannable identifier linked to a central database. When a die enters or exits storage, scanning updates its status in real time - location, condition, last maintenance date, and next scheduled use. RFID tagging takes this further by enabling automated tracking without line-of-sight scanning, which is particularly valuable for large die inventories where manual scanning of every movement introduces delays. Integration with ERP or CMMS platforms ties die location data into broader production planning and maintenance scheduling workflows.
Organization Frameworks by Use Case
Labels and tracking tools only work when they're built on a logical framework. The framework you choose should reflect how you actually search for dies - not how they look arranged neatly.
Here are common organization approaches with guidance on when each works best:
- By category or theme (floral, geometric, holiday, sentiment) - works best for craft users who design around visual themes and want coordinating sets together.
- By frequency of use - keeps high-rotation dies in the most accessible positions. Ideal for both craft and industrial settings where 20% of the inventory handles 80% of the work.
- By brand or product line - useful for crafters who buy coordinating stamp-and-die sets from specific manufacturers and want matching pieces side by side.
- By part number or production line - the standard industrial approach, linking each die to its associated product and press.
- By maintenance schedule or die condition - separates dies needing repair, sharpening, or inspection from production-ready tooling, preventing accidental use of compromised dies.
- By size or weight class - practical for industrial racks where physical constraints dictate which dies fit on which shelf levels.
Regardless of which framework you choose, the implementation workflow follows the same sequence. Here's a step-by-step process for building an organization system rather than just imagining a finished one:
- Choose your primary sort criterion. Pick one framework from the list above as your top-level organizer. Don't try to sort by three criteria simultaneously - it creates decision paralysis when putting things away.
- Define your categories. List every group within your chosen framework. For theme-based craft organization, that might be 8 to 12 categories. For industrial part-number systems, it's your full active die catalog.
- Assign physical locations. Map each category to a specific rack position, drawer, bin, or shelf section. Write it down - this becomes your master reference.
- Label everything. Apply physical labels to both the storage locations and the dies or their containers. A labeled slot without a labeled die (or vice versa) creates gaps in the system.
- Create the digital catalog. Enter your inventory into whatever tracking tool you chose - spreadsheet, app, or barcode database. Include location data so the digital record points you to the physical spot.
- Establish a return protocol. The system only holds if every die goes back to its assigned spot after use. For craft, that means returning a set to its pocket immediately after a project. For industrial, it means scanning the die back into storage and confirming its condition.
- Review and adjust quarterly. Collections grow and usage patterns shift. A category that made sense six months ago may need splitting, or a rarely used section can be consolidated to free prime real estate for high-rotation items.
The crafters who find their systems sustainable long-term almost always share one trait: they picked a framework simple enough to follow on a tired Tuesday evening, not just an inspired Saturday afternoon. The same applies to industrial tooling teams. A tracking system that requires three extra steps per die movement won't get used consistently, and inconsistent use is worse than no system at all because it creates false confidence in data that's already outdated.
Organization handles the "where is it" problem. But even perfectly organized dies deteriorate if storage conditions silently work against them - and that's a different category of mistake entirely.
Common Storage Mistakes That Shorten Die Life
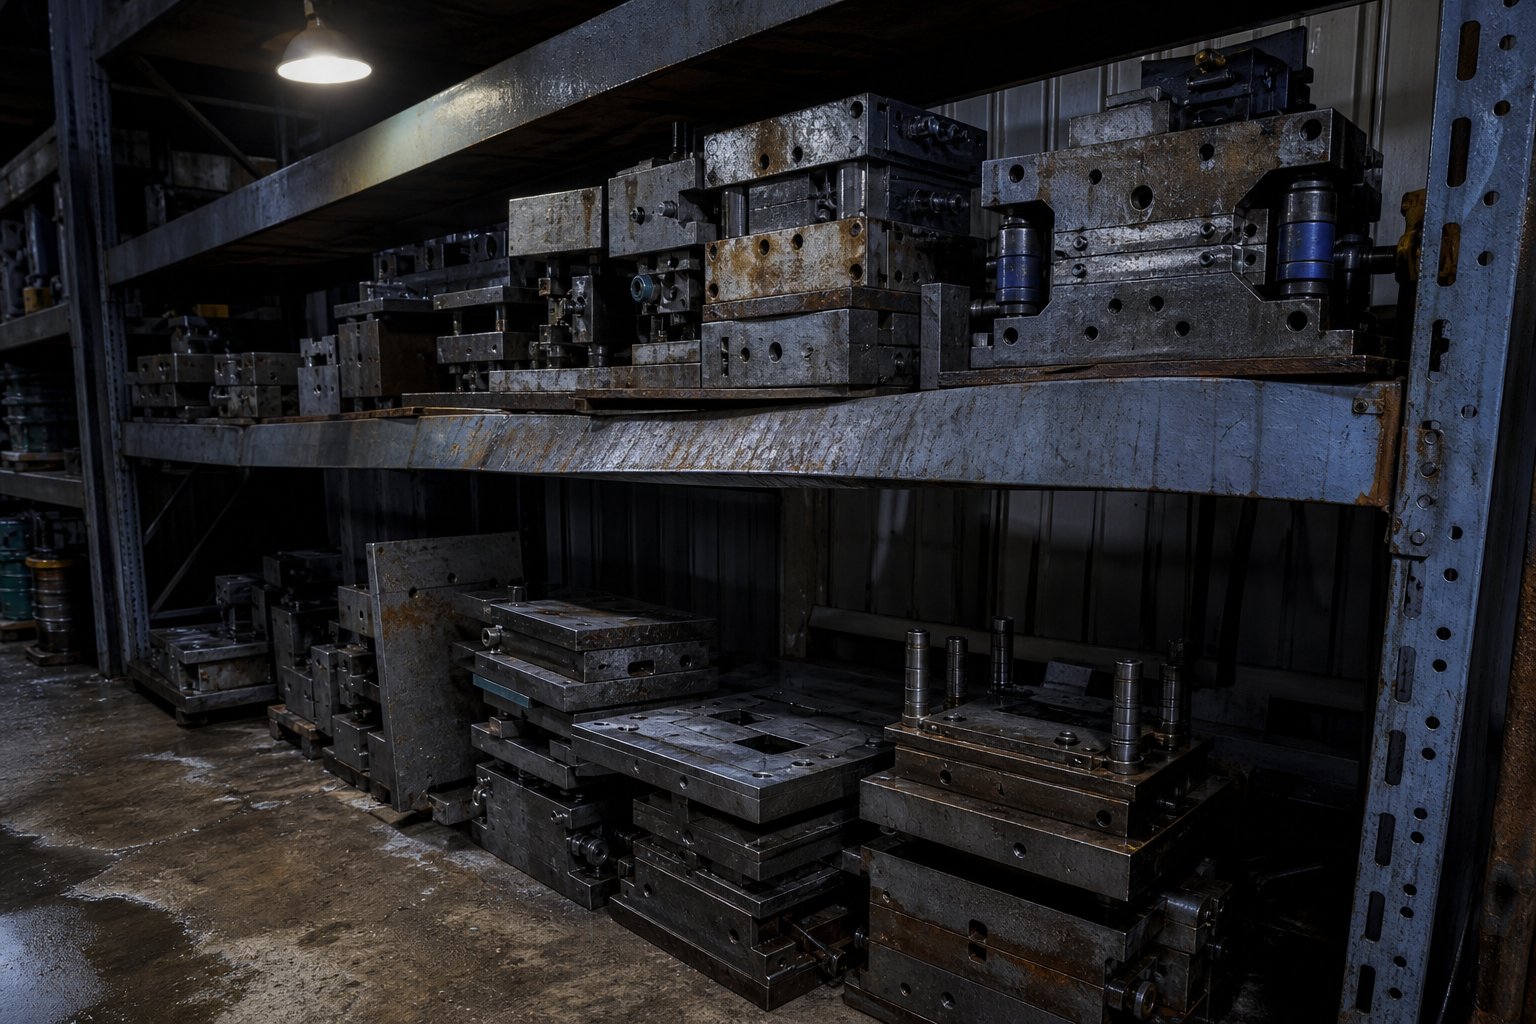
Deterioration rarely announces itself. A stamping die doesn't send an alert when its cutting edges develop micro-pitting from condensation, or when a rack beam quietly deflects another millimeter under an overloaded bay. These problems compound in silence - and by the time they're visible, the damage is already expensive. Whether you're managing heavy stamping tooling in a press shop or a growing craft die collection, the same pattern applies: small, repeated storage mistakes produce consequences that far outweigh the cost of prevention.
Overloading and Structural Failure Risks
This is the mistake with the highest stakes in industrial settings. Heavy duty tool and die racks are engineered for specific load limits, and exceeding those limits - even gradually - creates a progressive failure mode that's invisible until it's catastrophic. A documented shelving collapse case illustrates the pattern: dense materials stored on shelving never rated for that weight caused beams to deform over time until the entire section collapsed. No one was injured in that instance, but damaged inventory, operational downtime, and hours of cleanup followed.
The same failure logic applies to injection mold storage racks and die racks alike. A single overloaded level can trigger a chain reaction that takes adjacent bays with it. And the root cause is almost always the same - someone placed a die without checking capacity because the rack "looked fine."
- Mistake: Exceeding rack weight capacity by adding dies without tracking cumulative load. Consequence: Beam deflection, connection failure, and potential structural collapse causing inventory destruction and injury risk. Prevention: Post load limits visibly on every bay, track cumulative weight per level, and inspect beams quarterly for signs of bending.
- Mistake: Using standard retail or light-duty shelving for heavy dies. Consequence: Shelving designed for lighter products deforms under concentrated loads, often failing suddenly rather than gradually. Prevention: Match shelving type to actual product weight - heavy stamping dies require structural-grade racking, not general-purpose units.
- Mistake: Stacking craft dies without support or separation. Consequence: Thin dies bend, intricate designs get crushed, and lower dies develop scratches from metal-on-metal contact. Prevention: Store craft dies flat on magnetic surfaces or individually sleeved in pockets - never loose in piles.
Environmental Neglect and Corrosion Damage
You might have the sturdiest rack in the building, but if humidity is unchecked, corrosion does what mechanical stress couldn't. Metal stamping dies are precision tools where even minor surface rust causes irregularities in stamped parts. Industry guidance recommends keeping relative humidity below 50% and maintaining temperatures between 18–22°C to prevent condensation on die surfaces.
The most costly storage mistake most operations overlook is environmental neglect - corrosion develops invisibly under protective coatings and inside die cavities where inspections rarely reach, silently degrading precision surfaces until the die produces out-of-tolerance parts with no obvious mechanical cause.
- Mistake: Storing dies in uncontrolled environments near loading docks, exterior walls, or HVAC vents where humidity fluctuates. Consequence: Condensation forms on tool steel surfaces, initiating rust that pits cutting edges and degrades surface finish. Prevention: Dedicate a climate-controlled storage zone, use dehumidifiers, and apply rust-preventive coatings before placing dies into storage.
- Mistake: Skipping pre-storage cleaning. Consequence: Residual lubricants, metal shavings, and moisture trapped against die surfaces accelerate localized corrosion. Prevention: Clean dies thoroughly with appropriate degreasers, dry completely, and apply a protective oil film or VCI wrap before storage.
- Mistake: Storing craft dies in humid basements or garages without protective sleeves. Consequence: Thin carbon steel dies develop rust spots that transfer to paper during cutting, ruining projects and dulling edges. Prevention: Keep dies in enclosed containers with silica gel packets, especially in climate-variable storage areas.
Disorganization That Wastes Time and Money
Disorganization isn't dramatic - no one takes a photo of a messy die drawer and posts it as a cautionary tale. But the costs accumulate steadily. Every minute spent hunting for a misplaced die is a minute of press downtime or a minute of creative momentum lost. Multiply that across a year, and the number surprises people.
- Mistake: No consistent return protocol - dies get placed wherever there's an open slot. Consequence: Retrieval time multiplies, operators pull the wrong die and run test hits before realizing the error, and "lost" dies get reordered unnecessarily. Prevention: Assign fixed locations, label both the die and the position, and enforce a scan-in/scan-out or return-to-slot discipline.
- Mistake: Overcrowding racks to avoid purchasing additional storage. Consequence: Dies become inaccessible without moving others first, increasing handling time and the risk of accidental drops or surface damage during shuffling. Prevention: Maintain at least 15–20% open capacity as buffer space, and plan storage expansion before reaching full density.
- Mistake: Mixing die condition statuses - storing damaged dies alongside production-ready ones without marking. Consequence: A die needing sharpening or repair enters production, produces defective parts, and potentially damages the press or downstream tooling. Prevention: Physically separate dies by condition status using color-coded tags or dedicated zones for "ready," "needs maintenance," and "awaiting inspection."
Each of these mistakes shares a common trait: they're cheap to prevent and expensive to fix after the fact. The rack inspection that takes 15 minutes quarterly costs nothing compared to the structural collapse it prevents. The silica gel packet in a craft storage box costs cents compared to replacing a rusted die set. And the labeling system that takes an afternoon to implement saves hundreds of hours of searching over its lifetime.
Avoiding these mistakes keeps your dies intact - but what about the dies already in storage for weeks or months at a stretch? Long-term preservation introduces a different set of challenges that go beyond rack strength and label placement into the chemistry of metal, moisture, and time.
Preserving Dies in Storage Against Rust and Damage
Metal doesn't care that it's sitting on an expensive rack. If the surrounding air carries enough moisture, corrosion begins at the molecular level - invisible at first, then irreversible. Preservation in storage isn't about doing one thing right. It's about layering multiple defenses that match the specific material your dies are made from, because tool steel, thin carbon steel, and photopolymer each degrade through entirely different mechanisms.
Rust Prevention Strategies for Stored Metal Dies
Rust is the primary enemy for any metal die in storage. The approach you need depends on the die material and how long it will sit idle.
For industrial stamping dies made from hardened tool steel, applying anti-rust oil to the cavity, cutting edges, and all exposed metal surfaces is the baseline requirement before a die enters storage. But oil alone has limits - it migrates, thins over time, and leaves gaps. VCI (vapor corrosion inhibitor) wraps add a second layer of defense by emitting molecules that form an invisible protective film on metal surfaces within an enclosed space. The combination of contact oil plus VCI enclosure provides redundant protection that neither method achieves alone.
For craft dies made from thin carbon steel, the stakes are lower in dollar terms but just as frustrating in practice. A rusted craft die transfers oxidation marks onto paper and cardstock, ruining finished projects. Since these dies lack protective coatings in most cases, even brief exposure to humid air initiates surface oxidation. Rubber stamp storage ideas that work for polymer-mounted stamps - open trays, hanging racks - are exactly wrong for bare steel cutting dies that need enclosed, dry environments.
Here's what works for each die type:
- Hardened tool steel (industrial dies): Degrease surfaces thoroughly, apply a thin film of rust-preventive oil or wax-based protectant, wrap in VCI film or paper, and store on polyurethane die storage bases to prevent moisture wicking from bare metal racks.
- Thin carbon steel (craft cutting dies): Wipe with a light machine oil or Renaissance Wax, store in enclosed magnetic cases or sealed plastic sleeves with silica gel desiccant packets, and avoid storing near exterior walls or in garages where temperature swings cause condensation.
- Photopolymer (clear stamps and flexible dies): No rust risk, but UV degradation and chemical breakdown are the threats. Store away from direct sunlight and heat sources, keep on original acetate backing sheets to prevent warping, and avoid contact with rubber or vinyl materials that can cause chemical transfer and yellowing.
Climate Control and Environmental Best Practices
Surface treatments buy time, but they can't overcome a hostile environment indefinitely. Temperature and humidity are the two variables that determine how fast any protective measure breaks down.
For industrial die storage areas, maintaining relative humidity below 50% and temperatures between 18-22°C creates conditions where condensation is unlikely to form on metal surfaces. That sounds straightforward until you consider that many die storage areas sit near loading docks, exterior walls, or in sections of the plant without dedicated HVAC - exactly the zones where humidity spikes during weather changes.
Practical environmental controls scale with your budget and risk tolerance:
- Minimum viable control: Portable dehumidifiers in the storage area, humidity monitors with alert thresholds, and VCI emitters placed inside enclosed rack bays or cabinets.
- Mid-level control: Dedicated HVAC zone for die storage with humidity setpoints, sealed storage area with vapor barriers on exterior walls, and automated logging of temperature and humidity data for trend analysis.
- Full climate control: Enclosed climate-controlled die vault with redundant dehumidification, positive air pressure to prevent humid air infiltration, and integration with facility BMS (building management system) for real-time monitoring.
Craft users face the same physics on a smaller scale. A craft room in a finished basement, a garage workshop, or a closet against an exterior wall all introduce humidity risks that a temperature-stable interior room doesn't. Silica gel packets inside sealed storage containers are the simplest countermeasure - they absorb ambient moisture before it reaches die surfaces. Replace or recharge them every few months, since saturated silica gel stops protecting entirely. For mold storage racks or any enclosed shelving holding metal dies, adding a small rechargeable dehumidifier canister inside the cabinet provides continuous protection without electricity.
Inspection Schedules to Catch Problems Early
Preservation isn't a one-time action - it's a recurring commitment. Even the best protective measures degrade over time. Oil films thin out, VCI wraps lose potency after 12-24 months, and silica gel packets saturate. Without periodic checks, you're relying on protection that may have already failed.
How often should you inspect? The answer depends on how well-controlled your storage environment is:
- Uncontrolled environment (no dedicated climate control, variable humidity): Inspect industrial dies monthly. Check craft dies every 4-6 weeks. Look for any discoloration, spotting, or film breakdown.
- Partially controlled environment (dehumidifier present, interior room, moderate stability): Inspect industrial dies quarterly. Check craft dies every 2-3 months. Reapply protective oils if surfaces feel dry or show dullness.
- Fully controlled environment (dedicated HVAC, humidity below 50%, sealed area): Inspect industrial dies every 6 months. Craft dies can go 4-6 months between checks if stored in sealed containers with fresh desiccant.
Industrial inspections should follow a consistent checklist: verify VCI wrap integrity, check for condensation inside enclosures, examine cutting edges and cavity surfaces under adequate lighting for any rust spots or pitting, confirm that die storage bases haven't absorbed moisture or shifted position, and note findings in the die's maintenance record. Establishing a maintenance log that tracks inspection dates, observed conditions, and any corrective actions taken transforms reactive repair into predictive maintenance - you catch problems at the "surface discoloration" stage rather than the "tolerance failure" stage.
For craft collections, inspections can be simpler but still deliberate. Pull a representative sample of dies from storage, check for any orange or brown spots on bare steel edges, verify that silica gel packets haven't turned from blue to pink (indicating saturation), and confirm magnetic sheets still hold dies securely without sliding. A 10-minute check every couple of months is all it takes to catch problems before they spread to adjacent dies in the same container.
The pattern across all preservation strategies is the same: match the protection method to the material, control the environment as much as your situation allows, and verify regularly that your defenses haven't quietly expired. Storage that looked perfect six months ago may already be failing - and the only way to know is to look.
Choosing the Right Storage System for Your Operation
Every storage decision covered in this article boils down to one question: does your system match the reality of what you're storing, how often you access it, and how long it needs to last? The answer isn't universal. A crafter with 80 thin cutting dies in a spare bedroom needs a completely different setup than a tooling manager cycling 60 progressive dies through quarterly production runs. But the decision framework is the same for both.
Matching Your Situation to the Right Storage System
Rather than defaulting to whatever's convenient or cheap, run your situation through these decision criteria in priority order:
- Die type and material. This determines your protection requirements. Tool steel needs rust-preventive coatings and climate control. Thin carbon steel needs enclosed dry storage. Photopolymer needs UV protection. Start here because it eliminates options that can't meet baseline preservation needs.
- Weight and dimensions. This dictates structural requirements. If your dies need a forklift, you need engineered racking from die storage racks manufacturers who design for concentrated loads - not repurposed warehouse shelving. If your dies weigh grams, structural concerns disappear and organization becomes the primary challenge.
- Inventory size and growth trajectory. Size your system for where you'll be in two years, not today. A crafter at 100 dies heading toward 200 should skip the single binder and invest in a scalable pocket or drawer system now. An industrial shop adding 10 dies per year needs rack bays with planned expansion capacity.
- Access frequency. High-rotation dies demand immediate accessibility - front-facing positions, clear labels, no shuffling required. Low-rotation dies can occupy denser, less convenient positions. Mismatching access frequency to position is how retrieval time quietly doubles.
- Available space and facility constraints. Measure before you buy. Floor load capacity, ceiling height, aisle width for equipment, or simply the dimensions of your craft room closet - these physical constraints narrow your options faster than any preference.
- Budget relative to die value. Spending $300 on racking to protect $50,000 in tooling is underinvestment. Spending $500 on craft storage furniture for a $200 die collection might be overkill. Proportion matters - your stamp & die storage system should reflect the value of what it's protecting.
Working through these criteria sequentially prevents the most common purchasing mistake: buying based on a single factor (usually price or aesthetics) while ignoring the others. The cheapest mold die storage racks save nothing if they can't handle the load. The most elegant craft organizer fails if it doesn't scale with a growing collection.
Storage as Part of the Complete Die Lifecycle
The deeper insight running through every section of this article is that storage isn't a separate activity from die use - it's a continuous phase in the die lifecycle. A die moves from manufacturing to production to storage to retrieval to production again, repeating that cycle for years or even decades. How well it survives each storage phase directly determines how many production cycles it delivers before requiring repair or replacement.
That lifecycle perspective changes how you evaluate storage investments. A climate-controlled storage area with proper racking isn't an overhead expense - it's an extension of the die's productive life. A quarterly inspection that catches early-stage corrosion isn't busywork - it's preventing a $15,000 regrind. A labeling system that shaves two minutes off every retrieval isn't a nice-to-have - across hundreds of die changes per year, it's measurable productivity.
Die longevity actually starts upstream of storage, at the manufacturing stage. Dies engineered with standardized base dimensions, consistent resting surfaces, and integrated lifting points store more predictably and safely than dies designed without those considerations. Manufacturers like YICHEN design stamping dies with the full lifecycle in mind - not just press performance, but maintainability, durability in storage, and stable production over years of cycling between rack and press. Tooling managers who partner with suppliers thinking beyond the hit count and into storage compatibility, maintenance access, and long-term dimensional stability get dies that perform better and last longer across every phase of their service life.
Whether you're organizing a craft room or planning an industrial die vault, the principle holds: treat storage as an active part of your tooling strategy, not an afterthought that happens after the real work is done. The dies that last longest are the ones stored with the same intentionality they were manufactured with.
Stamping Die Storage FAQs
1. What is the best way to store heavy stamping dies?
Heavy stamping dies require structural I-beam racks or custom welded racks rated for concentrated point loads, not standard pallet racking. Each shelf level should support your heaviest die with at least a 25% safety factor. Place polyurethane die blocks (Shore A 80-95 durometer) between the die and rack surface to cushion precision-ground tool steel. Before storage, degrease all surfaces, apply rust-preventive oil, and wrap in VCI film. Manufacturers like YICHEN engineer dies with standardized base dimensions and flat resting surfaces, which simplifies rack configuration and improves storage stability over repeated cycles.
2. How do you prevent rust on stamping dies in storage?
Rust prevention requires a layered approach. First, clean dies thoroughly to remove residual lubricants and metal shavings. Apply a thin film of rust-preventive oil or wax-based protectant to all exposed metal surfaces. Then wrap industrial dies in VCI (vapor corrosion inhibitor) film, which emits protective molecules that form an invisible barrier on metal within enclosed spaces. Control the storage environment by maintaining relative humidity below 50% and temperatures between 18-22 degrees Celsius. For craft dies made from thin carbon steel, store them in sealed containers with silica gel desiccant packets and check every 4-6 weeks for early signs of oxidation.
3. Why do standard pallet racks fail for die storage?
Standard pallet racks are designed for evenly distributed loads across pallets, not concentrated point loads from heavy stamping dies. A 3,000 kg die sitting on two roll-formed beams creates localized stress far exceeding the rated distributed capacity. Over time, beams deflect gradually in a progressive failure mode that is invisible until catastrophic collapse occurs. Roll-formed beams also lack the torsional rigidity needed to absorb dynamic forces during forklift placement and retrieval. Purpose-built die racks use hot-rolled structural steel members, welded or bolted connections, and beam profiles engineered specifically for concentrated rather than distributed loading.
4. How should I organize a large craft die collection for quick retrieval?
For collections over 200 dies, combine physical organization with digital tracking. Choose one primary sort criterion such as theme, frequency of use, or brand to avoid decision paralysis. Assign fixed physical locations using clear pocket systems or labeled magnetic cases, then create a digital catalog in a spreadsheet or dedicated app listing each die's name, category, and storage position. Implement a strict return protocol where every die goes back to its assigned spot immediately after use. Review your system quarterly as collections grow and usage patterns shift. The key is picking a framework simple enough to follow consistently, not just on inspired organizing days.
5. How often should stored stamping dies be inspected?
Inspection frequency depends on your storage environment quality. In uncontrolled environments with variable humidity, inspect industrial dies monthly and craft dies every 4-6 weeks. In partially controlled environments with dehumidifiers present, inspect industrial dies quarterly and craft dies every 2-3 months. In fully climate-controlled storage with humidity below 50%, industrial dies need inspection every 6 months and craft dies every 4-6 months. Check VCI wrap integrity, look for condensation inside enclosures, examine cutting edges for rust spots under good lighting, and verify that protective oil films have not dried out. Log all findings to enable predictive maintenance.


