


What a Custom Stamping Die Is and How It Works
Imagine you need to mark thousands of metal parts with a logo so precise that every single impression looks identical. A standard letter set or off-the-shelf punch won't cut it. That's where a custom stamping die enters the picture.
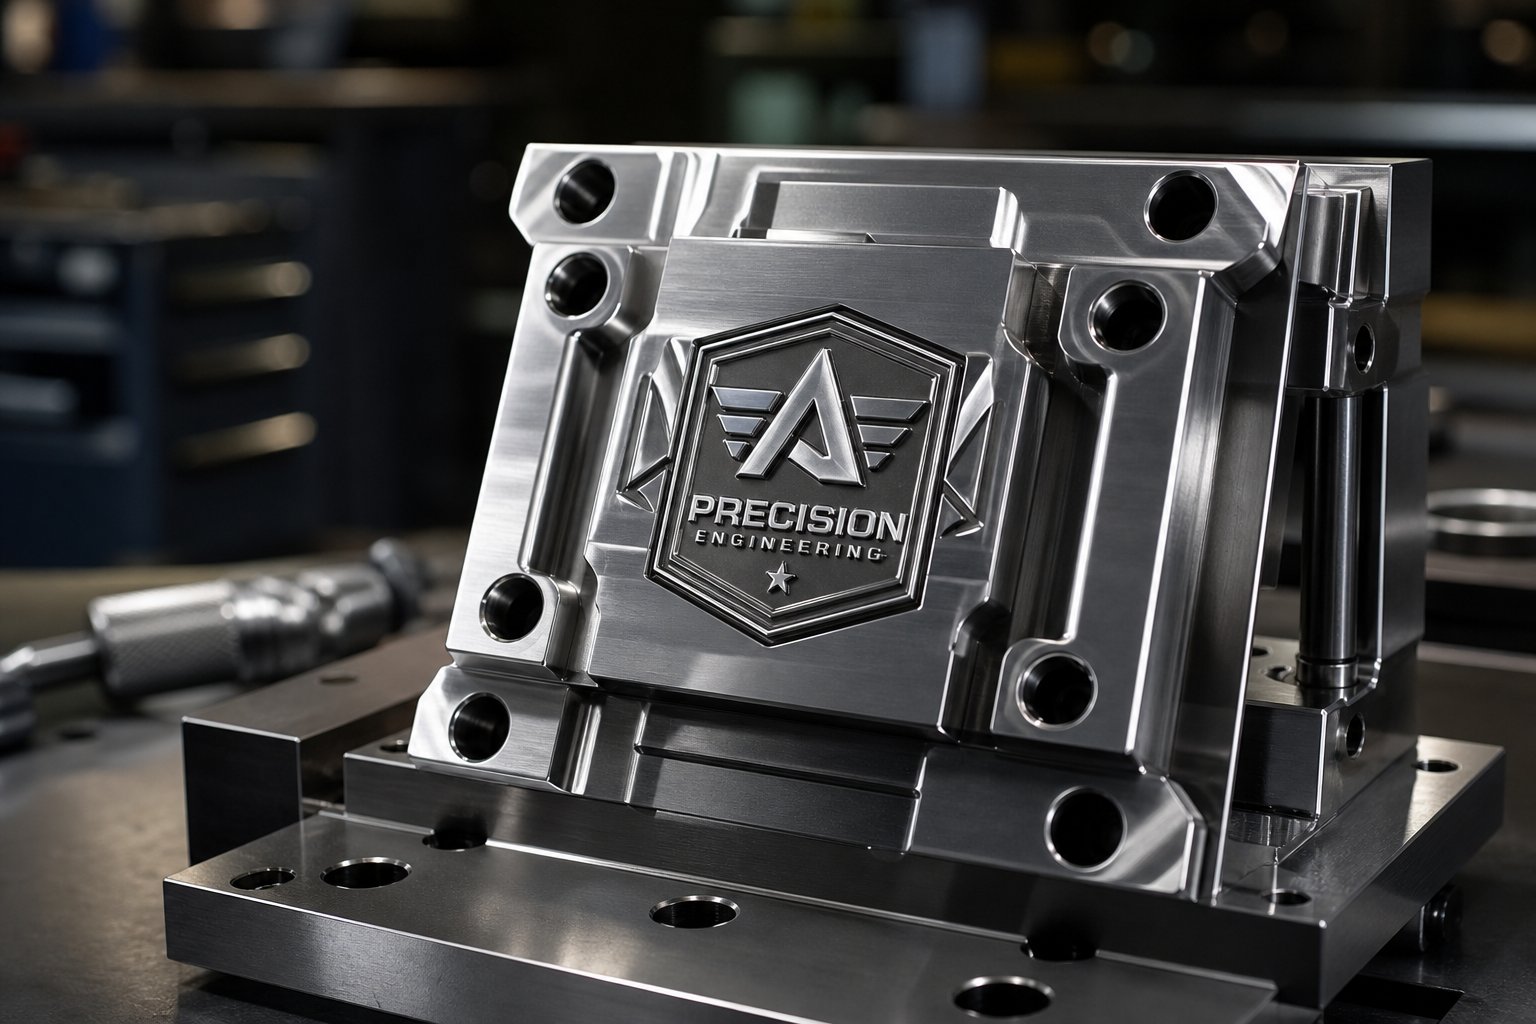
A custom stamping die is a precision-machined tool engineered to exact specifications, designed to cut, form, or impress a specific shape into a workpiece under controlled force. Unlike generic metal stamps, it is purpose-built for a particular part geometry, logo, or marking requirement.
The concept is straightforward: a hardened tool steel die carrying a raised or recessed design is pressed into or against a softer material. The force displaces material at the contact surface, permanently transferring the pattern onto the workpiece. What makes it "custom" is the engineering behind it. Every dimension, angle, and surface finish is tailored to produce one specific result, reliably, over thousands or even millions of cycles.
How a Custom Stamping Die Works Mechanically
When you press a custom metal stamping die into a workpiece, force transfers through the die face and concentrates along the geometry of the design. Raised features on the die face push material downward or outward, while recessed areas remain untouched. This controlled displacement is what creates the impression.
Die face geometry plays a critical role. Sharp edges produce clean cuts and defined mark boundaries. Angled relief surfaces allow displaced material to flow without cracking or distorting. The depth and sharpness of the die profile determine how much force is needed and how permanent the resulting mark will be. As The Fabricator notes, stamping dies are special, one-of-a-kind precision tools where cutting and forming sections are typically made from hardenable tool steel or other wear-resistant materials.
The press or hammer delivers the energy, but the die does the shaping. Whether the force comes from a hydraulic press delivering tons of pressure or a hand-swung hammer striking a die stamp, the principle is the same: concentrated force plus precise geometry equals a permanent, repeatable impression.
Custom Dies vs Standard Tooling
So when does a standard punch or letter set fall short? More often than you'd expect.
Standard tooling works fine for generic shapes, basic alphanumeric characters, or simple round holes. But the moment your requirements include a unique logo, complex geometry, tight dimensional tolerances, or high-volume repeatability, purpose-built stamping dies become necessary. Custom metal stamps are engineered to hold specific tolerances that adapted or generic tooling simply cannot guarantee. If your part geometry is unique or proprietary, custom tooling is the only path.
Think of it this way: standard metal stamps are like off-the-rack clothing. They fit a general purpose. Custom metal stamping dies are bespoke, built to match your exact specifications so every impression, cut, or form is consistent from the first part to the millionth.
The real payoff shows up in production. A well-designed custom die produces virtually identical parts every cycle, at speeds that can reach hundreds or even 1,500 strokes per minute in high-speed applications. That level of consistency and throughput is impossible with standard tooling adapted to a purpose it wasn't designed for.
Of course, all of this raises a practical question: what type of custom die do you actually need? The answer depends on your application, and the options are more varied than most buyers realize.
Types of Custom Stamping Dies Explained
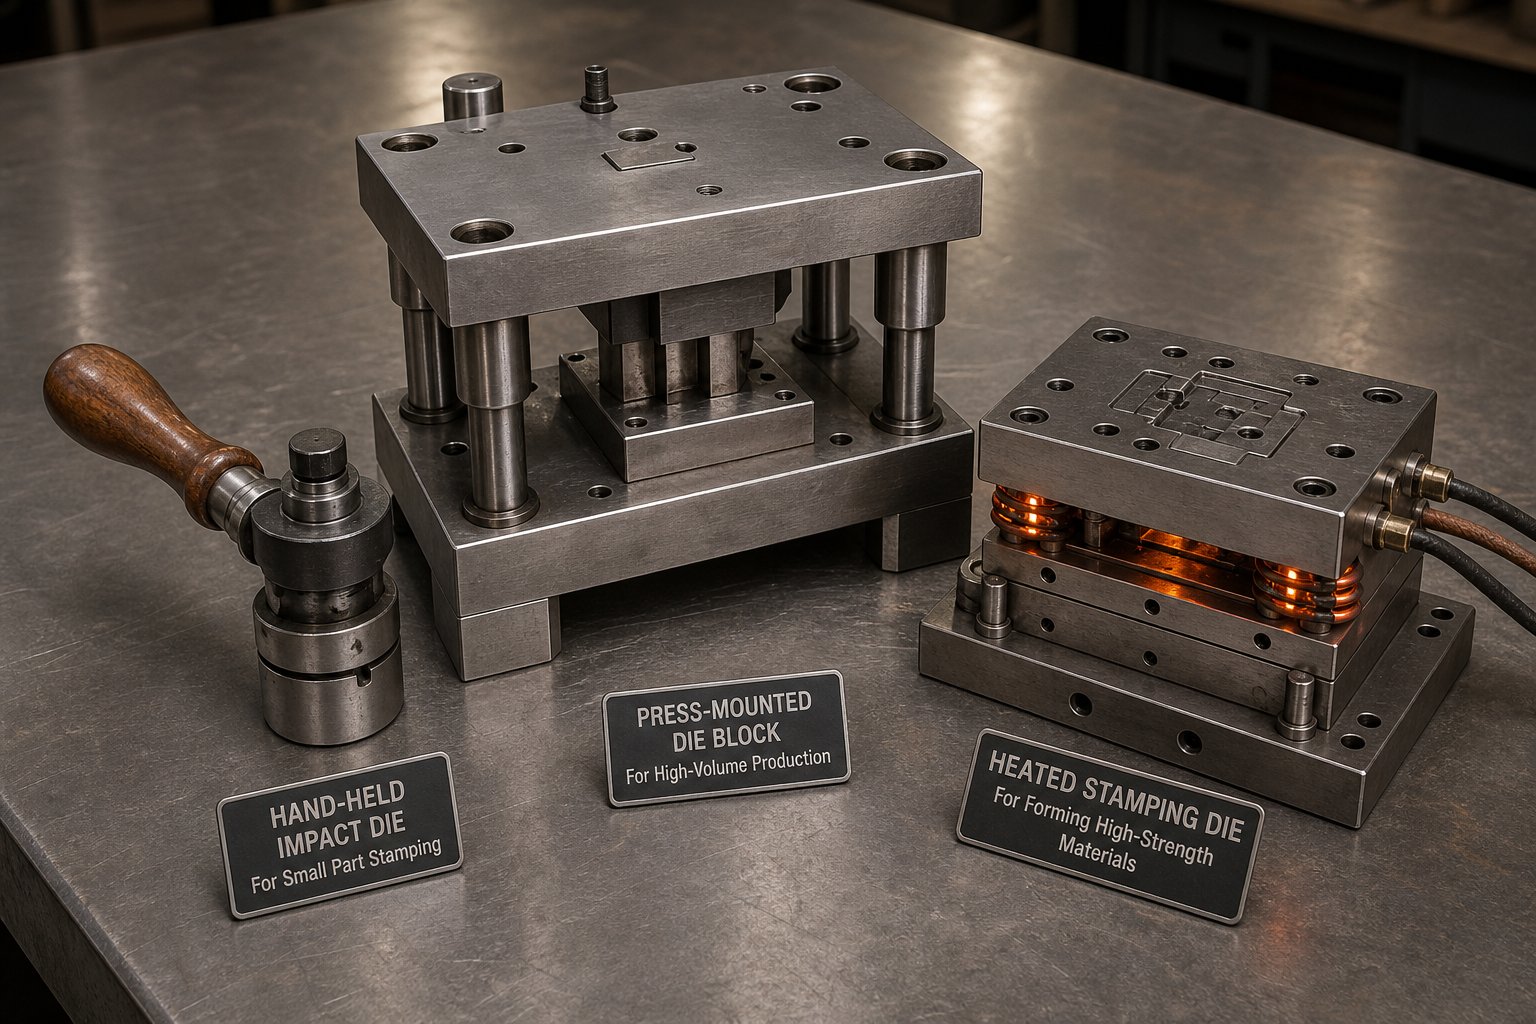
The variety of custom die stamp configurations available can be overwhelming if you haven't worked through a die order before. Each type solves a different problem, and picking the wrong one means wasted material, poor mark quality, or a die that doesn't survive its intended production run. Here's a clear breakdown of the three major classification axes you'll encounter when specifying metal stamping tools.
Embossing Dies vs Debossing Dies
The distinction here is directional. A metal embossing stamp uses a matched male-female die set to push material upward from behind, creating a raised relief on the workpiece surface. The male die carries the design in reverse; the female counter-die provides support from the opposite side. The result is a three-dimensional impression that projects above the surrounding surface, catching light and drawing attention.
Debossing works in the opposite direction. A single male die presses the design downward into the workpiece surface, creating a recessed impression. No counter-die is strictly required for many applications, as the material itself absorbs the displacement. As Arkay Packaging explains, embossing projects toward the viewer while debossing recedes into the material, producing depth and shadow rather than projection.
When do you choose one over the other? Embossing suits applications where visibility at a distance matters, such as prominent brand marks or serial identifiers that need to be read quickly. A custom metal embossing stamp is also the go-to choice when tactile feedback is part of the functional requirement. Debossing works better for understated marking, recessed text on machined surfaces, or situations where a raised impression would interfere with mating parts or stacking.
Hot Stamping vs Cold Stamping Dies
This classification is about thermal conditions during the stamping operation, not force type.
Hot stamping dies are heated before or during the impression cycle. The elevated temperature serves two purposes: it improves material flow in the workpiece, allowing finer detail and cleaner edges, and it enables foil transfer processes where a metallic or pigmented film bonds to the substrate under heat and pressure. Hot stamping is common for marking plastics, applying decorative foils to metal surfaces, and working with materials that become more pliable at temperature.
Cold stamping dies operate at ambient temperature, relying entirely on mechanical force to displace material. This is the standard approach for most steel stamps for metal applications, where the workpiece is hard enough to hold a clean impression without thermal assistance. Cold stamping avoids heat-related distortion, requires simpler tooling setups, and is generally faster in cycle time since there's no heating or cooling phase.
Material suitability guides the choice. Softer substrates like leather, certain plastics, and thin foils often benefit from heated dies. Harder metals, particularly steel and brass at production thickness, respond well to cold stamping with properly hardened dies.
Impact Dies vs Press-Based Dies
This is where production volume enters the equation most directly.
Impact dies are metal hand stamps designed to be struck with a hammer or mallet. You position the die stamp against the workpiece, deliver a single blow, and the impression forms. They're portable, inexpensive to produce, and require no supporting equipment beyond a striking tool and a solid backing surface. A logo steel stamp used for marking individual parts in a machine shop is a typical example.
Press-based dies mount into hydraulic, mechanical, or pneumatic presses. The press delivers consistent, repeatable force at controlled speed and depth. This eliminates the variability inherent in hand-struck impressions and enables automated production at volumes ranging from hundreds to millions of parts per run.
The tradeoff is straightforward: impact dies cost less upfront and offer flexibility, while press-based dies deliver consistency and throughput at higher initial investment.
| Dimension | Impact Dies (Hand-Struck) | Press-Based Dies |
|---|---|---|
| Force Method | Manual hammer or mallet strike | Hydraulic, mechanical, or pneumatic press |
| Typical Applications | Individual part marking, low-volume ID stamps, field use | Production stamping, progressive forming, high-volume marking |
| Production Volume Suitability | 1 to several hundred parts | Hundreds to millions of cycles |
| Material Thickness Range | Thin sheet to moderate plate (limited by strike energy) | Thin foil through heavy plate (limited by press tonnage) |
| Relative Cost | Low (die only, no equipment) | Higher (die plus press setup and fixturing) |
Each die type addresses a specific combination of mark requirements, substrate properties, and production scale. But even after selecting the right category, there's a deeper engineering decision waiting: which die steel grade will survive the demands of your particular application? That choice hinges on hardness, wear resistance, and the material you're stamping into.
Die Materials and Hardness Ratings That Affect Performance
You've selected a die type. You know whether you need embossing or debossing, hot or cold, impact or press-mounted. But here's what most suppliers gloss over: the steel grade inside that die determines whether it lasts 500 impressions or 500,000. Stamping die steel isn't a one-size-fits-all material. Different grades bring different strengths, and choosing wrong means premature failure or unnecessary expense.
Tool Steel Grades for Stamping Dies
Four grades appear most frequently in steel stamping dies, each occupying a different position on the performance spectrum.
D2 is the workhorse for long-run applications. With high carbon and approximately 12% chromium content, it delivers exceptional wear resistance and can reach 62-64 HRC after hardening and tempering. It's ideal for blanking, punching, and forming dies that require close tolerances over extended production runs. The tradeoff? D2's hard carbide structure makes it more brittle under heavy impact.
A2 is the balanced performer. This air-hardening steel contains about 5% chromium and achieves 63-65 HRC. It offers less wear resistance than D2 but significantly better toughness and excellent dimensional stability during heat treatment. When your steel stamping tool needs to resist cracking more than it needs to resist abrasion, A2 is often the smarter pick.
S7 fills the shock-resistance niche. Rated at 60-62 HRC, it's purpose-built for tools that absorb repeated mechanical impact, such as metal stamps for steel parts that get struck by a hammer. If your die experiences high-impact loading, S7's toughness prevents the catastrophic chipping that would destroy a D2 die in the same application.
M2 is a high-speed steel that retains hardness at elevated temperatures, reaching approximately 62-64 HRC. It excels in applications where frictional heat builds during rapid cycling. For high-speed stainless steel stamping operations where thermal softening would dull a conventional die, M2 maintains its edge.
Why does grade selection matter so much? It comes down to three variables: the hardness of your workpiece material, your expected production run length, and how fine the impression detail needs to be. A die marking soft copper at low volumes has completely different demands than custom metal stamps for steel parts running at production speed for millions of cycles.
Why Rockwell Hardness Matters in Die Selection
Here's the core principle: the die must always be significantly harder than the workpiece it stamps. A die marking soft aluminum doesn't need extreme hardness because there's minimal resistance from the substrate. But stainless steel stamps marking hardened stainless workpieces must be substantially harder to avoid the die wearing faster than the parts it produces.
The balance is tighter than it sounds. Insufficient hardness causes the die face to deform and wear prematurely. You'll notice impressions getting shallower, edges losing definition, and eventually the die becomes unusable well before its expected service life. On the other end, excessive hardness introduces brittleness. An overly hard die resists wear beautifully but becomes prone to micro-chipping and edge fracture, especially under impact or misalignment. As MetalTek notes, hardness measures a material's ability to resist permanent indentation, but pushing that resistance too far sacrifices the toughness needed to absorb operational shock.
When evaluating stamping die steel for your application, these are the material properties to weigh against each other:
- Hardness - resistance to surface deformation and wear from the workpiece material
- Toughness - ability to absorb impact energy without cracking or chipping
- Wear resistance - how long the die maintains sharp edges and defined features under repeated cycling
- Corrosion resistance - protection against oxidation during storage and in humid or chemically active environments
- Machinability - how readily the steel can be precision-machined into complex die geometries and fine details
No single grade maximizes all five properties simultaneously. D2 leads in wear resistance but sacrifices toughness. S7 leads in impact absorption but wears faster. The art of die specification is matching these tradeoffs to your specific combination of workpiece material, production volume, and mark quality requirements.
That matching process isn't guesswork, though. It follows a logical decision sequence driven by real production variables, starting with what you're stamping and how many parts you need.
How to Choose the Right Die Method for Your Application
Selecting a die steel grade is only half the equation. The other half is choosing which die method actually fits the job you're running. This decision isn't about preference. It's driven by three measurable variables: how many parts you need, what material you're stamping into, and what the finished mark has to look like.
Production Volume and Die Method Selection
Volume changes everything about die economics and construction.
If you're producing prototypes or short runs of a few hundred custom stamping parts, a simple single-hit die makes sense. These are relatively inexpensive, quick to manufacture, and adequate when you don't need millions of identical impressions. A single-station die executes one operation per stroke, keeping tooling costs low while still delivering accurate results for limited runs.
Scale up to tens of thousands or millions of cycles, and the calculation shifts dramatically. High-volume custom precision stamping demands progressive or compound dies engineered to survive sustained production without degradation. Progressive dies integrate multiple operations into one tool, using coil-fed material that advances through sequential stations with each press stroke. The upfront tooling investment is significantly higher, but the per-part cost drops to a fraction of what single-hit operations produce. For custom bracket stamping or any repeating geometry at scale, progressive tooling pays for itself quickly through throughput and consistency.
Material Considerations That Drive Die Choice
The workpiece material dictates die geometry, clearance specifications, and how much tonnage your press needs to deliver.
Softer metals like aluminum, copper, and brass are forgiving. They deform readily under lower force, allowing finer detail, tighter radii, and shallower die relief angles. You can achieve intricate custom stamped metal parts in these materials without extreme press capacity. Aluminum is soft but tends to adhere to die surfaces, so polished tooling and proper lubrication become critical to prevent galling.
Harder substrates change the picture entirely. Custom steel stamping into mild steel requires more tonnage and wider clearances than the same geometry in brass. Stainless steel raises the bar further because it work-hardens during forming, meaning each stroke slightly increases the resistance the die encounters. Die construction for stainless needs to account for this progressive hardening with reinforced geometry and potentially staged operations. As Jiga's engineering guide notes, high-strength steels require careful die design and considerably higher press tonnage compared to softer, more ductile metals.
The takeaway: you can't separate die design from workpiece properties. A die geometry that produces perfect custom part stamping in aluminum may fail catastrophically when applied to stainless steel at the same depth and speed.
Mark Characteristics and Quality Requirements
What does the finished impression actually need to accomplish? A shallow identification mark has entirely different die requirements than a deep stamped metal logo intended to survive years of wear and handling.
Depth, clarity, and permanence are the three drivers here. A metal logo stamp that needs to remain legible after painting, powder coating, or surface wear requires deeper displacement and crisper edge geometry than a simple part number mark on an internal component. Coining-style dies deliver the highest precision and surface detail by inducing full plastic flow at the impression surface, but they demand significantly higher tonnage. Embossing and debossing offer visual impact with less force. Engraving-style dies cut rather than displace material, producing fine-line marks that are permanent but shallow.
Matching these characteristics to the right die method follows a clear decision sequence:
- Define mark requirements: depth, clarity, permanence, and visual appearance
- Identify workpiece material and its hardness rating
- Determine production volume and cycle time targets
- Select the appropriate die type based on the first three factors
- Specify the die material grade that balances wear resistance and toughness for the application
Skip a step and you'll end up with a die that either can't produce the quality you need or won't survive the production run you're planning. Every specification in this sequence feeds forward into the next, and the final variable that ties them all together is press tonnage, the force budget that ultimately determines what your die can accomplish.
Press Tonnage and Die Design Relationship
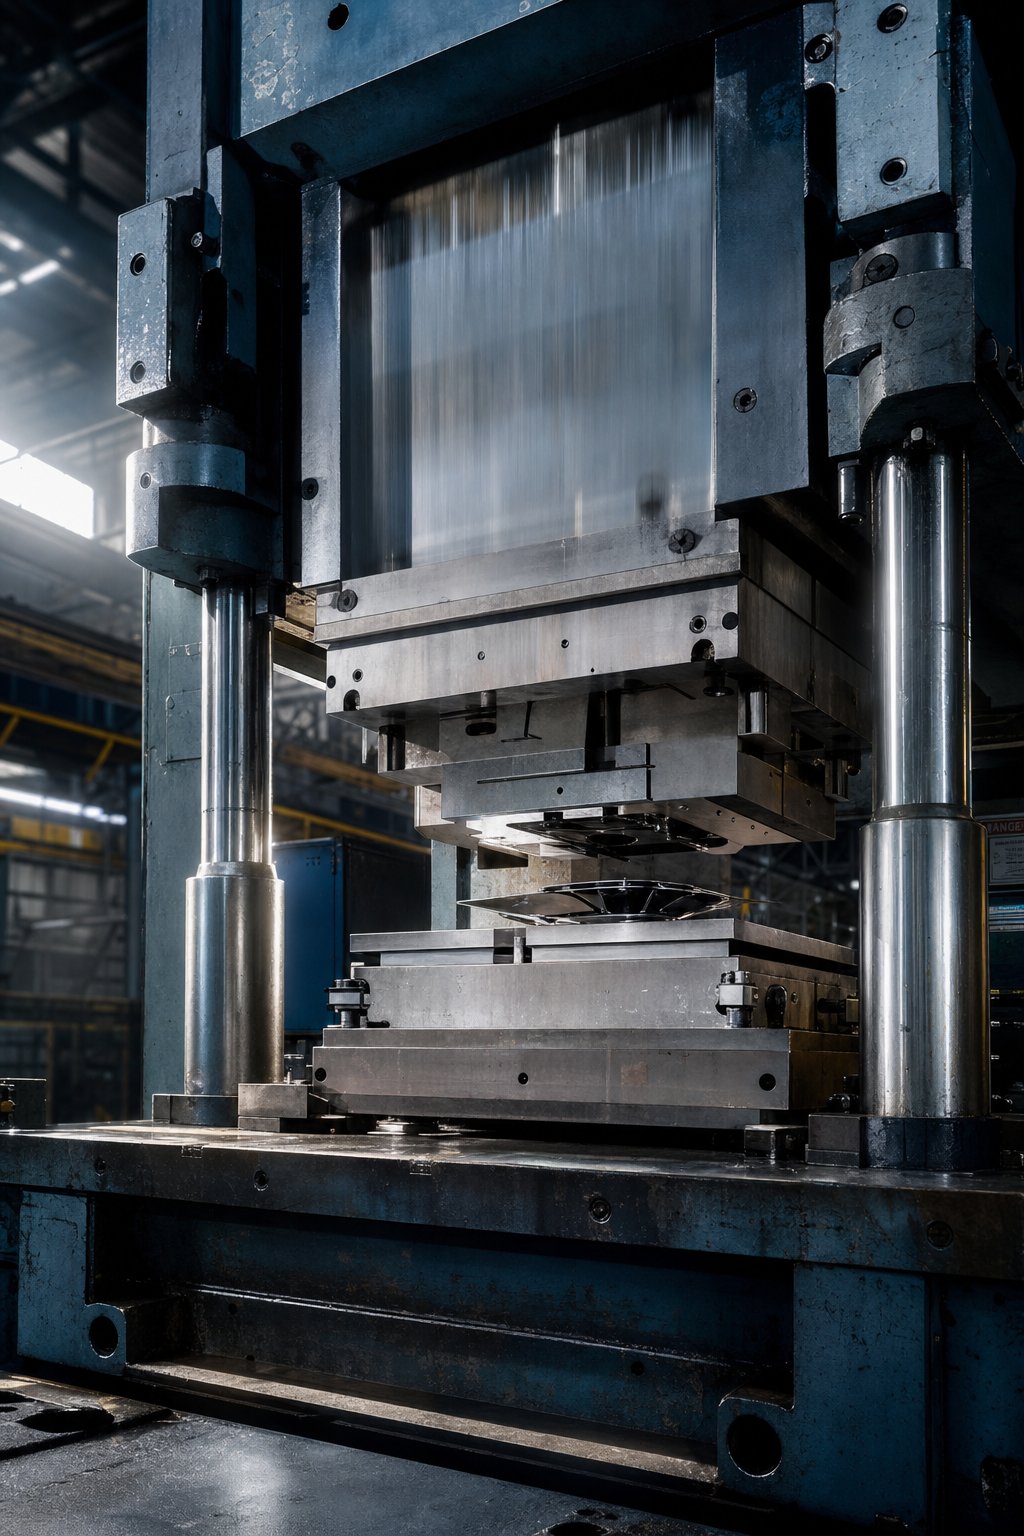
Every metal stamping die has a force budget. Exceed it and you get incomplete impressions, accelerated wear, or worse, equipment damage. Stay well below it and you're overspending on press capacity you don't need. The relationship between tonnage and die design is one of the most overlooked engineering considerations in custom die ordering, yet it directly determines whether your tooling performs as intended.
How Force Requirements Relate to Die Size and Depth
The principle is intuitive once you see it: a larger impression area means more material resisting displacement simultaneously, which demands more force. Double the stamped surface area and you roughly double the tonnage required. Deeper marks compound the effect because the die must push material further, encountering increasing resistance as displacement grows.
The engineering approach for calculating required force in stamping on metal follows a well-established formula. As detailed by stamping tonnage research, the fundamental calculation multiplies three variables: the perimeter of the impression (total length of all edges being formed), the material thickness of the workpiece, and the shear strength of that specific metal. A 2-inch diameter circle punched through 0.10-inch mild steel at 25 tons per square inch of shear strength requires roughly 15.7 tons of force, and experienced engineers add a 15-20% safety factor on top of that.
Material hardness acts as a multiplier across the entire equation. Soft aluminum has a shear strength around 11 tons per square inch. Annealed stainless steel jumps to approximately 37, and half-hard stainless reaches around 50. That means the same metal stamp punch geometry cutting stainless demands roughly three to five times the tonnage it needs for aluminum. When you're specifying a custom metal die stamp, the workpiece material isn't just a line item on a drawing. It's the single biggest driver of your force requirements.
Matching Die Design to Available Press Capacity
Die designers don't work in a vacuum. They design within the constraints of whatever press will run the tool. If your facility operates a 20-ton press, every decision about impression area, mark depth, and detail complexity must fit within that tonnage envelope.
This is where real-world tradeoffs happen. Imagine you need a large logo impression in stainless steel, but the calculation shows 30 tons required and your press delivers only 20. You have three options: reduce the impression area so the force requirement drops below capacity, stage the operation across multiple hits using a progressive approach, or invest in higher-capacity equipment. Each solution carries different cost and quality implications for your metal stamping die sets.
The relationship also flows in reverse. A press running consistently near its rated capacity experiences faster wear on bearings, guides, and the frame itself. Industry best practice from press compatibility guidelines recommends that calculated die force stay below the press's nominal tonnage with a safety margin of 20-30% to account for material variations, tool wear, and process fluctuations.
Undersizing press capacity relative to die requirements causes incomplete impressions and accelerated die wear. The press cannot deliver force it doesn't have, and metal die stamps operating at the edge of available tonnage produce inconsistent results while shortening both press and die service life.
For metal for stamping applications where the required tonnage calculation exceeds available capacity, the smarter move is always to adjust the die design rather than overload the press. Reducing perimeter, splitting operations across stations, or selecting a thinner workpiece gauge are all valid engineering responses that preserve quality and equipment longevity.
Force budgeting is the engineering backbone of any stamping project. But tonnage alone doesn't tell you what a die will cost or how long it takes to build. Those answers depend on a different set of variables: complexity, material grade, tolerances, and the workflow stages between concept and delivery.
Cost Factors and Lead Times for Custom Stamping Dies
Here's something frustrating about shopping for custom stamping dies: almost nobody publishes transparent pricing guidance. You request a quote, wait days for a response, and the number that comes back feels arbitrary if you don't understand what's driving it. Let's fix that.
What Drives Custom Stamping Die Pricing
Die cost isn't a single variable. It's a stack of engineering and manufacturing decisions, each adding its own layer to the final quote. When you're evaluating proposals from any custom metal stamping company, knowing which factors carry the most weight helps you make smarter tradeoffs early in the design phase.
- Design complexity - The single biggest cost driver. A die carrying simple alphanumeric text is vastly cheaper than one reproducing an intricate logo with fine serifs, compound curves, or multi-level relief. Progressive dies performing multiple operations in sequence can cost several times more than single-stage tooling.
- Die size and impression area - Larger dies consume more raw material, require longer machining time, and demand bigger presses for trial runs.
- Material grade - A D2 or carbide die costs significantly more than A2, but the added expense often pays back through longer service life on high-volume runs.
- Tolerance and precision requirements - Tighter dimensional tolerances mean slower machining passes, additional inspection steps, and potentially wire EDM or grinding operations that add cost per hour.
- Surface finish specifications - Mirror-polished die faces prevent material adhesion during custom stamping but require extra hand-finishing time.
- Quantity ordered - Fixed engineering and setup costs spread across multiple identical dies, reducing per-unit price on larger orders.
Two hidden cost accelerators catch buyers off guard. Design revisions after machining has started essentially restart portions of the manufacturing process. And compressed lead times force a custom metal stamping manufacturer to prioritize your job over others, often at a 25-75% premium depending on urgency. As CNC lead time data confirms, rush fees pay for overtime, bumped jobs, and dedicated machine allocation.
Typical Lead Time Expectations
Every custom die passes through a predictable sequence of stages, and each stage consumes time. Understanding the workflow helps you set realistic delivery expectations and identify where delays typically originate.
The general progression looks like this: feasibility assessment and design review, CAE simulation to validate material flow and stress distribution, CNC machining of the die block, heat treatment to achieve target hardness, surface finishing and polishing, trial stamping on sample workpieces, dimensional inspection, and final approval. Simpler single-station dies with basic geometry may move through this pipeline in five to ten business days. Complex progressive dies with tight tolerances, exotic materials, or multiple stations commonly require three to six weeks from order confirmation to shipment.
For a concrete example of how these stages structure a real production timeline, YICHEN's stamping die workflow moves sequentially from feasibility assessment and CAE simulation through precision machining, trial runs, and final inspection. That end-to-end process illustrates why lead times vary so widely. A metal stamping dies manufacturer handling the full sequence in-house can compress timelines by eliminating handoffs between vendors, while shops that outsource heat treatment or simulation add transit and queue time at each step.
The biggest time killer, consistently, is incomplete design input. Missing tolerances, unclear material callouts, or artwork that isn't production-ready forces the engineering team to pause and request clarification. Every round of questions can cost days. If you're engaging custom metal stamping services for the first time, prepare vector artwork at final scale, specify your workpiece material and hardness, and define your tolerance requirements before requesting quotes. Clean inputs produce faster quotes, fewer revisions, and shorter overall lead times.
Labeling services for metal stamping follow similar cost logic: complexity, volume, and precision requirements stack to determine both price and timeline. Whether you need a single prototype die or production tooling for millions of cycles, the cost factors remain the same. Only their relative weight shifts.
Pricing and lead time give you the business case. But there's a technical layer that affects both cost and performance in ways most buyers never consider: how your workpiece material changes the die design itself. A die built for aluminum and one built for stainless steel aren't just different in hardness. They're different in geometry, clearance, and surface treatment from the ground up.
How Substrate Material Changes Die Design Requirements
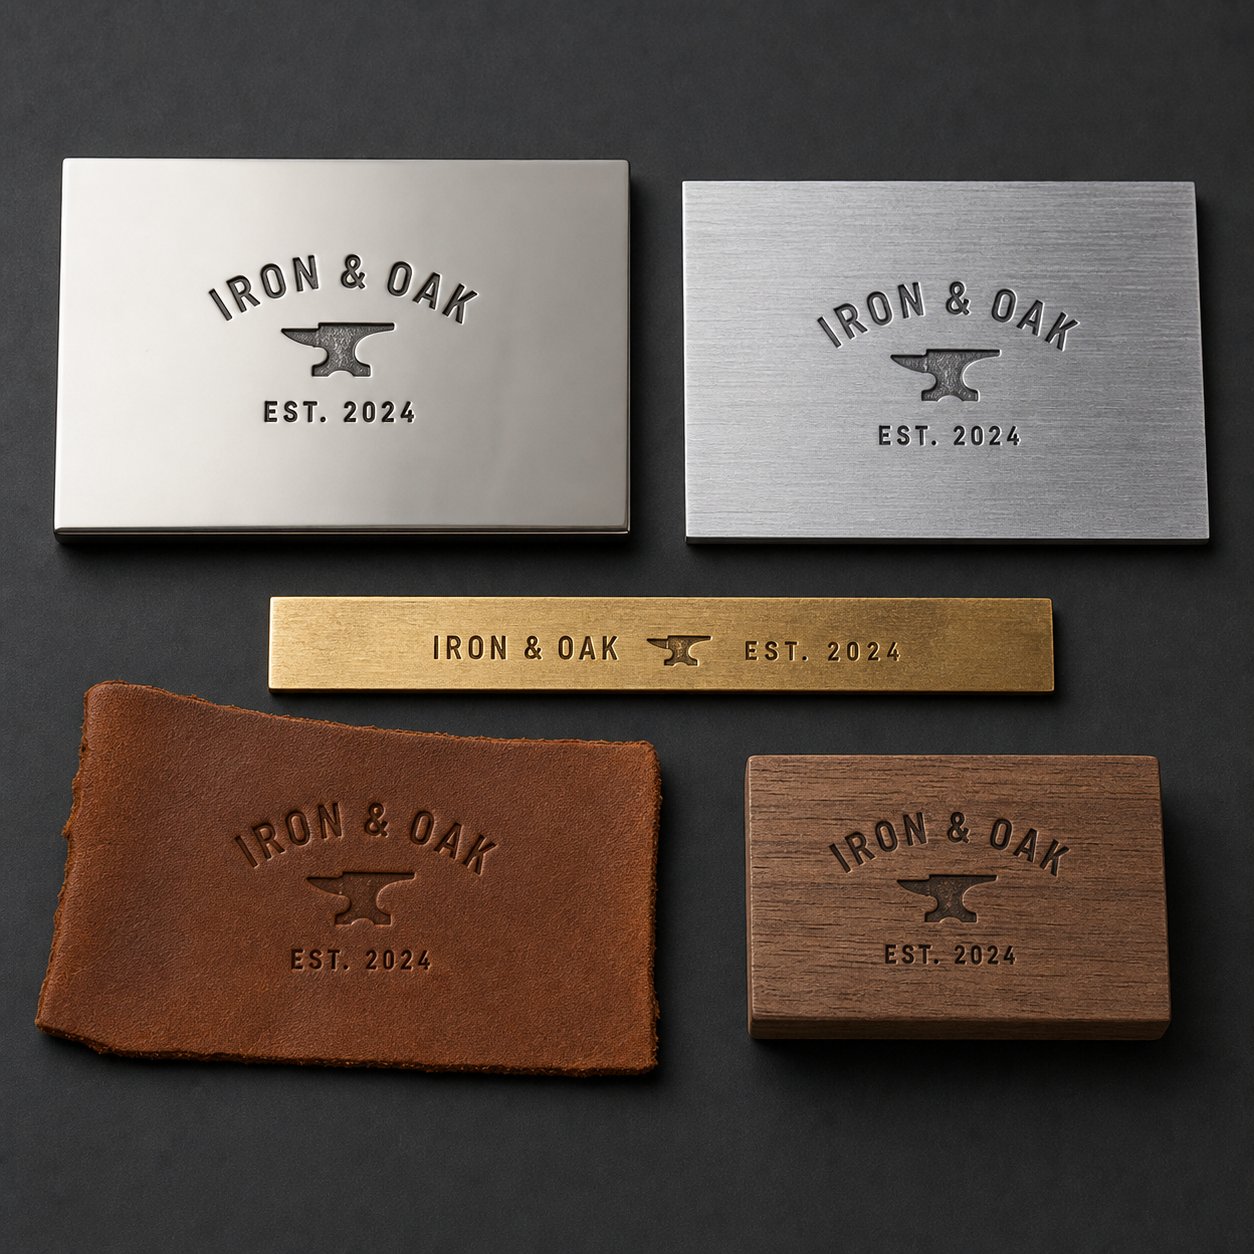
A die that produces flawless impressions in brass may chip on its first hit against stainless steel. Another die designed for marking hardened steel might crush fine detail into a leather workpiece. The substrate isn't just something the die acts upon. It actively shapes how the die must be built, and ignoring that relationship is one of the fastest ways to ruin expensive tooling.
Die Design Differences Across Substrate Materials
Every substrate responds to force differently. Metals resist displacement, wood compresses along grain lines, leather deforms elastically before taking a permanent set, and plastics may melt or crack depending on temperature and speed. These behaviors demand fundamentally different die geometries even when the impression design stays identical.
For harder substrates like mild steel and stainless steel, die faces need shallower relief angles and more robust construction. The die encounters significant resistance during material displacement, so thicker cross-sections and wider radii prevent stress concentrations that would crack thin die features. Stamped metal parts in these materials tolerate less depth per hit, and the die itself must be built from premium tool steels hardened well above the workpiece to avoid premature deformation.
Softer substrates flip the equation. Metal stamps for wood can incorporate finer detail, deeper impressions, and sharper edges because the substrate compresses easily under moderate force. Leather metal stamps follow a similar logic. Leather yields readily, accepting deep, highly detailed patterns without requiring extreme tonnage. The challenge with soft materials isn't force. It's controlling how much the substrate deforms beyond the intended impression boundary.
Plastics occupy a middle ground that varies wildly by polymer type. Thermoplastics may benefit from heated dies that soften the surface for clean impressions, while thermosets and filled composites behave more like hard substrates requiring robust die construction.
Stainless Steel and Aluminum Stamping Considerations
These two metals deserve special attention because they're among the most commonly stamped substrates, yet they each introduce challenges that trip up inexperienced buyers.
Stainless steel work-hardens during forming. Each stroke slightly increases the material's resistance to further deformation. Metal stamping for stainless steel requires wider clearances than the same operation in mild steel. Research published in MetalForming Magazine shows that austenitic grades like Type 304 and 316 may require as much as three times the forming force of low-carbon steel, with draw clearances of material thickness plus an additional 35-40%. That's a massive difference from the standard 10% per-side clearance used for mild steel.
For 316/316l custom metal stamping applications, die designers also need to account for slower forming speeds. Unlike carbon steel, stainless actually forms better at reduced speed because the work-hardening rate responds to strain rate. Heated dies can further improve results on difficult geometries by reducing the material's flow stress during impression.
Stamped stainless steel parts demand die surfaces with excellent finish quality and coatings like TiN or DLC to reduce galling. Without these precautions, stainless tends to weld itself to the die face at microscopic contact points, progressively roughening both the tool and the workpiece.
Aluminum presents the opposite problem. It's soft, requiring far less tonnage, but its low hardness makes it adhesive. Custom aluminum stamping operations fight a constant battle against material pickup, where thin layers of aluminum transfer onto the die surface and build up over repeated cycles. That buildup degrades impression quality and eventually requires production stops for cleaning.
The solution is highly polished die surfaces (Ra 0.2-0.4 micrometers) combined with proper lubrication and potentially anti-adhesion coatings. Die design guidelines note that CVD and PVD coatings enhance lubricity while preventing material pickup, extending die life particularly in aluminum and stainless steel applications. Punch-to-die clearance for aluminum typically runs tighter at 6-10% of material thickness, and punch radii should be set at eight to ten times material thickness to prevent the tool from penetrating through the soft sheet.
Aluminum's planar anisotropy also complicates forming. Rolled aluminum sheets behave differently depending on the direction of the applied force relative to the rolling direction. Die design handbooks for low-carbon steel shouldn't be applied directly to aluminum because differences in work-hardening behavior and surface topography alter the forming limits.
| Substrate | Recommended Die Material | Typical Depth Range | Special Requirements |
|---|---|---|---|
| Mild Steel | D2 or A2 tool steel (58-62 HRC) | 0.1-0.5 mm | Standard clearance of 5-10% per side; moderate tonnage |
| Stainless Steel (304/316) | D2 with TiN/DLC coating or carbide inserts | 0.05-0.3 mm | 35-40% additional clearance; slower speeds; up to 3x forming force vs mild steel |
| Aluminum | Polished A2 or D2 with PVD coating | 0.1-0.8 mm | 6-10% clearance; polished surfaces to prevent galling; 8-10x thickness for punch radii |
| Brass/Copper | A2 or D2 tool steel | 0.1-0.6 mm | Check directionality for rolled alloys; moderate force; clean edges achievable |
| Wood | Mild steel or A2 (lower hardness acceptable) | 0.5-3.0 mm | Sharp edges for clean fiber compression; heated dies improve burn-in marking |
| Leather | Brass or mild steel die; hardened steel for production volume | 1.0-5.0 mm | Fine detail achievable; moderate force; heated dies improve definition on thick hides |
The pattern here is clear: harder substrates constrain what the die can do, while softer substrates constrain how cleanly the die can do it. Either way, the substrate dictates the tooling rather than the other way around. Stamped metal outcomes depend as much on understanding the workpiece as on specifying the tool itself.
With substrate behavior mapped, the remaining question is practical: how does a buyer actually move from understanding these variables to holding a production-ready die in hand? That journey from concept to finished tooling has its own stages, pitfalls, and decision points.
From Concept to Production-Ready Custom Stamping Die
You've done the research. You understand die types, steel grades, substrate behavior, and press tonnage requirements. But there's a gap between knowing what you need and actually receiving a production-ready custom metal stamping tool. That gap is filled with a structured engineering workflow, and the buyers who navigate it smoothly are the ones who come prepared.
Design Preparation and Feasibility Analysis
Before any metal stamp maker begins cutting steel, they need specific inputs from you. Incomplete information is the number one cause of delays, revision loops, and cost overruns. Here's what to have ready before submitting an RFQ:
- Vector artwork at production scale - Provide your design in a scalable vector format (DXF, AI, or EPS). Raster images introduce ambiguity about edge geometry that forces the engineering team to interpret rather than execute.
- Workpiece material specification - Include the exact alloy, temper, and thickness. Saying "stainless steel" isn't enough. 304 annealed at 0.8 mm and 316L half-hard at 1.2 mm require entirely different die approaches.
- Production volume targets - Whether you need 200 parts or 2 million determines die construction, material grade, and whether a simple single-station tool or progressive tooling makes economic sense.
- Tolerance and quality requirements - Define what "good enough" looks like. Specify dimensional tolerances, acceptable depth variation, and any cosmetic standards the finished impression must meet.
With these inputs in hand, the engineering team performs a feasibility analysis. This is the gatekeeping step where experienced engineers evaluate whether your design can be reliably stamped given the constraints of your chosen material and geometry. As detailed in comprehensive die design process guides, this review examines whether bend radii are achievable, whether features are spaced far enough apart to maintain material integrity, and whether specified tolerances are realistic for the stamping method. A seasoned engineer with 15+ years of experience can immediately identify problematic features, such as geometry that's likely to crack, distort, or require impractical tonnage.
Think of feasibility analysis as a reality check. It's far cheaper to adjust a design at this stage than to discover a flaw after hardened tool steel has been machined. Some features that look fine on screen simply can't survive the physics of material displacement at production speed.
CAE Simulation and Prototyping
Here's where modern custom metal stamping separates from how things were done two decades ago. Instead of building a die, trying it, finding problems, re-machining, and trying again, today's die makers simulate the entire stamping process digitally before cutting a single piece of steel.
Computer-aided engineering platforms like AutoForm and DYNAFORM use finite element analysis to predict exactly how sheet metal will behave under the proposed die geometry. Engineers can visualize material flow into the die cavity, identify zones of excessive thinning or wrinkling, predict springback behavior, and calculate stress distribution across the die face. The die design simulation process allows designers to iterate rapidly on digital models, solving problems that would otherwise require expensive physical rework.
What does this mean for you as a buyer? Fewer iterations, lower risk of first-article failure, and a shorter path from concept to approved custom metal stampings. CAE simulation essentially front-loads the problem-solving. Issues that once surfaced only during physical tryout, such as cracking at tight radii or incomplete fill in deep cavities, get resolved in software at a fraction of the cost.
For complex geometries, simulation also optimizes blank shape and identifies whether staged forming operations will produce better results than a single-hit approach. This is particularly valuable when ordering a custom metal die for progressive applications where multiple stations must work in sequence without introducing cumulative error.
Machining, Trial Runs, and Final Inspection
Once simulation validates the design, physical manufacturing begins. The sequence follows a predictable path, though the time and precision invested at each step vary based on die complexity.
CNC machining translates the validated 3D model into physical tool steel. High-precision milling, turning, and often wire EDM produce the die geometry to tight tolerances. For a custom made metal stamp carrying fine logo detail, machining may involve multiple operations across different machine types to achieve the required surface definition.
Heat treatment follows machining. The die block is hardened and tempered to its target Rockwell value, transforming relatively soft machinable steel into the wear-resistant surface that will survive production cycling. This step is carefully controlled because distortion during heat treatment can undo the precision achieved in machining.
Surface finishing brings the die face to its final condition. Depending on the application, this ranges from grinding to mirror polishing. Dies for aluminum stamping, as discussed earlier, need exceptional surface finish to prevent material adhesion.
Trial stamping is where simulation meets reality. The finished die runs against sample workpieces under production conditions. Engineers measure impression depth, check dimensional accuracy, inspect edge quality, and evaluate overall mark consistency across multiple strikes. Any deviation from specification gets identified here, not after the die ships to your facility.
Dimensional inspection confirms that both the die itself and the trial parts meet drawing requirements. Measurements typically include optical profiling of the die face, CMM verification of critical dimensions, and visual inspection under magnification for micro-defects.
For manufacturers and tooling engineers ready to move from research to an actual RFQ, YICHEN's stamping die service structures this entire workflow end-to-end, covering feasibility assessment, CAE simulation, precision machining, trial runs, and final inspection under one roof. Having the complete pipeline managed by a single custom metal stamp die supplier eliminates the coordination overhead of splitting stages across multiple vendors and reduces the handoff delays that stretch timelines.
The entire concept-to-production journey for a custom stamp metal tool can range from a few days for simple geometries to several weeks for complex progressive dies. What compresses that timeline most reliably isn't rushing the machining. It's arriving at the RFQ stage with clean inputs, realistic tolerances, and a clear understanding of what your application demands.
A production-ready die in hand doesn't mean the work is over, though. How you store, maintain, and troubleshoot that tooling determines whether it delivers the service life the engineering was designed to provide, or wears out prematurely from neglect.
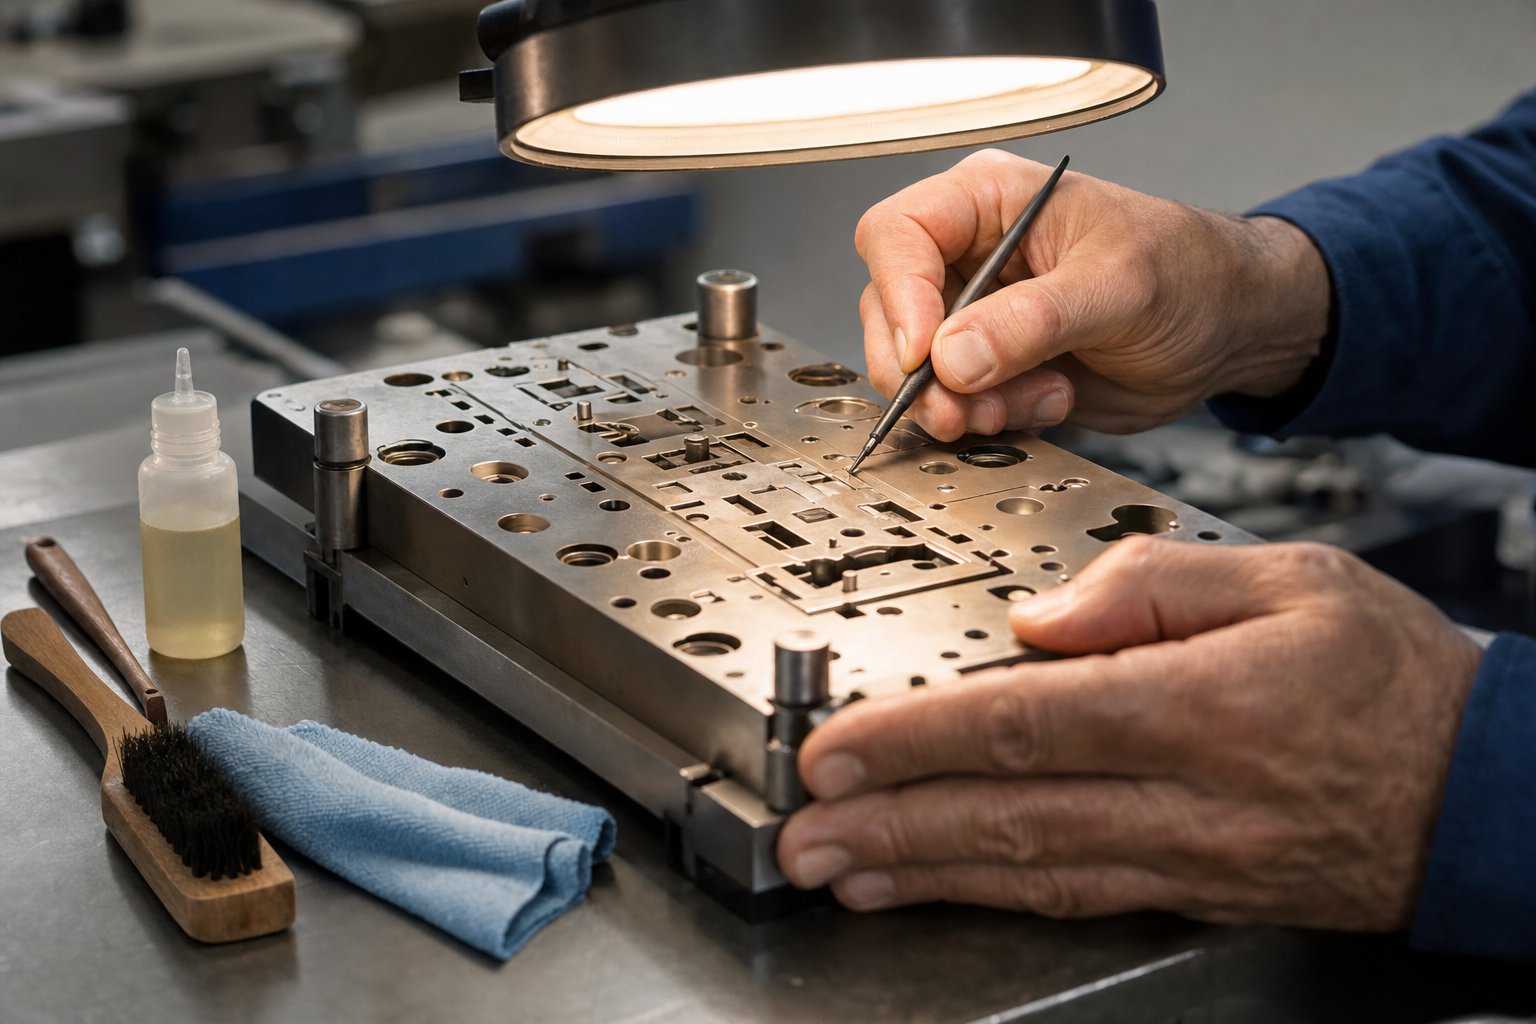
Maintenance and Troubleshooting for Longer Die Life
A well-engineered custom stamping die can deliver hundreds of thousands of flawless impressions. Or it can degrade within weeks. The difference rarely comes down to design or material selection. It comes down to what happens after the die leaves the toolroom. Proper care multiplies service life by factors that far outweigh the modest time investment required, yet most operators treat maintenance as an afterthought until quality problems force a production stop.
Extending Die Lifespan Through Proper Care
Think of your metal die stamp the way a machinist thinks of precision measuring instruments: it's a calibrated tool that loses accuracy when abused or neglected. The four pillars of die care are storage, cleaning, inspection, and periodic reconditioning.
Storage matters more than most shops realize. Stamping tools for metal should be stored in a dry, temperature-controlled environment, lightly oiled to prevent surface oxidation, and physically protected from impact. Stacking dies against each other or tossing them into a drawer invites edge damage that manifests as inconsistent impressions on the next production run. Use dedicated racks or protective cases that keep die faces separated and shielded.
Cleaning after every use is non-negotiable. Material buildup, metal shavings, and lubricant residue accumulate on the die face during stamping. Left in place, these contaminants embed into subsequent impressions, accelerate wear at high-pressure contact points, and can even cause corrosion during storage. As die maintenance best practices confirm, adopting a cleaning schedule that removes built-up residues using suitable solvents and brushes ensures all surfaces remain free of contaminants. Clean dies operate more efficiently and yield higher quality results.
Periodic inspection catches problems before they cascade. Check marking dies visually after every production run for signs of edge rounding, micro-cracks, pitting, or uneven wear patterns. Use magnification for fine-detail dies where micro-chipping isn't visible to the naked eye. Tool failure research shows that most die failures don't happen overnight. They develop gradually from overlooked maintenance issues, and early detection through routine inspections is the most reliable way to prevent catastrophic damage.
Re-sharpening and re-polishing extend service life significantly. When a permanent stamp for metal begins producing impressions with soft edges or reduced depth, the die face has worn past its optimal geometry. Professional regrinding restores the cutting profile without replacing the entire tool. For part marking stamps used in high-volume applications, scheduling reconditioning at fixed intervals rather than waiting for visible quality loss keeps impressions consistent across the entire production life of the die.
Troubleshooting Common Stamping Die Problems
Even with diligent maintenance, problems arise. The key is diagnosing root causes quickly rather than compensating with more force or slower speeds, which only accelerates deterioration. Here are the issues operators encounter most frequently with metal stamp die tooling, along with their causes and fixes.
Uneven impressions are the most common complaint. One side of the mark is deeper than the other, or certain characters appear crisp while adjacent ones are faint. The instinct is to hit harder, but that rarely solves the underlying problem and often introduces new ones.
Premature edge wear shows up as progressively softer impression boundaries. Metal engraving stamps that once produced razor-sharp marks begin leaving rounded, indistinct edges well before their expected service life. This pattern points to either a hardness mismatch or excessive operational force.
Material deformation around the impression appears as bulging, dishing, or thinning of the workpiece adjacent to the stamped area. The mark itself may look acceptable, but the surrounding material has been displaced in ways that affect part function or appearance.
Burr formation on stamped edges indicates that cutting geometry has degraded. What should be clean sheared edges instead produces raised material ribbons that require secondary deburring operations, adding cost and cycle time. As washer stamping die troubleshooting data notes, rough or uneven edges on stamped parts are a clear indication that the die is wearing out and requires either sharpening or replacement.
| Problem | Likely Cause | Corrective Action |
|---|---|---|
| Uneven impressions (one side deeper than other) | Die-to-workpiece misalignment; uneven workpiece surface; non-parallel press platens | Verify die alignment with press using a straight edge or indicator; surface-grind workpiece flat; check and shim press platens for parallelism |
| Premature edge wear or rounding | Die hardness insufficient for workpiece material; excessive tonnage causing micro-deformation; abrasive workpiece material | Upgrade to harder die steel grade or apply wear-resistant coating (TiN, DLC); reduce tonnage to minimum required; verify workpiece hardness against die spec |
| Material deformation around impression | Die clearance too tight; workpiece too thin for specified depth; insufficient material support beneath workpiece | Increase punch-to-die clearance; reduce impression depth; add a backing plate or stripper to support material adjacent to the impression zone |
| Burr formation on stamped edges | Worn or dull cutting edges; excessive clearance from wear progression; material buildup on die face | Re-sharpen or re-grind cutting edges; replace worn die sections; clean die face and inspect for material adhesion or galling |
| Inconsistent depth across production run | Press ram drifting; material thickness variation in workpiece stock; thermal expansion during long runs | Calibrate press ram and check hydraulic pressure consistency; verify incoming material thickness tolerances; allow thermal stabilization or add cooling |
| Cracking or chipping of die face | Die steel too brittle for application (excessive hardness); impact loading beyond design limits; pre-existing micro-cracks from heat treatment | Switch to tougher grade (e.g., S7 for impact applications); reduce striking force; inspect die with dye penetrant after heat treatment before production use |
A pattern worth noting: most die problems trace back to one of three root causes. Either the die was asked to work harder than its design allows (wrong material, too much force, wrong substrate), maintenance was deferred until damage became irreversible, or the operating environment drifted without anyone noticing (press calibration, material lot changes, temperature shifts). Comprehensive failure analysis confirms that multiple factors often compound to create failure conditions, and addressing them individually through structured inspection routines prevents the cascading deterioration that leads to unplanned downtime.
The bottom line: a custom stamping die is a precision instrument, not a consumable. Treat it accordingly. Establish a maintenance log, inspect at fixed intervals regardless of visible condition, clean after every run, store properly, and address wear proactively rather than reactively. The shops that do this consistently get three to five times the service life from identical tooling compared to those that run dies until they fail.
Frequently Asked Questions About Custom Stamping Dies
1. How much does a custom stamping die cost?
Custom stamping die pricing depends on several stacked factors. Design complexity is the biggest driver - a simple text die costs far less than an intricate multi-level logo die. Other major factors include die size, tool steel grade (D2 costs more than A2 but lasts longer), tolerance requirements, surface finish specs, and order quantity. Simple single-station dies may cost a few hundred dollars, while complex progressive dies can run into tens of thousands. Rush timelines typically add 25-75% to the base price. To get accurate pricing, provide vector artwork at scale, specify your workpiece material and hardness, define tolerances, and state your production volume when requesting quotes.
2. What is the difference between a stamping die and a regular metal stamp?
A regular metal stamp is typically a generic, off-the-shelf tool designed for standard characters or simple shapes. A custom stamping die is precision-engineered to exact specifications for a particular part geometry, logo, or marking requirement. Custom dies are built from specific tool steel grades selected to match your workpiece material, designed with calculated clearances and relief angles, and engineered to deliver identical results across thousands or millions of production cycles. The investment is higher, but the repeatability, precision, and production throughput far exceed what standard tooling can achieve.
3. How long does it take to get a custom stamping die made?
Lead time varies based on complexity. Simple single-station dies with basic geometry can be completed in five to ten business days. Complex progressive dies with tight tolerances or exotic materials typically require three to six weeks from order confirmation to shipment. The workflow includes feasibility assessment, CAE simulation, CNC machining, heat treatment, surface finishing, trial stamping, and dimensional inspection. The biggest delay factor is incomplete design input - missing tolerances or unclear material callouts force engineering pauses. Manufacturers like YICHEN (yichen-group.com/stamping-die/) that handle the full pipeline in-house can compress timelines by eliminating vendor handoffs between stages.
4. What tool steel is best for a custom stamping die?
The best steel grade depends on your workpiece material, production volume, and impact conditions. D2 tool steel offers exceptional wear resistance for long-run applications stamping harder metals. A2 provides better toughness with good dimensional stability, making it ideal where crack resistance matters more than abrasion resistance. S7 excels in impact-loaded applications like hand-struck dies because of its superior shock absorption. M2 high-speed steel retains hardness at elevated temperatures for rapid-cycling operations. The core rule is that the die must be significantly harder than the workpiece - a die marking aluminum needs less hardness than one stamping hardened stainless steel.
5. How do I maintain a custom stamping die to extend its lifespan?
Four practices multiply die service life significantly. Store dies in dry, temperature-controlled environments with a light oil coating to prevent oxidation, and protect them from physical impact. Clean die faces after every production run to remove material buildup, metal shavings, and lubricant residue that accelerate wear. Inspect dies visually after each run using magnification on fine-detail tools, checking for edge rounding, micro-cracks, and uneven wear patterns. Schedule re-sharpening or re-polishing at fixed intervals rather than waiting for visible quality loss. Shops that follow these routines consistently achieve three to five times the service life compared to those that run dies until failure.


