


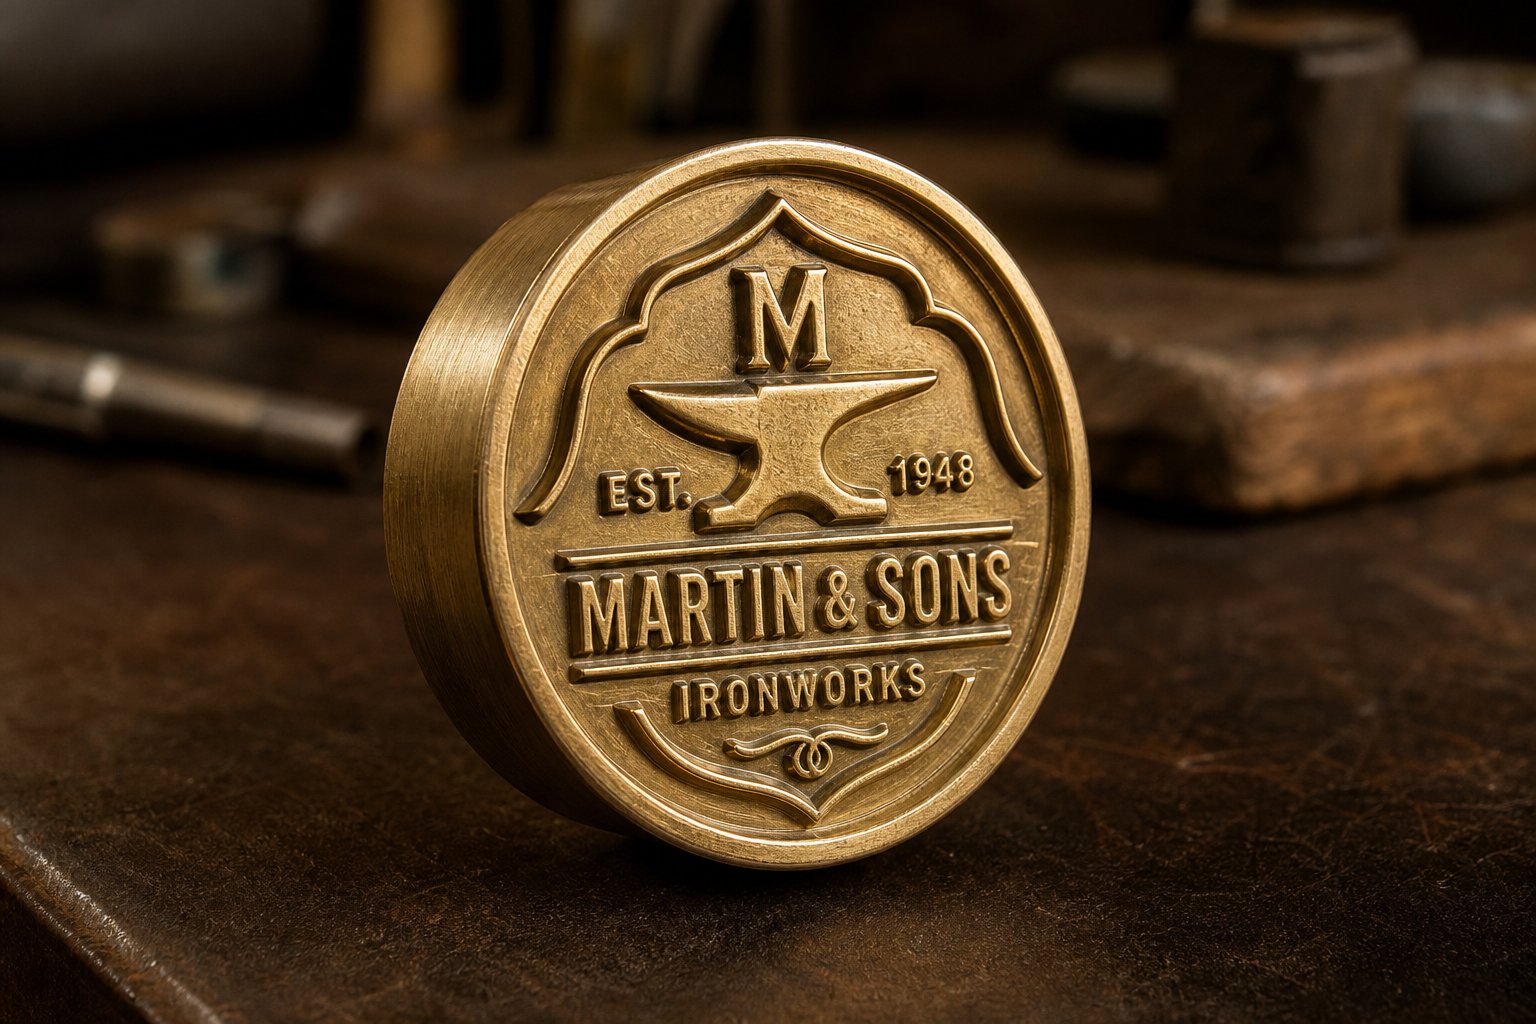
What Brass Stamping Dies Are and Why They Matter
Imagine pressing a heated metal block into leather and lifting it to reveal a perfectly crisp logo underneath. That is exactly what a brass stamping die does. Whether you are personalizing wallets in a small workshop or branding thousands of product packages on a factory floor, this single tool sits at the heart of the process.
What Is a Brass Stamping Die
A brass stamping die is a machined or engraved block of brass that transfers a design onto a substrate through heat, pressure, or a combination of both. The design - a logo, monogram, text, or decorative pattern - is cut in reverse relief into the die face. When the heated die presses against a surface, it leaves a permanent, mirror-correct impression in seconds.
A brass stamping die is a CNC-engraved or chemically etched brass block used to imprint logos, text, and designs onto materials like leather, wood, paper, and plastic through controlled heat and pressure.
Why use brass for stamping dies instead of any other metal? Brass is a copper-zinc alloy with a unique combination of physical properties that make it ideal for die work. It conducts heat evenly across the entire die face, preventing hot spots that scorch substrates or cold zones that leave faint marks. It machines cleanly, allowing engravers to hold sharp edges and fine detail through thousands of impressions. And it resists the oxidation and scaling that degrade softer die materials over repeated heat cycles.
Who Uses Brass Dies and Why
The user spectrum is broad. Small leather-goods makers and bookbinders rely on brass dies for hot stamping custom monograms and spine titles. Packaging houses use them to apply metallic foil branding on boxes and labels. Industrial operations stamp product identification marks onto plastics, wood, and textiles at production scale.
Brass occupies a practical sweet spot in the die material hierarchy. Magnesium dies cost less but wear quickly - their engraving detail breaks down after a few hundred impressions. Steel dies last longer but cost more and take longer to manufacture. A brass die for hot stamping delivers comparable mark quality to steel at a lower price point, routinely producing tens of thousands of impressions without noticeable degradation. For anyone running more than a prototype batch but less than a massive production campaign, brass is almost always the right call.
The real question is not whether brass works - it is how to get the most out of it. That starts with understanding how these dies are actually made.
How Brass Stamping Dies Are Manufactured
A polished brass block does not start life ready to brand leather or emboss paper. It goes through a precise sequence of steps - from a digital file on a screen to a heat-ready tool mounted in a press. Understanding how brass stamping dies are made helps you communicate with die makers, set realistic expectations for turnaround times, and appreciate why certain design choices cost more than others.
From Vector File to CNC Engraving
Every brass die begins as artwork. You'll need a vector file - typically in AI, EPS, SVG, or DXF format - because vector graphics define shapes with mathematical paths rather than pixels. This matters when a CNC machine needs to trace precise toolpaths at depths measured in thousandths of an inch. Raster images (JPEGs, PNGs) lack that precision and need to be converted before production begins.
Here is the critical step many people miss: the design must be mirrored. A brass die works like a rubber stamp. If you skip the mirror, your impressed image comes out backwards. Any reputable die maker handles this automatically, but it is worth verifying in the proof stage.
With the artwork finalized, fabrication follows one of two primary methods: CNC milling or chemical etching.
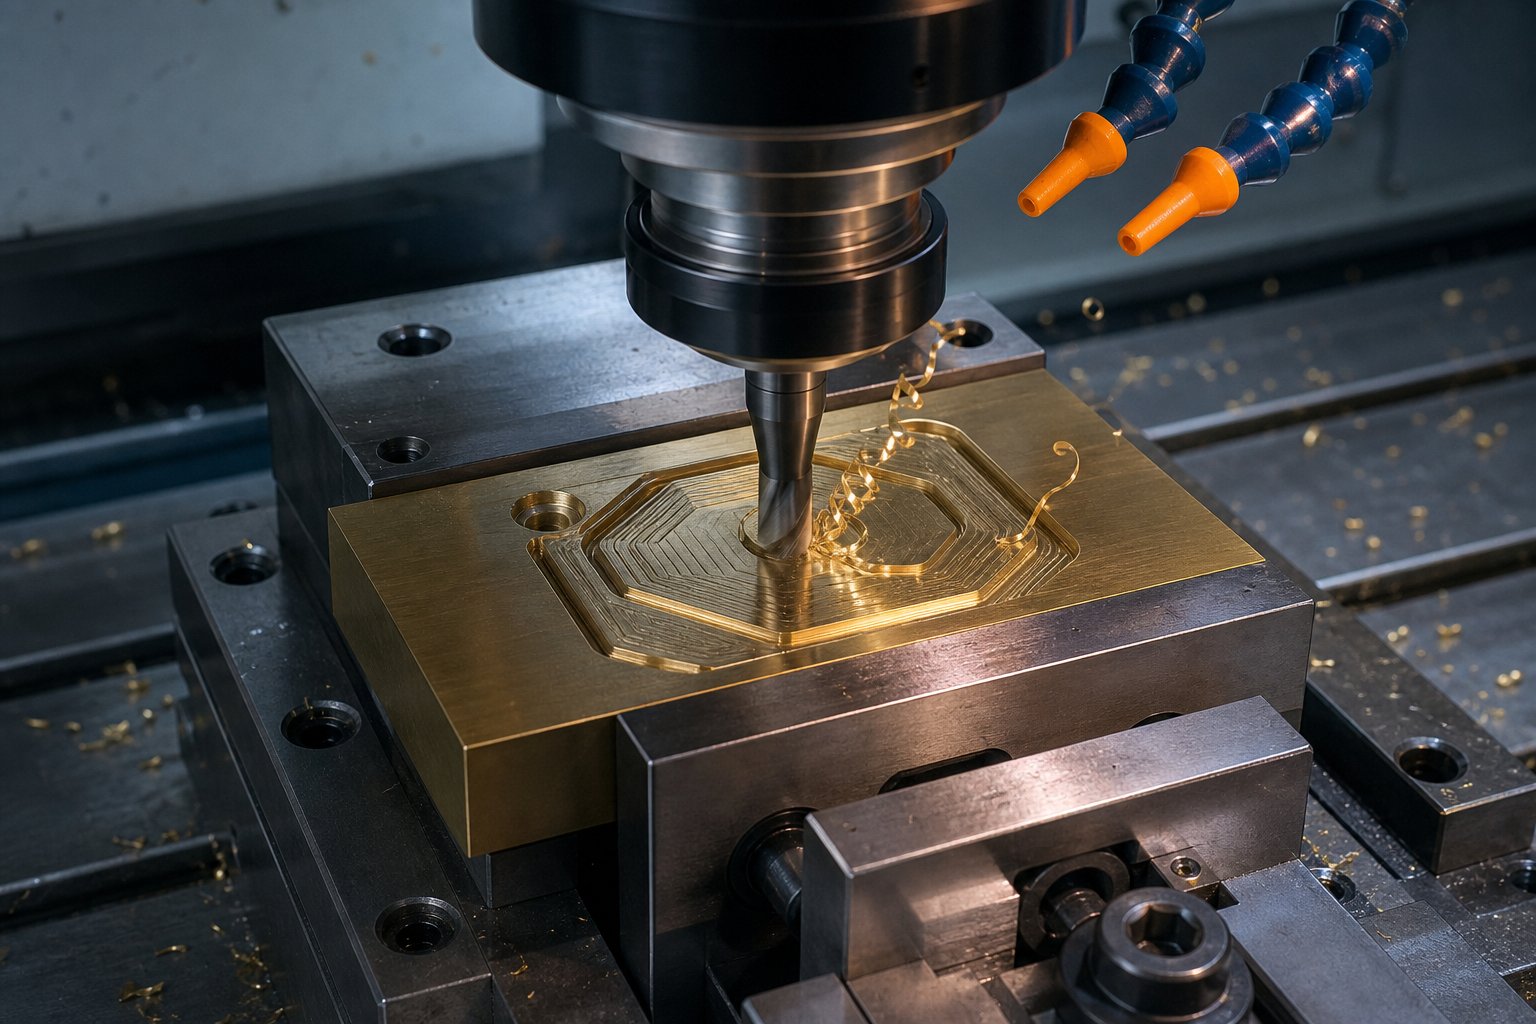
CNC milling uses computer-controlled rotary cutting tools to physically carve the negative space around your design, leaving the artwork standing proud as a raised surface. The process typically involves multiple passes with progressively finer bits. A typical CNC engraved brass die process starts with a rough clearing pass using a 1/8" end mill, followed by a fine detail pass with a 1/16" bit, and finishes with a V-bit engraving pass to capture sharp corners and tight radii. Feed rates stay conservative - around 20 inches per minute with shallow depth-per-pass settings of 0.015" - because brass is dense and punishes aggressive cuts with broken bits and rough surfaces.
Chemical etching takes a completely different approach. Instead of cutting brass away mechanically, it uses a photoresist mask and acid solution to dissolve unprotected areas. The result is a burr-free, stress-free surface that requires no mechanical deburring. Chemical etching produces higher precision on fine features and adapts easily to design changes without retooling costs.
When do you choose one over the other? Think of it this way:
| Factor | CNC Milling | Chemical Etching |
|---|---|---|
| Best for | Deeper relief (0.5 mm+), larger dies | Fine detail, shallow depths (under 0.5 mm) |
| Minimum feature size | Limited by bit diameter | Can resolve finer lines and gaps |
| Surface finish | May need deburring and polishing | Burr-free as produced |
| Design changes | Require new toolpaths | Require only a new photomask |
| Cost at low volume | Higher (tooling time) | Lower (no mechanical tooling) |
| Depth capability | Deep cuts possible | Limited to shallower profiles |
For most custom brass dies used in hot stamping and branding, CNC milling remains the dominant method because those applications demand deeper relief for clean impressions on leather, wood, and cardboard.
Finishing, Quality Control, and Mounting
Machining is only part of the story. A freshly cut die has rough edges, tool marks, and possibly burrs that would transfer to every impression if left untreated. Post-machining steps transform it from a raw blank into a production-ready tool.
Here are the brass die manufacturing steps in their typical sequence:
- Artwork preparation - Finalize vector file, mirror design, confirm dimensions with the client.
- Material surfacing - Flatten the brass blank to ensure perfect parallelism with the machine bed. Even slight surface variation produces patchy impressions.
- Rough clearing - Remove bulk material around the design using a larger end mill.
- Detail clearing - Switch to a finer bit to reach tight interior spaces the larger tool could not access.
- Engraving pass - Use a V-bit or ball-nose cutter to define sharp corners and intricate features.
- Deburring and polishing - Hand-finish or tumble the die to remove sharp edges. Polish the raised relief surfaces so they transfer heat evenly and release cleanly from substrates.
- Depth verification - Measure engraving depth at multiple points using a depth gauge or optical comparator. Uniform depth is non-negotiable for consistent impressions.
- Mounting - Attach the die to its intended press hardware.
Mounting options vary depending on the equipment you're working with. Common choices include aluminum backing plates (lightweight, easy to attach to heat platens), bunter posts (threaded rods for arbor presses and toggle machines), and hook-style fixtures for pneumatic presses. Some dies get a tapped hole on the back so they can thread directly onto a handle or machine screw - a practical approach for handheld branding irons.
The right mounting hardware ensures the die sits perfectly flat against the heating element and distributes pressure evenly across the face. A misaligned mount leads to deeper impressions on one side and faint marks on the other, regardless of how well the die itself was machined.
With a finished die in hand, the next decision is how you'll actually use it - and the stamping technique you choose changes everything about depth, temperature, and the final look of your impression.
Stamping Techniques That Use Brass Dies
A single brass die can produce dramatically different results depending on how you apply it. Hot stamping, blind debossing, foil stamping, embossing - these terms get tossed around interchangeably, but each one describes a distinct process with its own parameters for temperature, depth, and visual outcome. Confusing them leads to mismatched die specifications, wasted materials, and disappointing impressions. Here is a clear breakdown of each technique and how to pick the right one for your project.
Hot Stamping vs Blind Debossing vs Foil Stamping
Hot stamping is the broadest category. It uses a heated brass die pressed against a substrate with controlled pressure and dwell time. The result is a permanent impression - either a color change from heat alone (common on leather and wood) or a foil transfer. When people say "hot stamping," they sometimes mean just heat and pressure without any foil, and other times they mean foil application. Context matters, so always clarify with your supplier.
Blind debossing is the simplest variant. The heated die pushes into the material surface without any foil or pigment involved. You get a recessed impression that relies entirely on shadow and texture for visibility. Think of a logo pressed deep into a leather journal cover - no color, just depth. Because there is no foil to worry about, blind debossing demands deeper impressions than hot foiling and a die with slightly steeper bevel angles to create crisp walls that catch light effectively.
Foil stamping uses the same heated die principle, but adds a thin foil film between the die and the substrate. Heat activates the adhesive layer on the foil, bonding it to the material's surface wherever the die makes contact. The die does not need to press as deeply as blind debossing - it only needs enough contact to transfer the foil cleanly. Foil options range from metallic gold and silver to matte pigments, holographic patterns, and pearlescent finishes. Die temperature typically falls between 95 and 150 degrees Celsius depending on the foil series and substrate.
Embossing works differently from all three methods above. Instead of pressing into a surface, it raises the design above the substrate plane. This requires a matched male-female die pair - the brass die pushes from one side while a counter die (often made from a composite material or cast resin) supports the paper from the other side. The result is a three-dimensional, sculptured look. As Billerud's finishing guide notes, brass embossing dies can produce over one million impressions, making them the standard for high-volume and high-quality embossing work.
Each technique places different demands on the die itself:
- Die depth: Blind debossing requires the deepest relief (0.5 mm to 1.5 mm) to create visible shadow. Foil stamping needs minimal depth - just enough to ensure even contact. Embossing depth varies from a subtle 0.1 mm to a dramatic 0.6 mm depending on the stock weight.
- Bevel angle: Steeper bevels (around 45 degrees) help debossed impressions release cleanly from thick substrates. Shallower bevels (30 degrees or less) work better for foil stamping where the goal is flat, even foil coverage rather than deep dimensional cuts.
- Surface finish: Foil stamping requires a polished die face so the foil adheres uniformly without pitting or gaps. Blind debossing is more forgiving on surface texture since no material transfer occurs.
Choosing the Right Technique for Your Project
Picking between these four approaches comes down to a few practical questions. What visual effect do you want - color, texture, or dimension? What substrate are you working with? How many pieces need to be produced? And what is your budget for both die creation and per-piece production?
A leather goods maker stamping a logo onto vegetable-tanned hides might lean toward blind debossing for a subtle, tone-on-tone look - no consumables beyond the die itself. A cosmetics brand printing luxury packaging on coated cardstock would likely choose foil stamping with brass dies for that metallic shine that captures attention on retail shelves. A publisher producing hardcover book jackets might combine embossing with foil in what the industry calls a "stamp and bump" process - foil is applied first, then embossed in a second pass for both color and dimension.
The following table compares all four techniques across the parameters that matter most when specifying your die:
| Parameter | Hot Stamping (Heat Only) | Blind Debossing | Foil Stamping | Embossing |
|---|---|---|---|---|
| Die depth required | 0.3 - 0.8 mm | 0.5 - 1.5 mm | 0.2 - 0.5 mm | 0.1 - 0.6 mm |
| Temperature range | 120 - 200 C | 100 - 180 C | 95 - 150 C | Varies (may use no heat) |
| Foil compatible | Optional | No | Yes (required) | Optional (combination work) |
| Best substrate matches | Leather, wood, synthetics | Leather, heavy paper, cardboard | Coated paper, cardstock, plastic film | Heavy cover stock, cardboard, dull-coated paper |
| Visual result | Darkened/burnished mark | Shadow-only recessed impression | Metallic or colored foil graphic | Raised three-dimensional relief |
| Die pairs needed | Single die | Single die | Single die | Male + female counter die |
| Per-piece consumable cost | None | None | Foil material | None (unless combined with foil) |
Notice the difference between hot stamping and foil stamping is not the die itself - it is whether foil sits between the die and the substrate during the press cycle. A single well-made brass die can serve double duty for both heat-only marking and foil application, provided the depth and bevel suit both processes. That versatility is one more reason brass remains the go-to material for die work across such a wide range of applications.
Whichever technique you choose, the quality of your results depends heavily on the artwork you submit. Line thickness, font choices, and spacing between design elements all have hard limits when a heated metal block is doing the work - and those limits shift depending on your chosen technique.
Design Guidelines for Brass Die Artwork
A beautifully designed logo on screen does not always translate into a clean impression on leather or paper. Brass CNC engraving has physical limits - the cutting tools have real diameters, heat spreads through thin features unevenly, and pressure can crush delicate elements during stamping. Understanding these constraints before you submit artwork saves revision fees, turnaround delays, and disappointing results. Here are the design file requirements for brass stamping die work that separate a flawless impression from a muddy one.
Minimum Line Thickness and Font Size Rules
Every feature on your die - letters, border lines, graphic elements - must survive being carved into metal and then pressed repeatedly into a substrate under heat. The brass die minimum line thickness most die makers enforce is 0.5 mm (roughly 0.020 inches) for both positive elements (raised lines that stamp) and negative spaces (gaps between features). Drop below that threshold and you risk lines that fill in under pressure or break off entirely after repeated heat cycles.
Font selection matters more than most people expect. Sans-serif typefaces like Helvetica, Futura, and Arial hold up at smaller sizes because their uniform stroke widths stay above minimum thresholds consistently. Serif fonts - think Times New Roman or Garamond - introduce thin strokes and delicate bracketing that can disappear at small scales. As Gemini's plaque artwork guidelines note, sans-serif fonts can be produced reliably at sizes as small as 0.2 inches (approximately 21 pt), while serif fonts typically require a minimum height of 0.25 inches (27 pt) to maintain legibility.
What about the font size for brass stamping dies used in hot foil or debossing work? The rules tighten further because heat bleed becomes a factor. When two characters sit too close together, thermal energy from one feature migrates into the adjacent space, causing foil to transfer where it should not or substrate to scorch between letters. Industry specifications from United Silicone recommend exaggerating spacing between strokes beyond what looks normal on screen, understanding that vertical pressure and heat expansion will reduce those gaps during the stamping process. A safe minimum gap between adjacent elements is 0.022 inches - the same as the minimum stroke width.
Depth, Bevel, and Relief Considerations
Engraving depth is not a one-size-fits-all specification. The brass die engraving depth guidelines you follow should match your chosen technique and substrate. Shallow relief (0.2 to 0.4 mm) works for foil stamping on coated paper where you only need even contact, not a deep physical impression. Deeper relief (0.5 to 1.5 mm) suits blind debossing on leather or heavy cardstock where shadow and texture create visibility.
Bevel angle - the slope between the die's raised surface and its recessed background - controls how cleanly the die releases from the substrate after impression. A steeper bevel (around 45 degrees) prevents the die from dragging material upward on release, which is critical for deep debossing on soft materials like vegetable-tanned leather. Shallower bevels (30 degrees) suit foil work where minimal depth means less mechanical grip on the substrate.
Complex designs with isolated thin features present a specific risk. A long, narrow serif or a thin decorative swirl surrounded by deep negative space acts like a fin - it heats faster than the surrounding die face, loses heat faster during contact, and can physically snap under repeated pressure cycles. United Silicone's engineering guidance uses an apt analogy: imagine a tall person standing with legs together versus a shorter person braced with a wide stance. Wider, lower-profile features withstand stamping forces far better than tall, narrow ones. Fine characters are typically best served at a 0.035-inch relief, while larger graphic elements can handle 0.065 inches or more.
Before you send artwork to your die maker, run through this checklist:
- File format: Supply vector artwork in AI, EPS, SVG, or DXF. Convert all fonts to outlines or curves so the die maker's software renders them exactly as intended.
- Minimum stroke width: Verify every line, letter stroke, and gap measures at least 0.5 mm (0.020 inches). Check both positive and negative spaces.
- Font choice: Prefer bold sans-serif typefaces at small sizes. If using serif fonts, increase height to at least 27 pt and confirm thin strokes meet the minimum width.
- Element spacing: Leave at least 0.022 inches between adjacent characters, lines, or design elements to prevent heat bleed and over-stamping.
- Avoid condensed or distorted fonts: Horizontal compression thins vertical strokes below safe limits. Use standard weight variants instead.
- Specify engraving depth: Communicate your intended technique (foil, deboss, heat-only) so the die maker selects appropriate relief depth and bevel angle.
- Simplify isolated thin features: Thicken delicate swirls, hairline serifs, or single-pixel outlines. If a feature looks fragile on screen, it will be fragile in brass.
- Large solid areas: Designs with broad filled regions may trap air during stamping. Consider outlining large solids or discuss screening options with your die maker to facilitate air escape.
- Provide actual size: Include plaque dimensions and the exact position of the design within the die face. A design that works at 3 inches wide may violate minimum line rules when scaled to 1 inch.
Getting these details right at the artwork stage means your brass die arrives ready to perform from the first impression. The design rules above apply universally, but optimal temperature, pressure, and dwell time shift significantly depending on what material sits underneath the die - a distinction that makes substrate-specific guidance essential for consistent results.
Substrate-by-Substrate Application Guide
The same brass die behaves completely differently on vegetable-tanned leather than it does on coated cardstock or pine shelving. Temperature, pressure, and dwell time are not universal constants - they shift with every substrate change. Dial in the wrong combination and you'll get anything from a barely visible impression to a scorched disaster. This section gives you specific starting parameters for the most common materials so you can get to a clean mark faster with less trial and error.
Leather and Wood Substrates
Leather is the most popular substrate for brass die work, and for good reason. Natural hide accepts heat impressions beautifully, producing marks that are permanent, tactile, and visually rich. But "leather" is not one material - it is a family of materials, and the brass die temperature for leather stamping changes depending on tannage type and thickness.
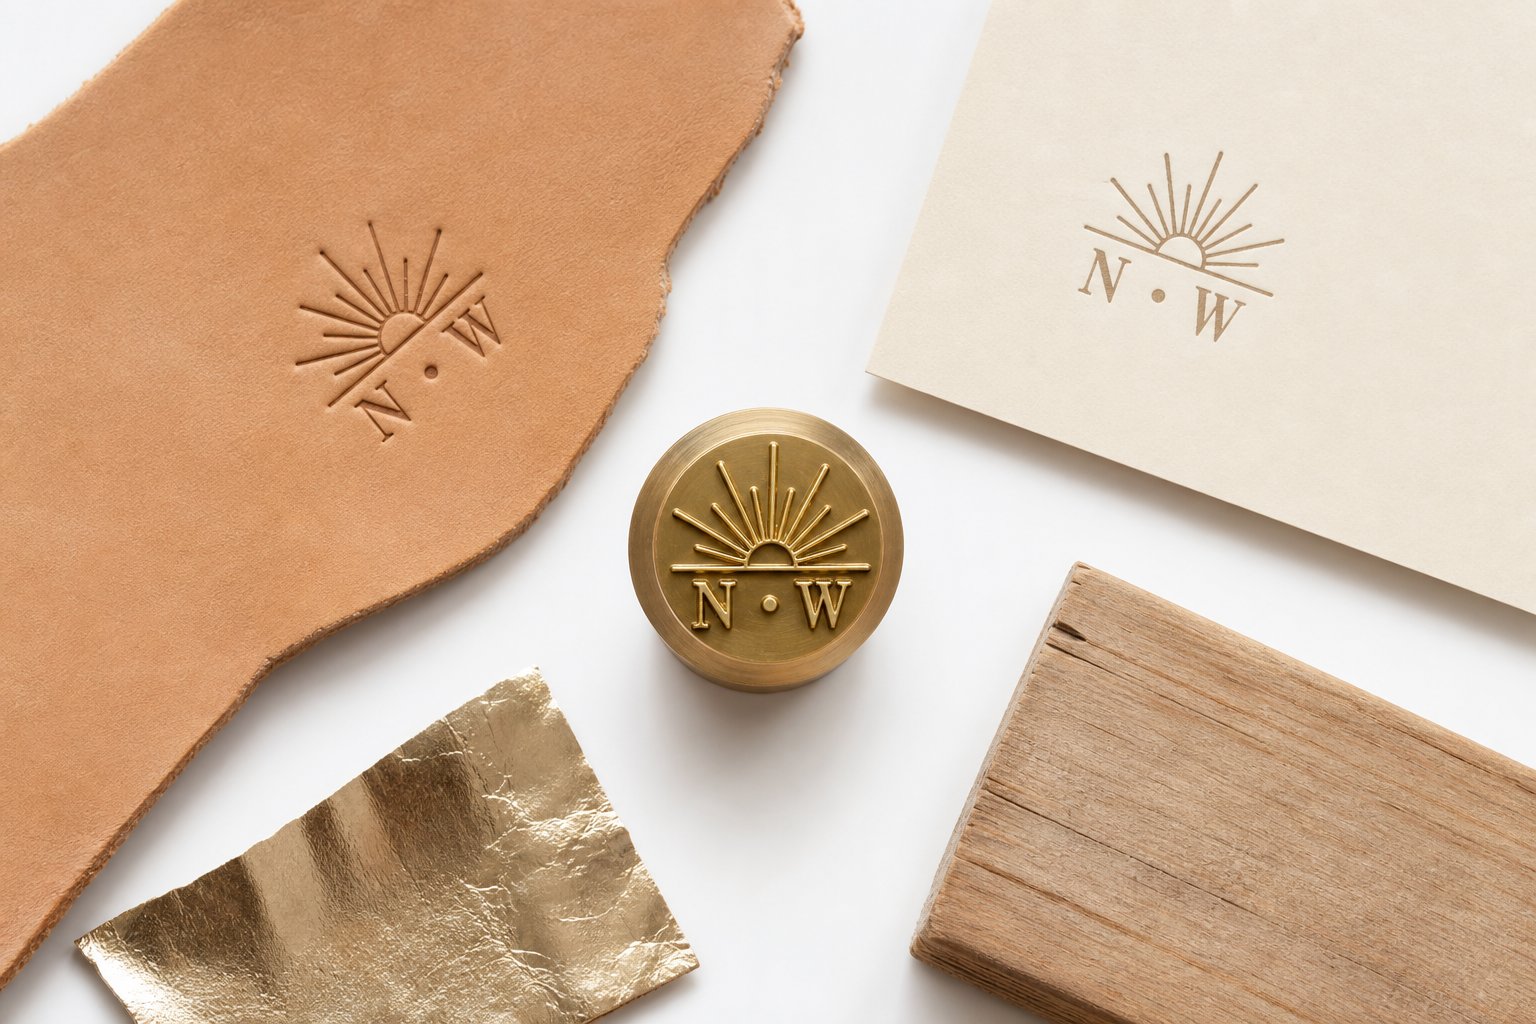
Vegetable-tanned leather is the gold standard for hot stamping. Its dense, firm fiber structure holds crisp impressions and tolerates higher temperatures without scorching as easily as chrome-tanned alternatives. Start your testing in the 150 to 175 degrees Celsius range (roughly 300 to 350 degrees Fahrenheit) with moderate pressure and a 2 to 4 second dwell time. Leatherworkers on community forums report that gold foil transfers cleanly on 1 mm veg-tan at around 120 degrees Celsius, with coverage improving as you approach 130 degrees Celsius - though edges begin to soften at the top of that range. For blind debossing without foil, you can push slightly hotter (up to 200 degrees Celsius) because you want visible darkening of the leather fibers rather than crisp foil adhesion.
Chrome-tanned leather is softer, stretchier, and more heat-sensitive. It brands at lower temperatures - typically 120 to 150 degrees Celsius - and needs lighter pressure to avoid over-compressing the material. Dwell time stays short, around 1 to 3 seconds. PU (polyurethane) leather and bonded leather synthetics demand even more caution; one practitioner found that PU leather begins to melt near 170 degrees Celsius, so staying in the 100 to 140 degrees Celsius window is essential.
A few leather preparation notes worth remembering: wipe the surface clean of oils, dust, and conditioner before stamping. Any residue acts as a barrier between the die and the hide, causing patchy foil transfer or uneven darkening. If you're stamping vegetable-tanned leather that has been stored in a dry environment, lightly misting the surface with water (then letting it absorb for a minute) can improve impression depth by softening the fibers just enough to accept the die.
Wood requires a fundamentally different approach. Hot stamping brass die on wood typically uses a branding iron configuration rather than a foil press, and temperatures run significantly higher. Softwoods like pine and cedar brand at 340 to 400 degrees Celsius (650 to 750 degrees Fahrenheit), while hardwoods like maple, walnut, and cherry need 400 to 455 degrees Celsius (750 to 850 degrees Fahrenheit).
Dwell time on wood is longer than leather - often 5 to 10 seconds for softwoods and up to 15 seconds for dense hardwoods. You're literally burning a controlled pattern into the grain, so the goal is a dark, even carbonization without charring the surrounding area. Moisture content affects results significantly. Air-dried wood with 8 to 12 percent moisture content brands more evenly than kiln-dried stock, which can produce a lighter, less consistent mark. Pre-warming the workpiece slightly helps reduce temperature shock and improves mark uniformity on thick stock.
Design complexity matters more on wood than most other substrates. Wood grain can interfere with fine detail, so clean, simple line work transfers best. Highly intricate artwork tends to get lost in the natural texture, especially on open-grain species like oak or ash.
Paper, Cardboard, and Plastic Substrates
Paper products are among the easiest substrates to stamp with a brass die. The brass die settings for paper and cardboard sit at the low end of the temperature spectrum - typically 90 to 130 degrees Celsius - with light pressure and very short dwell times of 1 to 2 seconds. The goal on paper is clean foil adhesion or a gentle debossed impression, not a burn mark.
Coated paper and cardstock accept foil transfer beautifully because their smooth, sealed surface provides consistent contact with the die face. Uncoated stocks are more porous, which can cause micro-gaps in foil coverage. If you're foil stamping on uncoated paper, a slightly higher temperature (add 10 to 15 degrees Celsius) and a fraction more dwell time compensates for the increased surface absorption.
Heavier card stocks and rigid board - the kind used for luxury packaging, book covers, and presentation folders - can handle deeper debossing without tearing because their caliper supports the mechanical displacement. Paper lighter than 200 gsm risks puncturing under aggressive depth or pressure settings.
Plastics split into two distinct categories. Softer thermoplastics like polyethylene, polypropylene, and PVC respond well to brass dies at temperatures between 165 to 200 degrees Celsius (325 to 400 degrees Fahrenheit). These materials soften predictably under heat, accept foil transfer readily, and produce clean debossed marks. Thermoset plastics and harder engineered resins require higher temperatures - approaching 400 to 455 degrees Celsius (750 to 850 degrees Fahrenheit) - similar to hardwood branding.
One critical consideration with plastics: surface energy. Most plastics need a surface energy of at least 38 to 42 dynes/cm for reliable foil adhesion. Low-surface-energy plastics like untreated polyethylene or polypropylene may require corona treatment or flame treatment before stamping to ensure the foil bonds permanently rather than peeling off over time.
Thin plastic films used in food packaging or pharmaceutical blister packs are generally not suitable for direct brass die hot stamping - the heat burns through before creating a usable mark. These applications are better served by specialized inline coders or cold foil processes.
Fabric and Specialty Materials
Synthetic textiles like nylon, polyester, and canvas can be hot stamped at temperatures similar to soft thermoplastics (150 to 200 degrees Celsius), though pressure must stay light to avoid crushing the weave. Foil transfer on fabric works best with smooth, tightly woven synthetics - open-weave or heavily textured materials lack the continuous contact area needed for clean adhesion.
Wax seals represent a niche but growing application. Brass dies designed for wax work at much lower temperatures (the wax itself melts at 60 to 85 degrees Celsius), and the die is used cold - pressed into still-molten wax to form the impression as it sets. The die's thermal mass actually helps here, drawing heat away from the wax and accelerating the set.
Food-grade applications like branding bread, tortillas, or cheese use food-safe brass dies at temperatures calibrated to the specific product. These are short-contact applications where the die leaves a cosmetic surface mark without cooking through the product.
The table below consolidates recommended starting parameters for the best substrate for brass stamping dies work. These values represent tested starting points - always run test impressions on scrap material before committing to production pieces, since the brass die dwell time by material varies with die size, design complexity, and specific equipment.
| Material Type | Temperature Range | Pressure Level | Dwell Time | Foil Compatibility |
|---|---|---|---|---|
| Vegetable-tanned leather | 150 - 200 C (300 - 400 F) | Medium to firm | 2 - 5 seconds | Excellent |
| Chrome-tanned leather | 120 - 150 C (250 - 300 F) | Light to medium | 1 - 3 seconds | Good |
| PU / synthetic leather | 100 - 140 C (210 - 285 F) | Light | 1 - 2 seconds | Good (test first) |
| Softwood (pine, cedar) | 340 - 400 C (650 - 750 F) | Firm, even | 5 - 10 seconds | Not typical (heat brand) |
| Hardwood (maple, walnut) | 400 - 455 C (750 - 850 F) | Firm, even | 8 - 15 seconds | Not typical (heat brand) |
| Coated paper / cardstock | 90 - 120 C (195 - 250 F) | Light | 1 - 2 seconds | Excellent |
| Uncoated paper / board | 100 - 130 C (210 - 265 F) | Light to medium | 1 - 3 seconds | Good (slightly higher temp) |
| Soft thermoplastics (PE, PP, PVC) | 165 - 200 C (325 - 400 F) | Medium | 2 - 4 seconds | Good (check surface energy) |
| Hard thermoset plastics | 400 - 455 C (750 - 850 F) | Firm | 3 - 8 seconds | Limited |
| Synthetic fabric (nylon, polyester) | 150 - 200 C (300 - 400 F) | Light | 1 - 3 seconds | Moderate (smooth weaves only) |
| Wax seals | Die used cold on molten wax | Light press into wax | Hold until set (3 - 5 sec) | Not applicable |
Keep in mind that these parameters interact. A larger die face needs more pressure and slightly longer dwell to ensure full, even contact. A deeply engraved die running at the same temperature as a shallow one will produce a lighter impression because less surface area is transferring heat. And ambient workshop temperature, substrate thickness, and even humidity all nudge the optimal settings in one direction or another.
The substrate tells you what temperature and time range to aim for, but how you actually deliver that heat - and how consistently you control pressure - depends entirely on what equipment sits on your bench or production line.
Equipment Compatibility and Heating Methods for Brass Stamping Dies
Knowing the right temperature and dwell time for your substrate is only half the equation. The press you use and how it delivers heat to the die face determine whether those settings translate into consistent results or frustrating variability from one impression to the next. Different equipment types mount brass dies differently, control pressure with varying precision, and heat the die through distinct mechanisms - each combination suited to a specific production context.
Press Types and Their Brass Die Compatibility
Not every press works the same way with a brass die. The mounting system, pressure delivery, and stroke control vary significantly across equipment categories, and matching your die to the wrong machine creates problems that no temperature adjustment can fix.
Arbor presses with heating elements are the workhorse of small-batch and hobbyist hot stamping. A brass die for arbor press hot stamping typically mounts via a threaded bunter post or a bolted clamp plate attached to a heated platen. You control pressure manually through the lever arm, which gives you tactile feedback but limited repeatability. Arbor presses excel for prototyping, short runs, and one-off custom work where you can afford to dial in each impression by feel.
Pneumatic hot stamping machines deliver air-cylinder-driven pressure at a preset force, eliminating the human variability of a manual press. Brass die mounting for pneumatic press setups usually involves a quick-change fixture plate - the die bolts to an aluminum adapter that slides into a dovetail or clamping rail on the heated head. The consistent downforce and programmable dwell cycles make pneumatic machines ideal for medium to high-volume production where every impression must match the last.
Hand-held branding irons are the simplest configuration. The brass die threads directly onto or clamps into the head of an electrically heated or flame-heated handle. You apply pressure by hand against the workpiece. This setup dominates leather workshops, woodworkers branding finished products, and any application where the workpiece cannot come to the press - furniture panels, assembled goods, or large items that won't fit under a platen.
Heat presses (clamshell and swing-away) use a large heated platen to apply even pressure across a wide area. Brass dies mount to the upper platen with high-temperature adhesive tape or bolt directly into tapped inserts. Heat presses provide excellent uniformity across the full die face but offer less precise pressure control than pneumatic systems. They work well for foil stamping on flat substrates like paper, cardstock, and thin leather pieces.
Here is a quick reference for matching equipment to your production needs:
- Arbor press with heated platen - Best for prototyping, custom one-offs, and runs under 50 pieces. Manual pressure control. Low equipment cost.
- Pneumatic hot stamping machine - Best for consistent production runs of 50 to 10,000+ pieces. Programmable pressure, dwell, and temperature. Moderate to high equipment cost.
- Hand-held branding iron (electric or flame) - Best for oversized workpieces, on-site branding, and low-volume craft work (1 to 100 pieces). Portable, minimal setup. Low equipment cost.
- Clamshell or swing-away heat press - Best for flat substrates, foil work, and medium runs (20 to 500 pieces). Even heat distribution across large die areas. Moderate equipment cost.
Heating Methods and Temperature Control
The heating methods for brass stamping dies fall into four main categories, and each one affects how evenly heat distributes across the die face - a factor that matters more with brass than with most other metals.
Why? Because brass has high thermal conductivity (roughly 109 W/m-K for common C360 alloy). That means heat flows rapidly through the entire die block. On the positive side, this prevents cold spots and ensures the full design area reaches operating temperature quickly. On the negative side, it also means any inconsistency in the heat source - a hot spot from a poorly positioned cartridge heater, for example - propagates through the die and can cause uneven foil transfer or substrate scorching in localized areas.
Electric cartridge heaters are the most common heating method for production presses. These cylindrical resistive elements insert into bored holes in the platen or directly into the die's mounting plate. They heat up quickly, respond well to PID controllers, and provide good uniformity when properly spaced. Most pneumatic and arbor press setups use cartridge heaters rated between 100 and 500 watts depending on die size.
External heating plates sandwich the brass die between a heated aluminum or steel platen and the press head. The die absorbs heat conductively from the plate beneath it. This approach works well for heat presses and some flatbed stamping machines. The downside is slightly slower thermal response when adjusting temperature - you're heating a larger thermal mass (plate plus die) rather than the die alone.
Gas-heated irons use a butane or propane flame to heat a metal head, into which the brass die is mounted. These are common in handheld branding applications and field work where electricity is unavailable. Temperature control is imprecise - you're estimating based on experience, color of the heated metal, or a surface thermometer. Gas heating produces less uniform results than electric methods, but the portability trade-off is worthwhile for many craft and woodworking applications.
Integrated digital temperature controllers are not a heating method themselves, but they transform any electric heating element into a precision instrument. A temperature controller for brass die work typically uses a thermocouple sensor embedded in the platen or die mount, feeding real-time readings to a PID controller that modulates power to the heating element. This maintains die face temperature within plus or minus 2 to 5 degrees Celsius of your target - critical when you're running foil that needs exactly 120 degrees Celsius for clean adhesion and scorches the substrate at 140 degrees Celsius.
The practical takeaway: if your work demands repeatable results across dozens or hundreds of impressions, invest in an electric cartridge heater paired with a digital PID controller. If you're branding a few leather goods at your bench and can tolerate slight impression-to-impression variation, a simpler heated iron or manual temperature check gets the job done.
Equipment choices shape your per-impression cost just as much as your quality ceiling. A pneumatic press with digital temperature control represents a significant upfront investment that pays back through speed and consistency on long runs - while a hand-held iron costs a fraction as much but demands more skill and time per piece. Understanding where your die, your equipment, and your production volume intersect helps you make smarter purchasing decisions when it comes to both hardware and the die material itself.
Cost Factors and Material Alternatives for Brass Stamping Dies
Equipment investment is only one piece of the budget picture. The die itself carries its own cost variables - and for many buyers commissioning their first custom die, pricing feels opaque. How much does a custom brass die cost? There is no single number, but there is a clear set of variables that move the price up or down predictably. Understanding these brass stamping die cost factors puts you in a stronger position when requesting quotes and comparing suppliers.
What Influences Brass Die Pricing
Five primary factors determine what you'll pay for a custom brass die:
- Die size - Larger dies consume more raw material and require longer machine time. A 1-inch square logo die costs significantly less than a 4 x 6 inch plaque die, even if the design complexity is identical.
- Engraving complexity - A simple text-only die with block lettering machines faster than an intricate logo with fine serifs, tight curves, and multiple isolated features. More complex toolpaths mean more CNC time, which directly increases cost.
- Engraving depth - Deeper relief requires more material removal passes. A die cut to 1.5 mm depth for blind debossing takes considerably longer to produce than a 0.3 mm shallow die intended for foil work.
- Mounting hardware - A bare brass block costs less than one mounted on an aluminum backing plate with threaded bunter posts or custom toggle hook fixtures. Specialized mounting adds both material and assembly labor.
- Order quantity - One-off custom dies carry the full setup cost. If you need five identical dies (for multiple workstations or backup tooling), the per-unit price drops because the CNC program, fixturing, and quality checks are shared across the batch.
Turnaround time also affects pricing. Standard lead times of 5 to 10 business days carry no premium, but rush orders (2 to 3 days) typically add 25 to 50% to the total - similar to the expedited surcharges common across custom metal fabrication services. If your timeline allows flexibility, standard production saves real money.
For a rough benchmark: small custom brass dies (under 2 inches) for hobbyist branding irons typically fall in the $50 to $150 range. Mid-size production dies (2 to 4 inches) with moderate complexity run $150 to $500. Large or highly detailed dies for industrial stamping applications can exceed $500 to $1,000+, especially when mounted with precision hardware for pneumatic presses.
Brass vs Alternative Die Materials
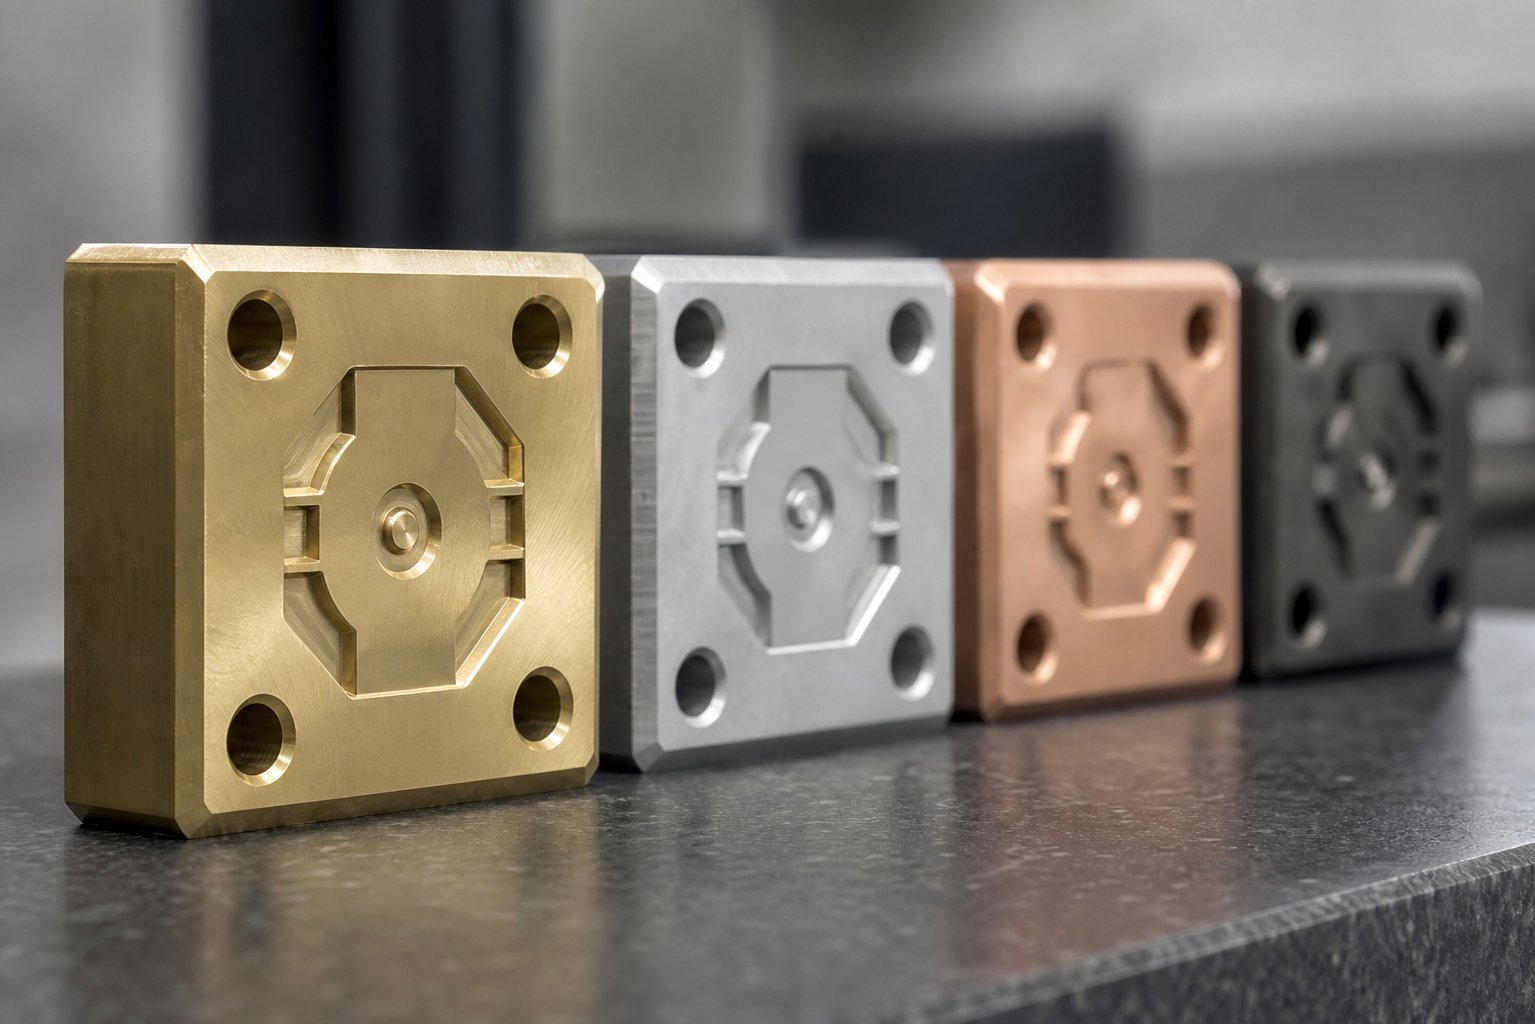
Brass is not the only option. Four other materials compete for die applications, and each occupies a different position on the cost-versus-performance spectrum. The brass vs magnesium die comparison is the most common decision point for buyers on a budget, while the steel vs brass stamping die debate matters most for high-volume operations planning long production campaigns.
Here is how the materials stack up:
| Die Material | Typical Cost Range | Lifespan (Impressions) | Detail Capability | Best Applications |
|---|---|---|---|---|
| Brass (C260/C360) | $$ | 50,000 - 100,000+ | High - holds fine lines and sharp edges well | All-purpose: foil stamping, debossing, branding on leather, paper, wood, plastics |
| Magnesium | $ | 5,000 - 10,000 | Moderate - fine detail possible but wears quickly | Short runs, prototyping, greeting cards, book bindings, low-pressure foil work |
| Zinc | $ | 3,000 - 8,000 | Low to moderate - softer alloy limits edge retention | Budget short-run dies, disposable tooling, proof-of-concept testing |
| Copper | $$-$$$ | 30,000 - 60,000 | Very high - softer than brass but machines to finer detail | High-detail foil stamping on paper, security printing, fine-art applications |
| Steel (tool steel) | $$$-$$$$ | 500,000 - 1,000,000+ | High - maintains edges under extreme pressure and heat | High-volume industrial marking, engineered plastics, long-campaign production |
A few observations from this comparison worth highlighting:
Magnesium costs roughly 40 to 60% less than brass for a same-size die, but the brass die lifespan in impressions is typically 5 to 10 times longer. If you only need a few hundred impressions for a short packaging run or event materials, magnesium saves money. Beyond a few thousand pieces, you'll replace the magnesium die - possibly more than once - making brass cheaper over the project's life.
Steel outlasts brass by an order of magnitude but costs 3 to 5 times more upfront and takes longer to machine due to its hardness. Steel makes sense when you're running a single die design through hundreds of thousands of cycles on a production line. For moderate volumes - say 10,000 to 50,000 impressions - brass delivers equivalent quality at a fraction of the investment.
Copper occupies a niche for ultra-fine detail work. Its softer composition machines to tighter tolerances than brass, but that same softness means it wears faster under repeated heat and pressure. It is the specialist's choice for high-end stationery and security applications, not a general-purpose alternative.
Choosing between these materials ultimately depends on your production volume, detail requirements, and budget horizon. For engineers and sourcing teams comparing alloy characteristics across multiple applications, YICHEN's Materials resource provides a useful starting point for evaluating brass, steel, and other production metals side by side - helpful context when the die material decision intersects with broader part material specifications.
Price and material selection tell you what you're buying into. But even the right die in the right material can underperform if something goes wrong during production - and knowing how to diagnose and fix common problems saves both time and impressions.
Troubleshooting Common Brass Die Problems
You've dialed in your temperature, chosen the right substrate, and mounted your die - but the impression still doesn't look right. Before scrapping the workpiece or blaming the die maker, most hot stamping failures trace back to a handful of diagnosable causes with straightforward fixes. This troubleshooting guide covers the problems you're most likely to encounter and walks through each one as a cause-and-solution pair so you can get back to clean impressions fast.
Shallow or Uneven Impressions
When your brass die leaves a mark that's faint on one side, missing corners, or inconsistently deep across the design, the issue almost always lives in the pressure or contact system rather than the die itself. Here's what to check:
- Insufficient overall pressure - The die isn't being driven hard enough into the substrate to create full contact. Fix: Increase press force incrementally. On an arbor press, apply more lever pressure; on a pneumatic machine, raise the cylinder PSI in small steps until the full design area transfers cleanly.
- Uneven platen or mounting surface - If the heated platen is warped, worn, or the die mount isn't perfectly flat, one edge of the die contacts the substrate before the other. Fix: Place a sheet of carbon paper between the die and a flat test surface, press down, and check the contact pattern. If pressure concentrates on one side, shim the low-pressure zones with thin foil or paper until uniform contact is achieved. Replace platens that show visible concavity or wear grooves.
- Worn die surface - After tens of thousands of impressions, the raised relief surface develops micro-rounding at the edges and loses height uniformity. Fine details wear first because they have less mass. Fix: Inspect the die face under magnification. If edges appear rounded or specific areas are visibly lower than the rest, the die needs resurfacing or replacement.
- Incorrect substrate preparation - Leather with surface oils, paper with excess moisture, or plastic with static charge all resist clean impression transfer. Fix: Clean the substrate surface immediately before stamping. Wipe leather with a lint-free cloth, condition paper stock to proper humidity (below 8% moisture), and use anti-static treatment on plastics.
- Substrate warping or unevenness - A cockled sheet or curved leather piece won't make full contact with a flat die. Fix: Flatten substrates before stamping. For paper, acclimate stock in a controlled-humidity environment. For leather, use a backing plate or jig that holds the piece flat during the press cycle.
Scorching, Sticking, and Foil Transfer Problems
Temperature-related failures are the most common headaches in brass die work. Because brass conducts heat so efficiently, even small overshoots in temperature or dwell time translate immediately into visible damage on the substrate.
- Substrate scorching - The material darkens, burns, or discolors beyond the intended impression area. Cause: Temperature set too high, dwell time too long, or both. Fix: Reduce temperature in 5 degree Celsius increments and shorten dwell time until the mark is clean without surrounding discoloration. On leather, scorching often appears as a dark halo around letters; on paper, it shows as yellowing or brittleness at the impression edges.
- Die sticking to substrate - The die grabs the material on release, pulling fibers from paper, stretching leather, or leaving residue on the die face. Cause: Adhesive residue buildup from foil, melted substrate material baked onto the die, or excessive temperature causing the substrate to partially fuse to the brass. Fix: Clean the die face thoroughly - use a brass brush (never steel, which scratches the relief) and a solvent appropriate for the residue type. For foil residue, isopropyl alcohol or a dedicated foil cleaner works well. Lower the temperature if sticking recurs after cleaning.
- Incomplete foil transfer (bare spots or patchy coverage) - Parts of the design transfer foil cleanly while other areas show the bare substrate underneath. Cause: Insufficient temperature preventing full adhesive activation, uneven pressure leaving low-contact zones, or foil-substrate incompatibility where the adhesive layer doesn't bond with the surface chemistry. Fix: Increase temperature gradually and confirm with a rub test - if foil lifts when rubbed lightly, adhesion is incomplete. Verify even pressure across the die face. If the problem persists, switch to a foil grade formulated for your specific substrate type (coated vs. uncoated paper, treated vs. untreated plastic).
- Foil bleeding or blurred edges - Foil extends beyond the design borders, smearing into non-image areas. Cause: Temperature too high, dwell time too long, or a worn die whose edges can no longer define crisp boundaries. Fix: Reduce heat and shorten press time. Inspect die edges - if they show visible rounding or pitting, the die has reached a point where it can no longer produce sharp foil breaks and needs replacement or re-machining.
- Foil bubbling or wrinkling - The transferred foil shows small bubbles, wrinkles, or lifted patches after stamping. Cause: Moisture trapped in the substrate vaporizing under heat, creating pockets beneath the foil layer. Alternatively, unstable foil quality or insufficient pressure failing to press the foil flat against the surface. Fix: Pre-dry substrates before stamping (especially paper and leather stored in humid conditions). Verify foil feed tension is consistent, and ensure pressure is uniform across the full image area.
A quick note on how to clean a brass stamping die during production: develop a habit of wiping the die face with a soft cloth between every 20 to 50 impressions when running foil. Residue builds incrementally, and catching it early is far easier than scrubbing baked-on adhesive after a full production run. For deeper cleaning, remove the die from the press, soak briefly in warm solvent, and scrub gently with a brass-bristle brush. Avoid abrasive pads or steel wool - they round the fine edges your die depends on for sharp impressions.
Die Wear and Longevity Issues
Every brass die has a finite lifespan. The question is whether yours reaches its full potential or degrades prematurely due to preventable factors. Recognizing the brass stamping die wear signs early lets you plan replacements before quality slips below acceptable levels.
- Edge rounding on fine features - The earliest visible wear sign. Thin lines and small text lose their crispness first because they have the least material mass and experience the most thermal cycling per unit of surface area. Action: Compare a fresh impression against your original proof. If fine details are softening, the die is entering its decline phase. Plan a replacement before the degradation becomes obvious to end customers.
- Surface pitting or corrosion - Small pits or discolored patches appear on the die face, especially in dies exposed to acidic substrates (some vegetable-tanned leathers) or chemical cleaning solvents used improperly. Action: Light pitting can sometimes be polished out if it hasn't reached the relief depth. Deep pitting requires die replacement.
- Depth loss across the die face - After many thousands of impressions, the overall relief height decreases as the raised surfaces compress and wear under repeated impact. Action: Measure relief depth with a depth gauge and compare to the original specification. A loss of more than 15 to 20% typically makes the die unsuitable for debossing work, though it may still function for foil transfer where less depth is needed.
What accelerates die wear? Running temperatures higher than necessary tops the list - excessive heat softens the brass surface microscopically with each cycle, accelerating material loss. Stamping abrasive substrates (uncoated cardboard, raw wood) wears dies faster than smooth materials. And poor cleaning habits allow residue to bake into a hard crust that requires aggressive removal methods, damaging the die in the process.
To extend your die's usable life:
- Store dies in a dry environment, ideally wrapped in anti-tarnish cloth or sealed in a zip-lock bag to prevent oxidation between uses.
- Never stack dies face-to-face without protective material between them - brass is soft enough that contact pressure can transfer marks between die surfaces.
- Clean after every production session, not just when visible residue appears.
- Run at the lowest effective temperature for your substrate and foil combination - every degree above the minimum accelerates surface wear without improving impression quality.
Knowing when a die needs replacement - and having the information ready to order its successor quickly - keeps production moving without quality gaps. That ordering process itself has its own set of best practices worth understanding before you pick up the phone or fill out a quote form.
How to Order and Evaluate Custom Brass Stamping Dies
Replacing a worn die or commissioning your first custom tool should be straightforward - but vague quote requests lead to vague results. Suppliers need specific information to produce a die that matches your application, and you need a clear framework for inspecting what arrives. Whether you're a leather workshop owner ordering a single branding die or a packaging engineer sourcing production tooling, the process below keeps both sides aligned from first contact through final delivery.
Information to Gather Before Ordering
Imagine calling a supplier and saying "I need a brass die with my logo on it." That's like walking into a machine shop and asking for "a metal part." The more detail you provide upfront, the fewer revision cycles you'll burn through - and the faster your die ships. Here's the ordering process laid out step by step:
- Finalize your vector artwork - Supply the design in AI, EPS, SVG, or DXF format with all fonts converted to outlines. If your file is a raster image (JPEG or PNG), expect the supplier to charge a conversion fee or reject it outright. The custom brass die artwork requirements are non-negotiable at this stage: clean vector paths, no open contours, and accurate dimensions at the final stamp size.
- Specify your substrate - Tell the supplier exactly what material you'll be stamping: vegetable-tanned leather, coated cardstock, pine, ABS plastic, or whatever applies. This determines the engraving depth and bevel angle they'll cut into the die.
- Define your desired impression type - Are you foil stamping, blind debossing, heat branding, or embossing? Each technique requires different relief depth, surface finish, and edge geometry. A die optimized for foil work won't perform well for deep leather debossing.
- Confirm your mounting system - Identify your press type and how the die will attach. Bunter post for an arbor press? Bolt pattern for a pneumatic machine? Threaded shank for a handheld iron? Provide the mounting dimensions - hole spacing, thread size, plate thickness - so the die arrives ready to install without modification.
- State your production volume expectations - A die destined for 500 impressions on a craft project can be specified differently than one expected to run 50,000 cycles on a production line. Volume affects material grade recommendations, depth specifications, and whether the supplier suggests brass or an alternative like steel.
- Communicate your turnaround requirements - Standard lead times (5 to 10 business days) keep costs reasonable. Rush production compresses that timeline but adds 25 to 50% to your invoice. Plan ahead when possible.
- Request a proof or mock-up - Ask for a digital rendering or test impression before the die ships. Reputable suppliers provide a mirrored artwork proof for your sign-off, catching errors before metal gets cut.
A few red flags to watch for in supplier communication: unwillingness to discuss material grade or alloy specifics, no mention of a proofing step, inability to specify engraving depth tolerances, or quoting without asking about your substrate and technique. A good die maker asks questions - if the supplier takes your order without clarifying any details, you're likely dealing with a generic service that won't optimize the die for your application.
Evaluating Die Quality and Selecting Your Material
Your die arrives. Before mounting it on your press and running production, take five minutes to inspect it. A brass die quality inspection checklist catches manufacturing defects that would otherwise show up as inconsistent impressions across your first hundred pieces - by which point you've already wasted substrate and time.
Here's what to look for in a brass die supplier's finished product:
- Uniform engraving depth - Use a depth gauge or dial indicator to measure relief depth at multiple points across the die face. Variation should stay within plus or minus 0.05 mm for foil work and plus or minus 0.1 mm for debossing applications. If one corner measures significantly shallower than the opposite side, the die was either machined on an improperly leveled bed or warped during post-processing.
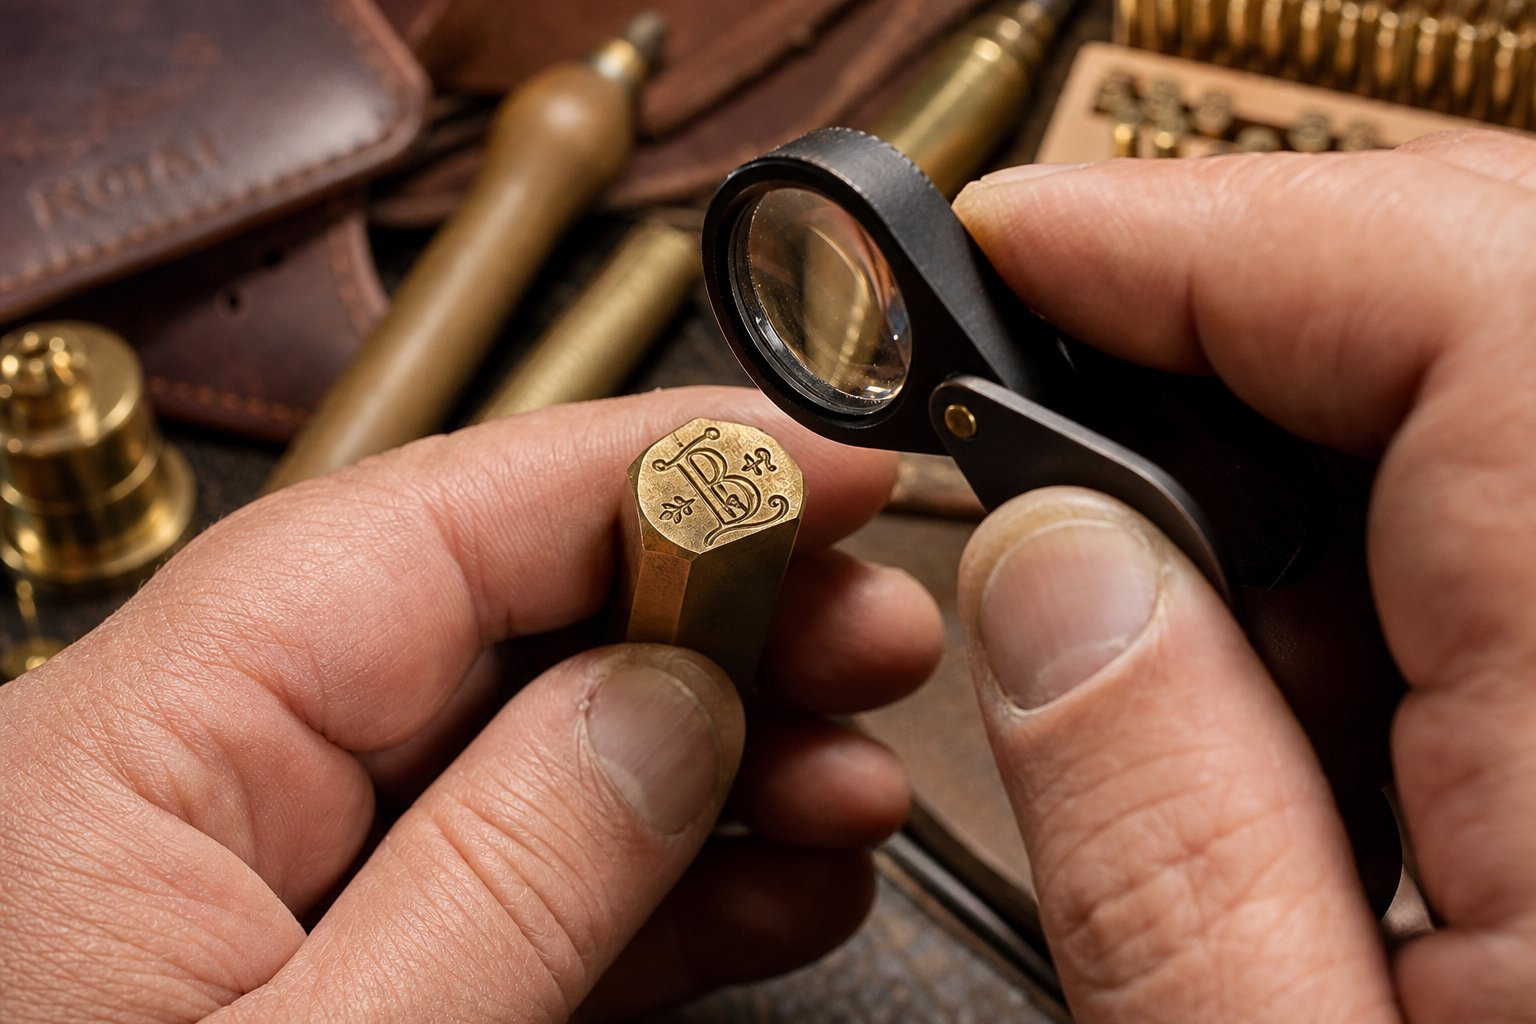
- Clean edges and sharp transitions - Inspect the boundary between raised design surfaces and recessed background areas under magnification or a loupe. Edges should be crisp, not rounded or ragged. Burrs along cut walls indicate incomplete deburring. Fuzzy or uneven transitions mean the CNC bit was worn or the feed rate was too aggressive.
- Proper mounting alignment - If the die includes a backing plate or mounting hardware, verify that the design is centered and square relative to the mount points. A die that sits crooked in the press produces angled impressions that no amount of shimming fully corrects. Check that threaded holes are tapped cleanly and that the die sits perfectly flat against a known-flat reference surface.
- Surface finish quality - The raised stamping surface (the part that contacts your substrate) should be polished smooth. Tooling marks, scratches, or machining grooves on this surface will transfer to every impression. The recessed background areas don't need the same polish - some texture there is acceptable since those areas never contact the substrate.
- Design accuracy - Compare the physical die against your original vector artwork. Check letter spacing, line weights, and any fine details that might have been simplified during fabrication. Minor deviations are normal at the smallest feature sizes, but anything visible at normal viewing distance indicates a quality issue.
Beyond inspecting the finished die, the alloy grade itself deserves attention. Not all brass is equal - and how to order a custom brass stamping die that performs over its full expected lifespan starts with understanding the metal underneath.
C360 brass (free-machining brass containing about 60% copper, 35% zinc, and 3% lead) is the most common choice for stamping dies. Its lead content acts as a chip-breaker during CNC machining, producing cleaner cuts and smoother surfaces. C260 brass (70% copper, 30% zinc) offers better corrosion resistance and slightly higher durability but machines less cleanly - as comparative analyses of these alloys show, C360 delivers excellent machinability while C260 is favored where long-term environmental exposure is a concern.
For most hot stamping and branding applications, C360 provides the ideal balance: it machines to fine detail, conducts heat evenly, and holds up through tens of thousands of thermal cycles. C260 makes more sense for dies that will be stored long-term between infrequent use or exposed to corrosive substrates (certain chemical-tanned leathers or treated papers).
Material selection gets more complex when you're also specifying stamped parts rather than just the die itself - comparing brass against aluminum, steel, and stainless steel for the components being produced. For engineers and sourcing teams navigating these decisions, YICHEN's Materials page serves as a practical research tool where you can compare brass alloys alongside other production metals during the specification phase, helping align die material choices with broader project requirements.
The bottom line: a well-ordered brass die - specified clearly, inspected carefully, and matched to the right alloy for your application - delivers consistent impressions from the first press cycle through its final production run. Take the time to communicate thoroughly with your supplier, verify quality on delivery, and you'll avoid the frustrating rework cycles that plague rushed or under-specified orders.
Frequently Asked Questions About Brass Stamping Dies
1. How long does a brass stamping die last?
A well-maintained brass stamping die typically lasts between 50,000 and 100,000 impressions before noticeable wear affects quality. Lifespan depends on substrate abrasiveness, operating temperature, cleaning habits, and design complexity. Fine-detail features wear first, while bold designs with thicker lines retain sharpness longer. Running at the lowest effective temperature and cleaning the die face regularly between production sessions extends usable life significantly. By comparison, magnesium dies last only 5,000 to 10,000 impressions, while steel dies can exceed 500,000 cycles.
2. What is the difference between CNC engraving and chemical etching for brass dies?
CNC engraving uses rotary cutting tools to mechanically carve material away from the brass block, producing deeper relief suitable for debossing and branding applications. Chemical etching uses a photoresist mask and acid bath to dissolve unprotected areas, creating burr-free surfaces ideal for fine detail at shallow depths under 0.5 mm. CNC milling is preferred for leather branding and deep debossing work, while chemical etching suits high-precision foil stamping on paper where tight tolerances and smooth surfaces matter most. Design changes are cheaper with etching since only a new photomask is needed rather than reprogramming toolpaths.
3. What temperature should I use for brass die hot stamping on leather?
Temperature depends on the leather type. Vegetable-tanned leather stamps best between 150 and 200 degrees Celsius for blind debossing, or around 120 to 130 degrees Celsius for foil transfer. Chrome-tanned leather requires lower heat at 120 to 150 degrees Celsius due to its softer, more heat-sensitive structure. Synthetic PU leather needs the most caution, staying between 100 and 140 degrees Celsius to avoid melting. Always run test impressions on scrap material first, increasing temperature in 5-degree increments until you achieve clean results without scorching or halo marks around the design edges.
4. What file format do I need to order a custom brass stamping die?
Suppliers require vector artwork in AI, EPS, SVG, or DXF format with all fonts converted to outlines or curves. Vector files define shapes with mathematical paths that CNC machines can trace precisely, unlike raster images (JPEG, PNG) which lack the resolution needed for toolpath generation. Your design must meet minimum line thickness requirements of 0.5 mm for both positive elements and negative spaces. Supplying a raster file typically incurs additional conversion fees and may result in detail loss. Always provide the artwork at actual stamp size with clear dimensions specified.
5. How do I fix incomplete foil transfer with a brass stamping die?
Patchy or incomplete foil transfer usually stems from three causes: insufficient temperature preventing full adhesive activation, uneven pressure leaving low-contact zones, or foil-substrate incompatibility. Start by increasing temperature in 5-degree increments and performing a rub test - if foil lifts when rubbed lightly, adhesion is incomplete. Next, check pressure uniformity by examining the impression pattern across the full die face. If problems persist after adjusting heat and pressure, switch to a foil grade specifically formulated for your substrate type, as coated papers, uncoated stocks, and plastics each require different adhesive chemistries for reliable bonding.


